Objective: In this video and/or step by step walkthrough, you’ll learn about the relationships between various Revit elements and the three types of VECTOR assemblies
Build Screen
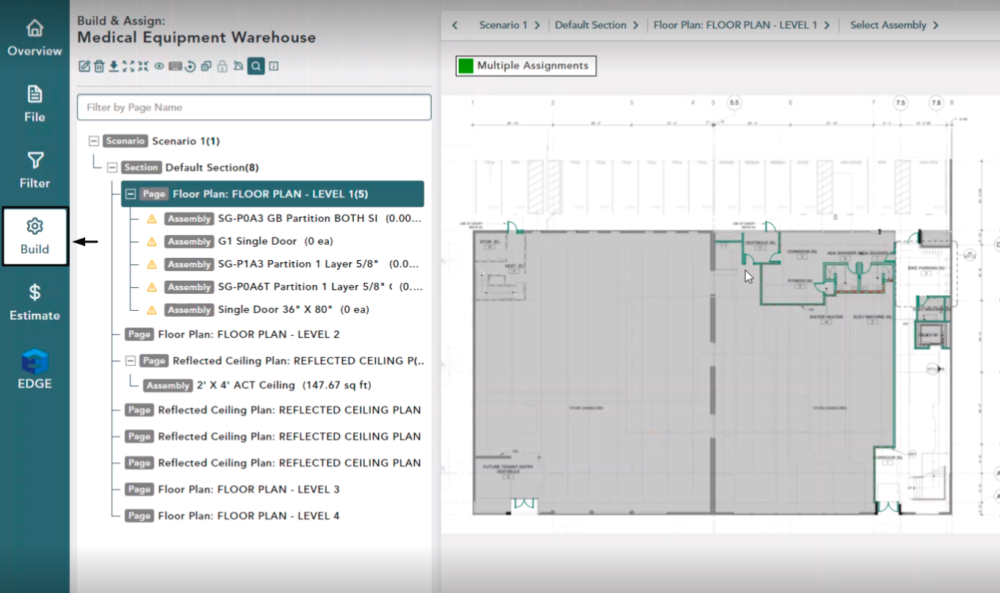
Make sure you are on your Build Screen inside of your VECTOR Bid
Ensure your Page is selected and that it is utilizing a valid filter set and REVIT Elements are appearing on the page
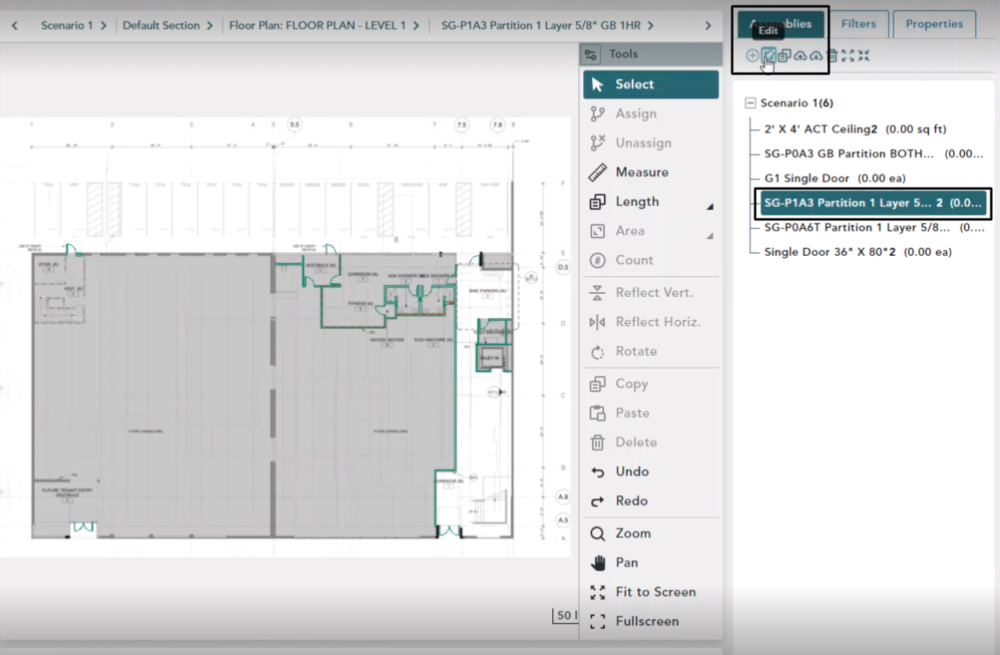
Assemblies
Click on the Assemblies tab on the right-hand side
Click to select an Assembly
Then click Edit
Edit Scenario Assembly
In the Edit Scenario Assembly window, there is a Type drop-down on the right-hand side
Click the arrow
You have three possible values Area, Length or Count

Length
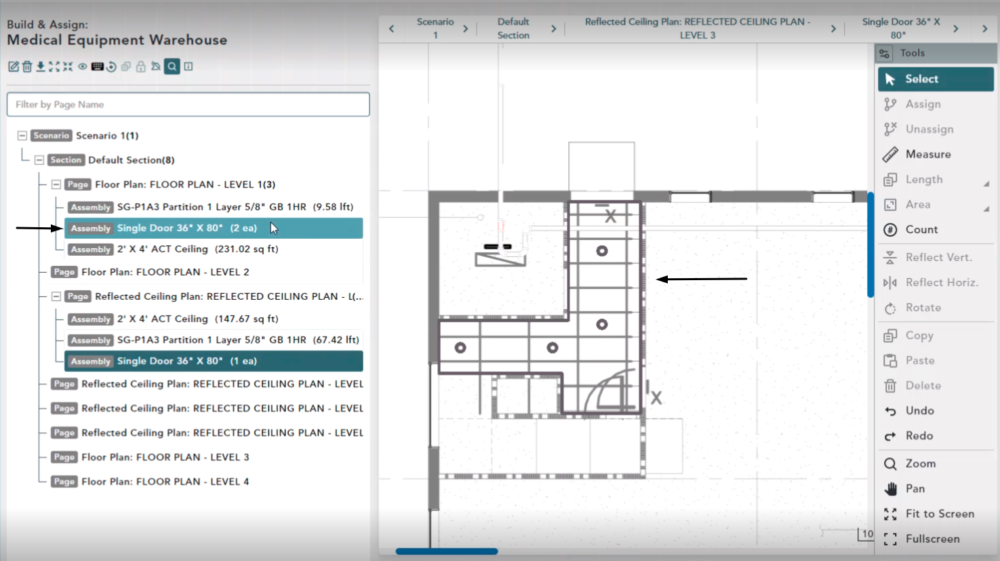
Inside of the Page on the left hand side in the Bid Tree we have one of each Assembly Type added into the page
Zoom in to the shapes
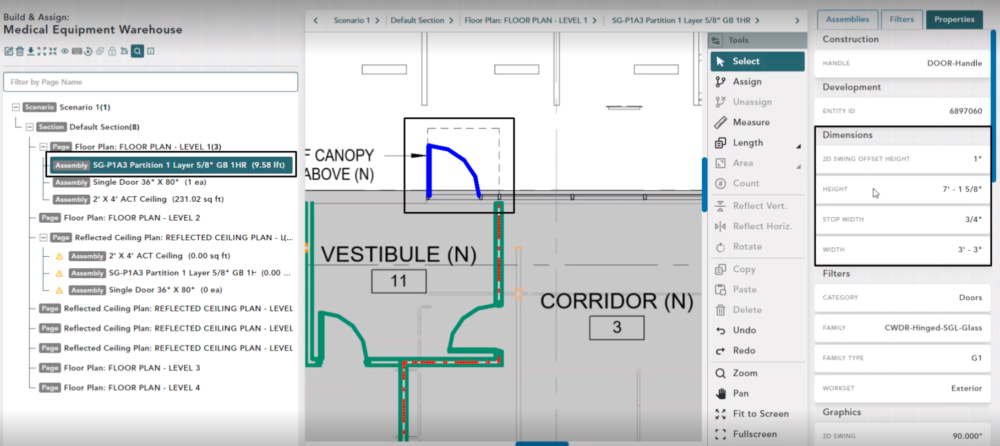
Select the first Assembly in the List, Length
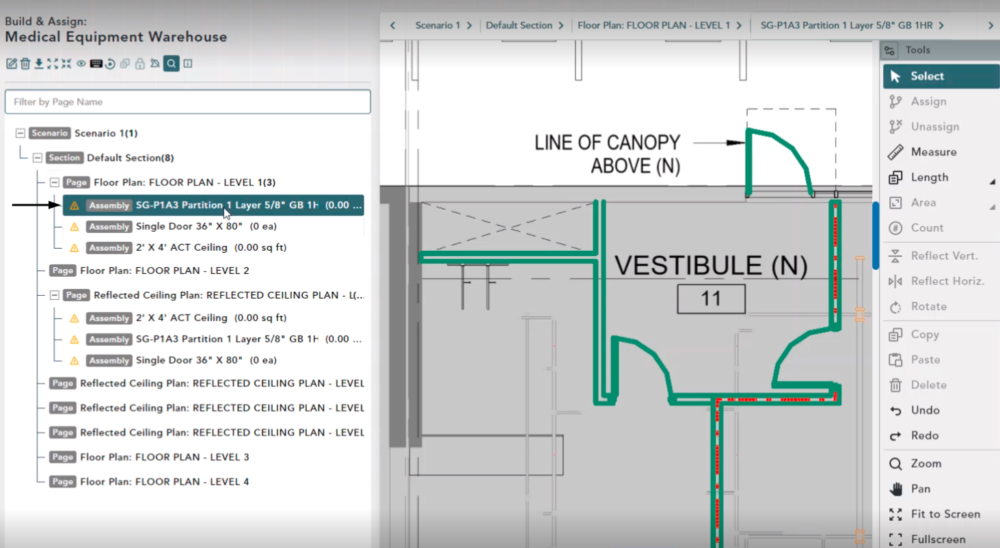
Select the Wall Element (it will turn blue to show it is selected)
Then click the Properties tab
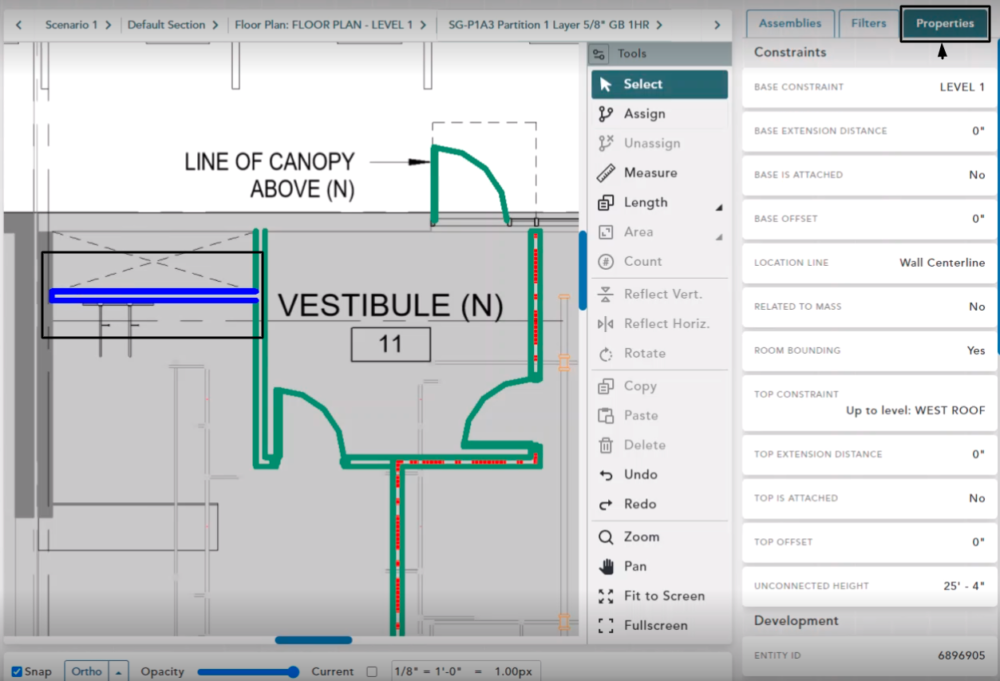
Perform Assignment
We can see it contains dimensions for Area, Length and Volume.
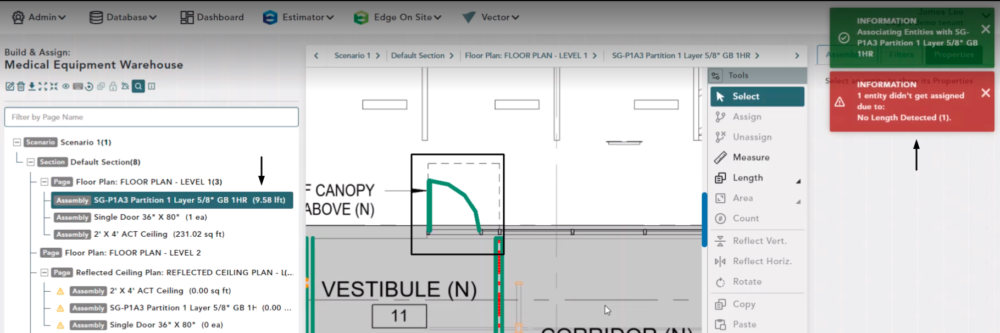
Click on Assign
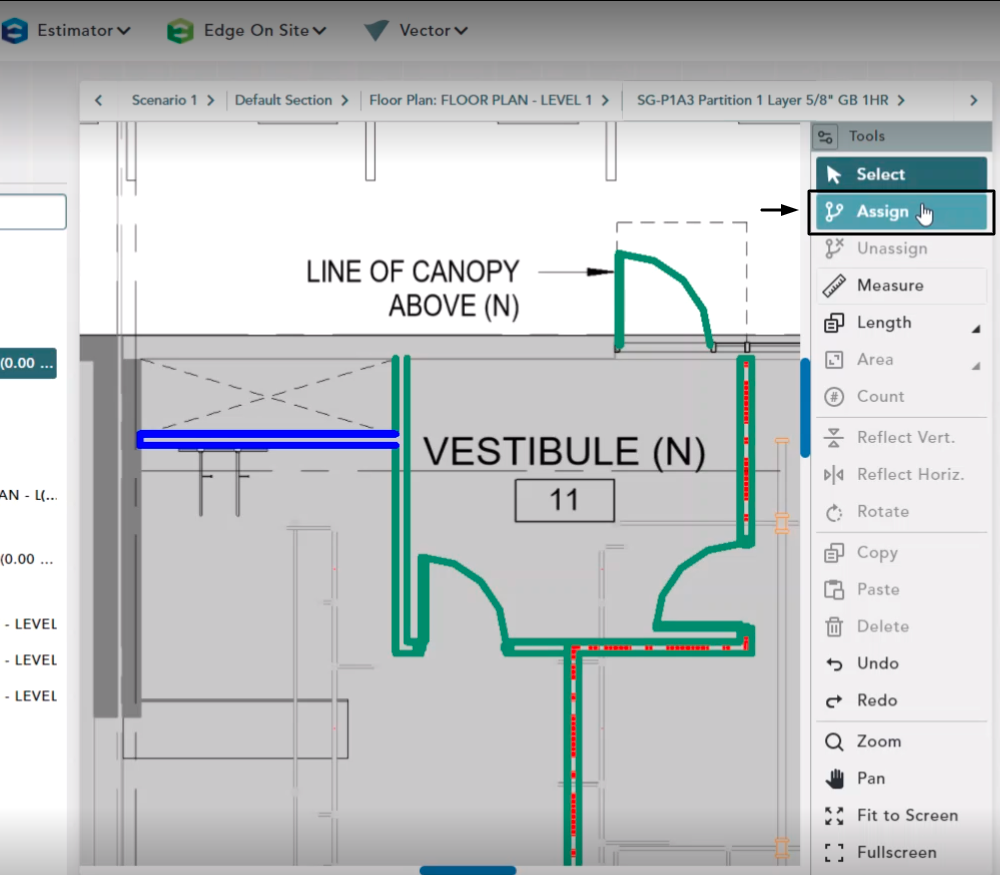
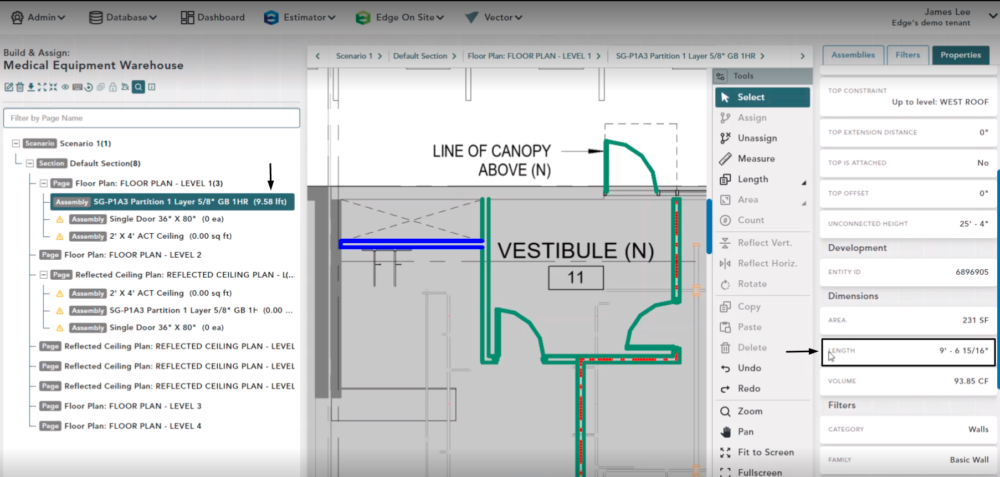
The lineal footage for the length assembly has been populated
The assembly is of the type Length so it was able to detect a length dimension and map it
Area Assembly
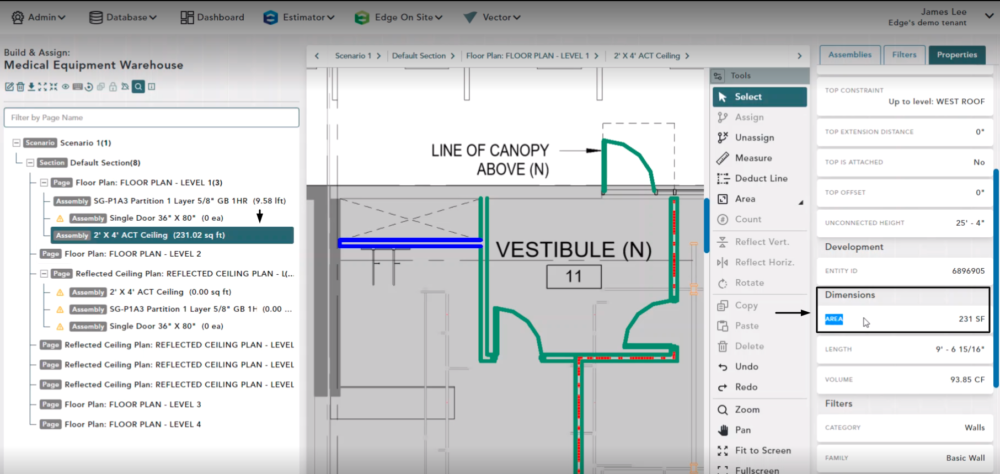
For this example we are selecting the Area Assembly 2′ x 4′ ACT Ceiling (0.00 sq ft)
Then, clicking Assign
This assembly is of the type Area so it was able to detect an area dimension of 231 SF and map it
You can also choose the Count Assembly to perform the same assignment (see video for instructions)
REVIT Element without Length Dimension
Select a Length Assembly, then choose a different REVIT element
Inside of the Properties tab there is no Length dimension
When you click Assign, you will receive a message stating that this entity does not have a Length to assign and will be ignored
Click Yes to continue

You will receive a message that the entity was not assigned, the color of your element did not change and no quantity was updated for the assembly
If you choose Area with no dimension you will be met with the same notifications and see no changes
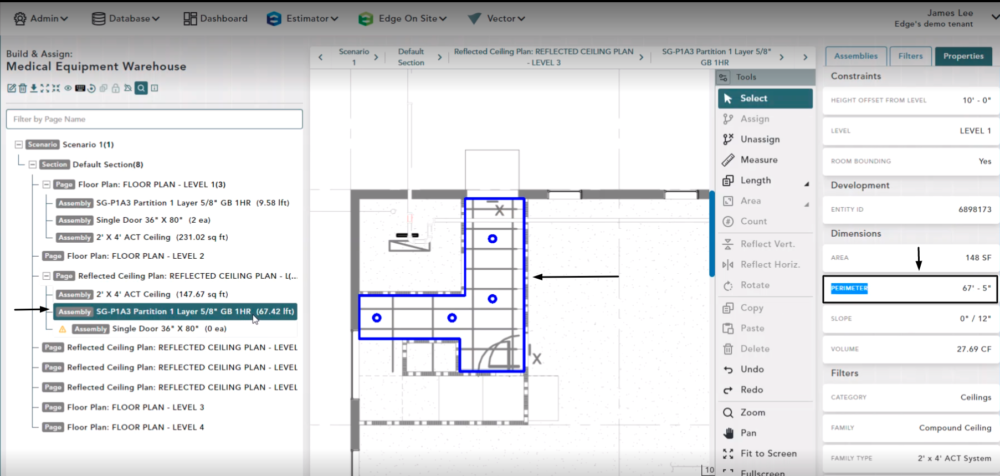
Ceiling Element Interaction – Area Assembly
Click on the Area Assembly
When you select the Shape, under the Properties tab you will see dimensions for Area, Perimeter, Slope & Volume
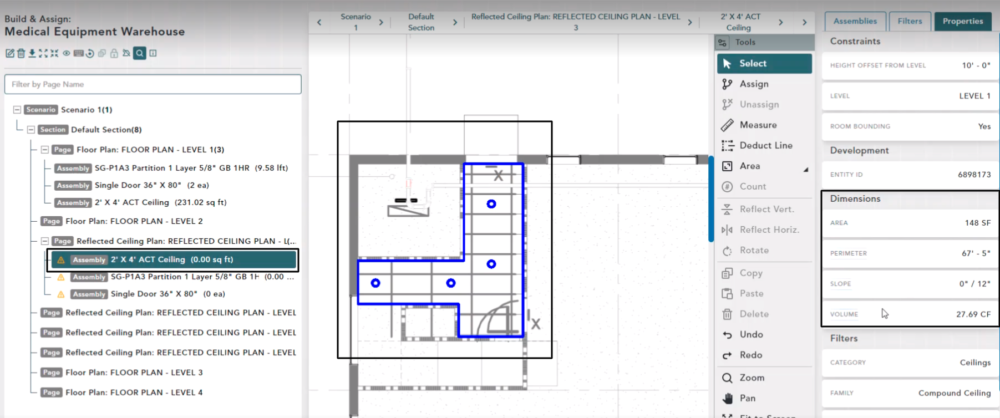
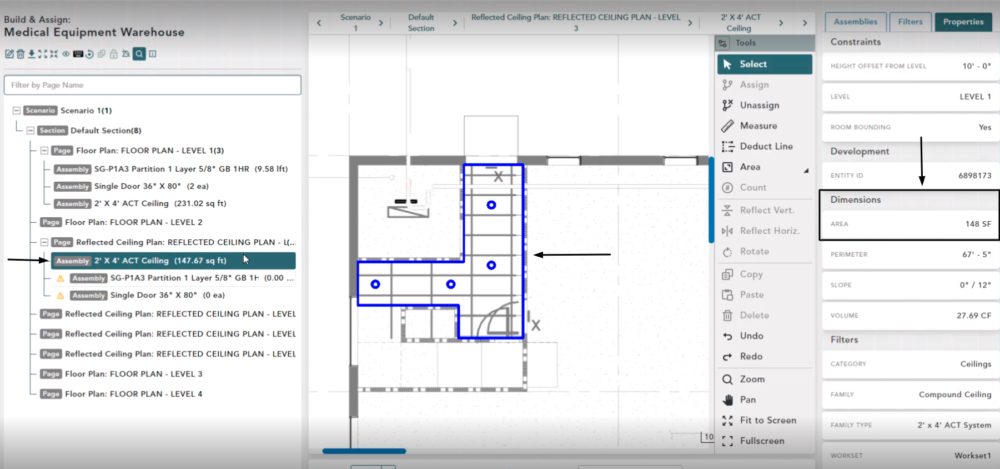
Click Assign
This assignment was successful because an Area dimension was detected matching the Area Assembly type
Ceiling Element Interaction – Length
Perform the same Assignment
This assignment was successful because a Length dimension was detected matching the Length Assembly type
Ceiling Element Interaction – Count Assembly
Perform the Assignment
This assignment was also successful because all REVIT elements can be assigned as a Count