Objective: In this video and/or step by step walkthrough, you’ll learn how to assign quantities from a Revit element to a VECTOR assembly
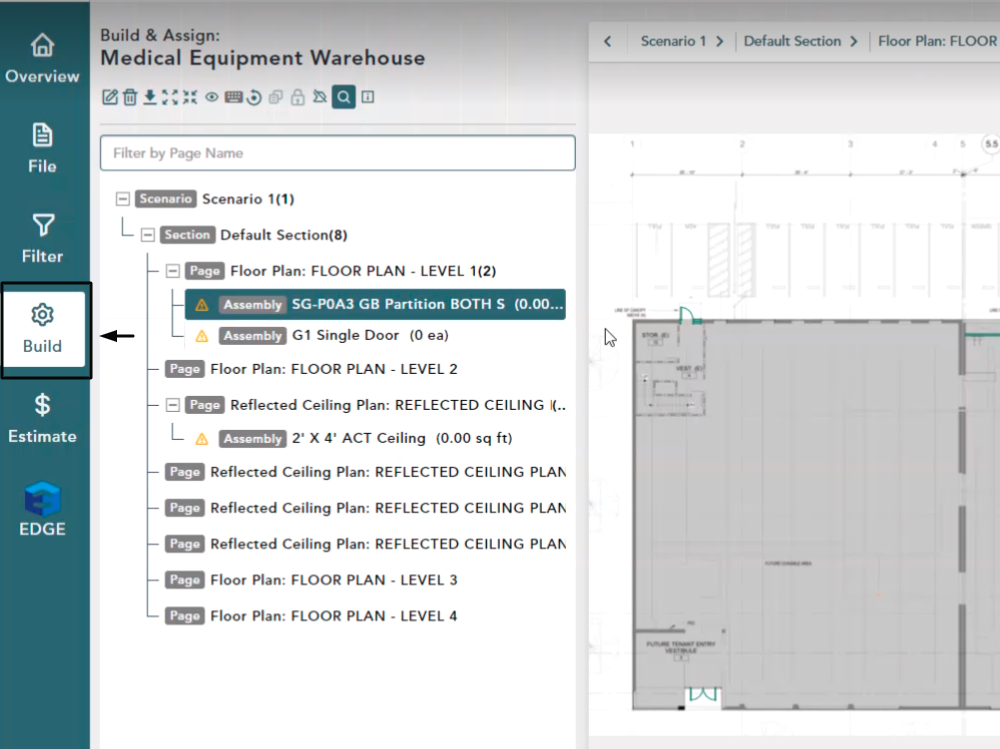
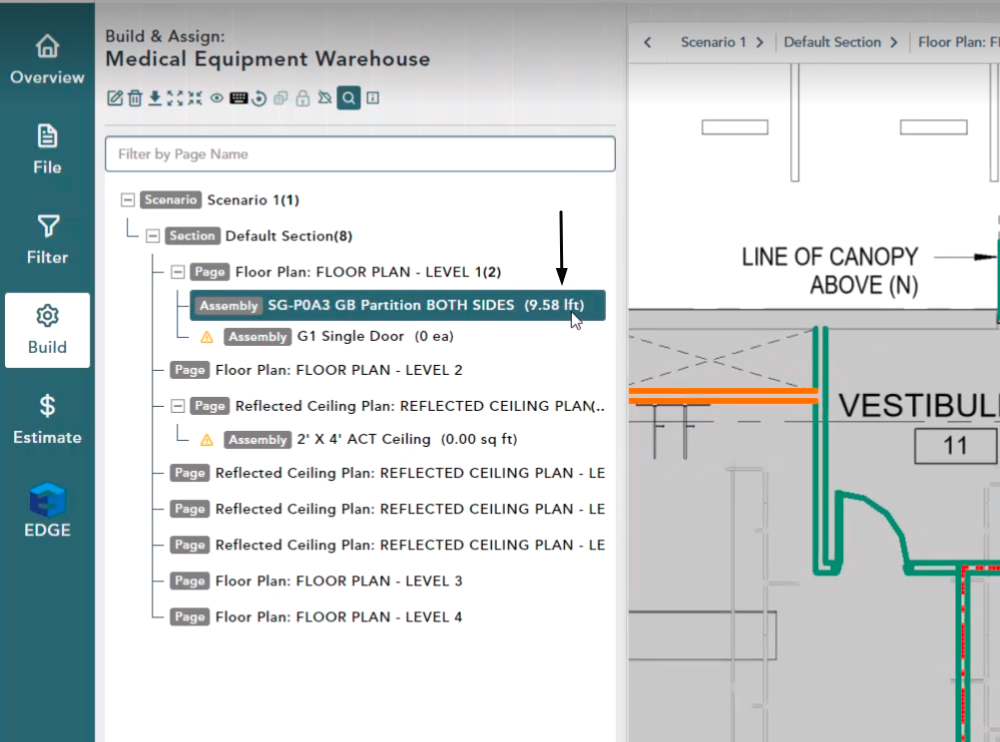
Build Screen
Make sure you are on your Build Screen inside of your VECTOR Bid
Ensure your Page is selected and that it is utilizing a valid filter set
Assemblies
Make sure you have some Assemblies added to your Scenario and your relevant Pages
Perform Take Off
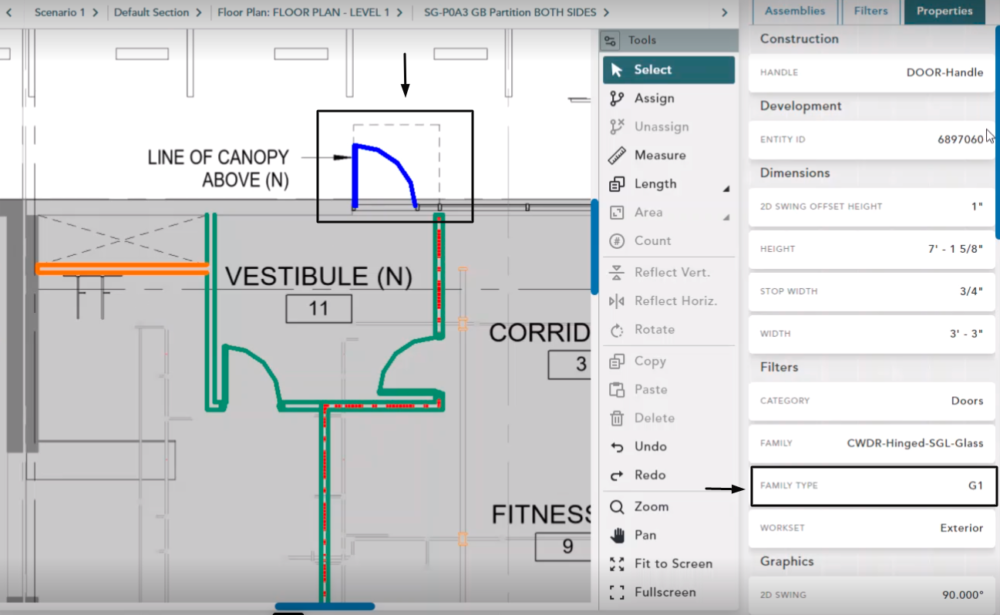
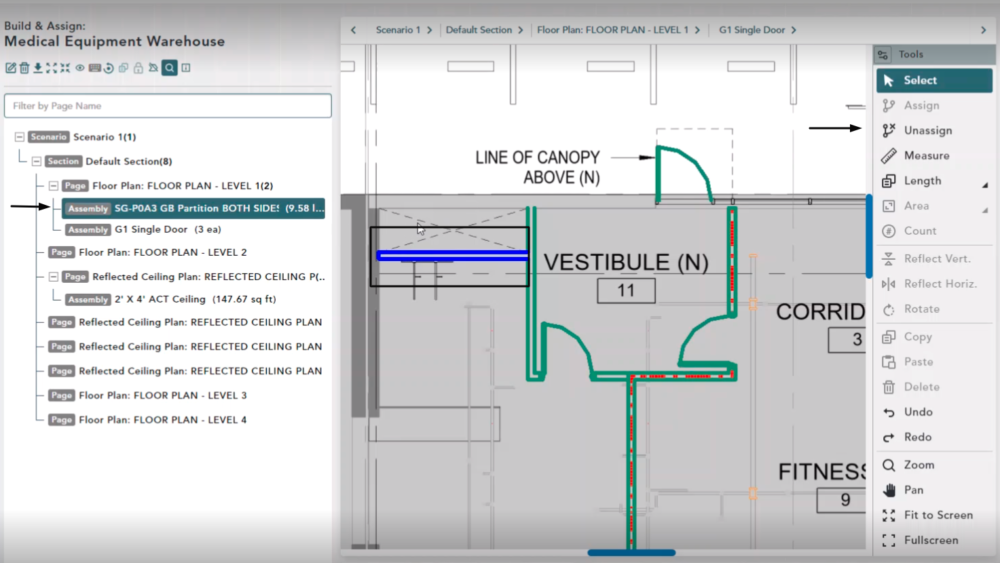
Zoom in on the area with some REVIT Elements
Select the REVIT Element (it will turn blue to show it is selected)
On the right hand side you can view all Properties related to this element
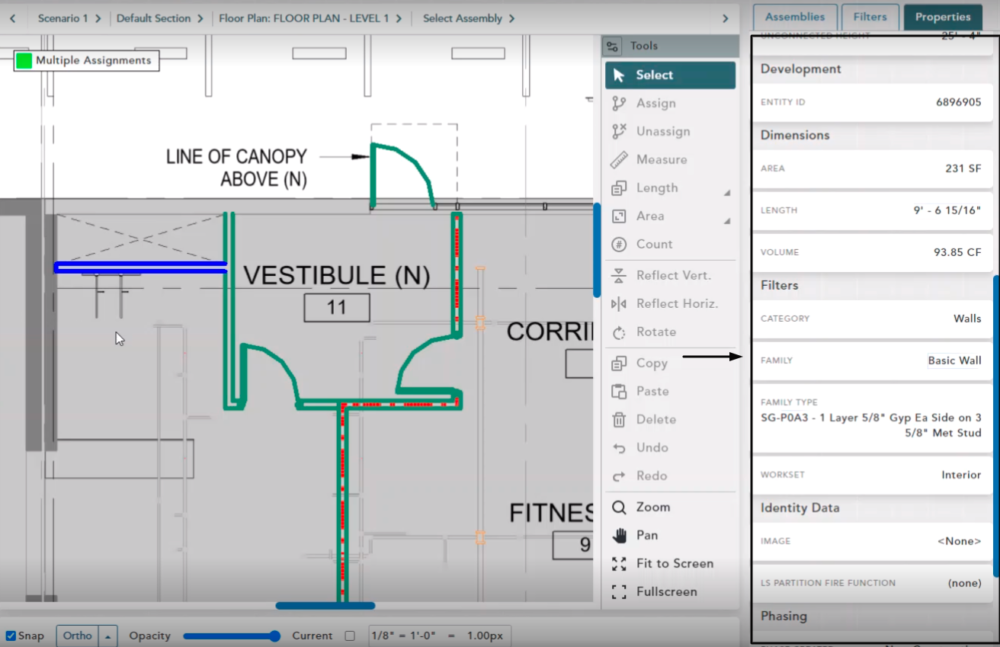
For this example, we will use the Length dimension under the Properties tab to assign to our Assembly
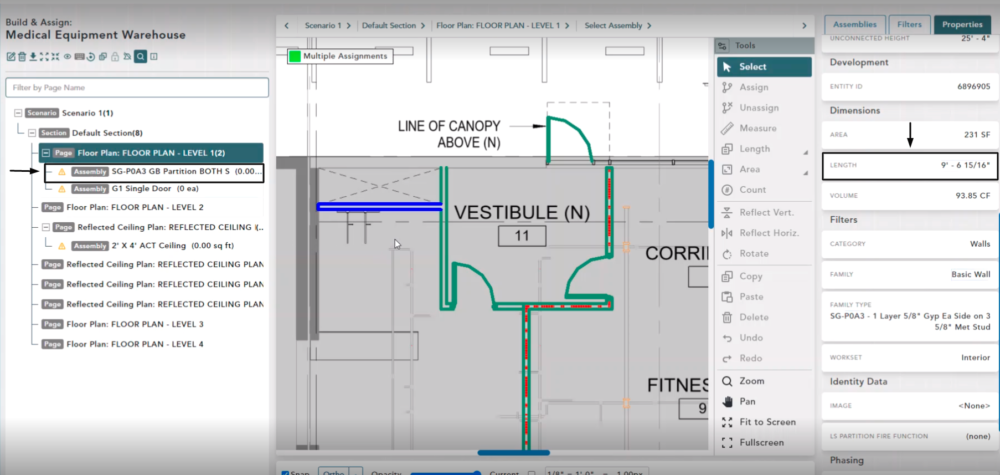
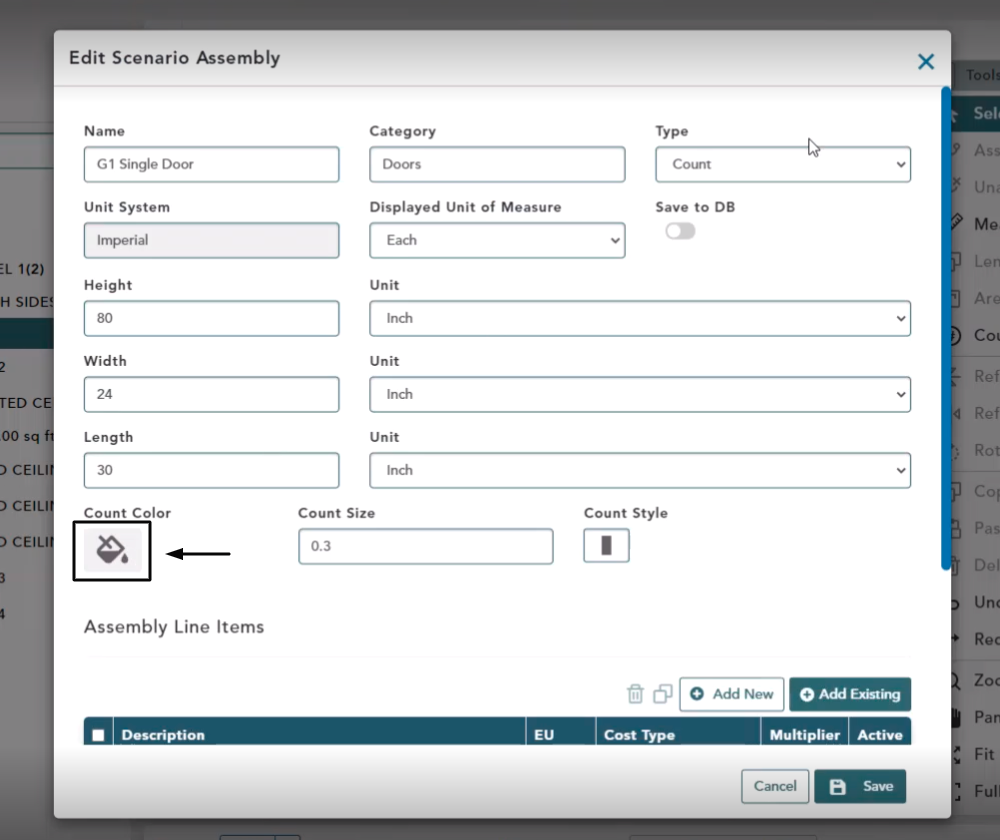
Make sure that you have an Assembly added to your Page representing this wall size or something similar
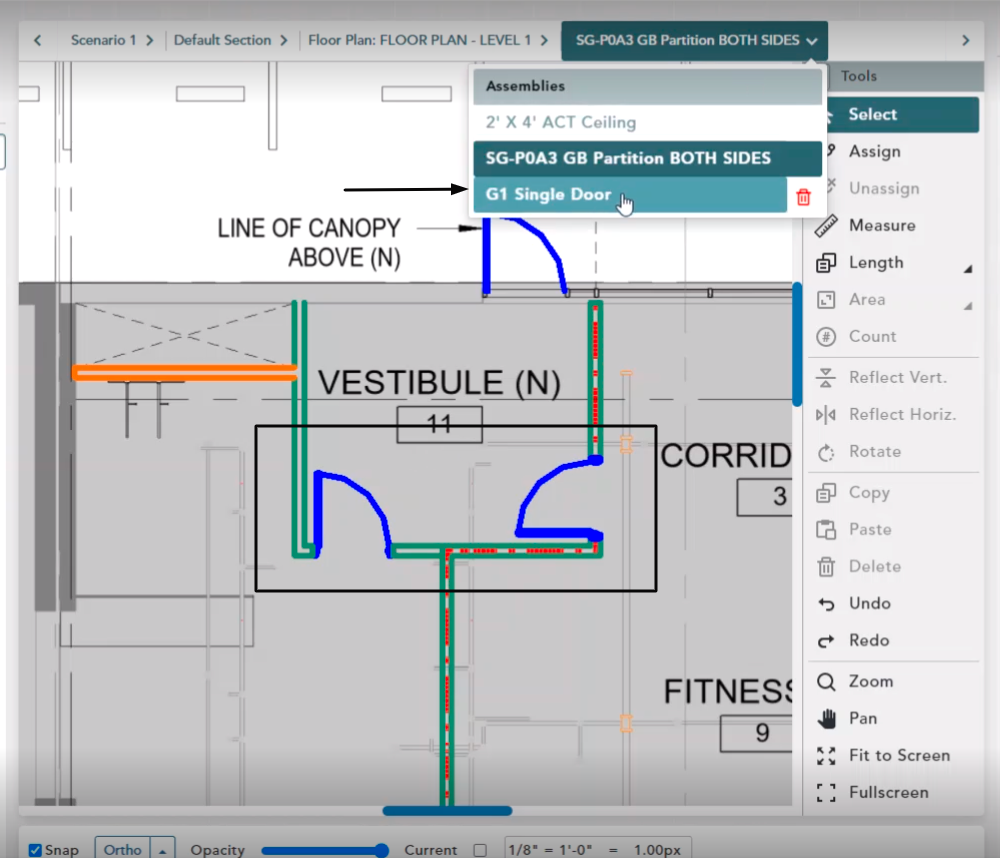
Click to select the Assembly in the Bid Tree on the left or use the drop-down box on the top menu

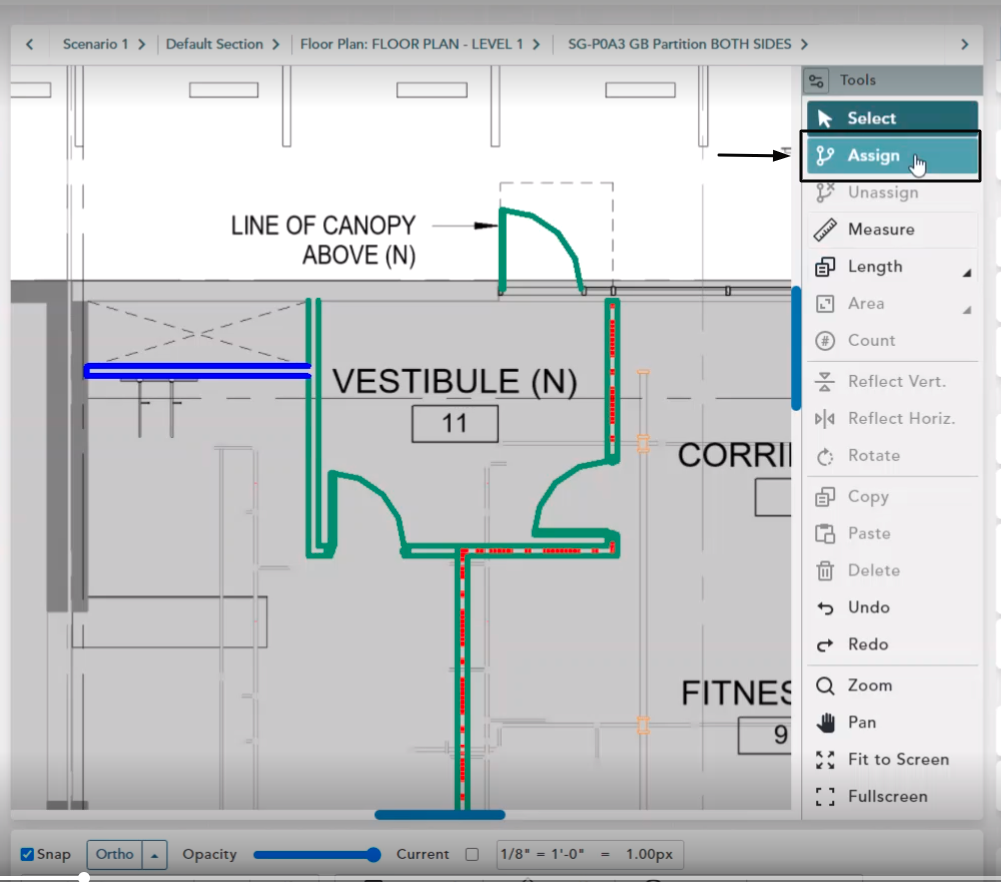
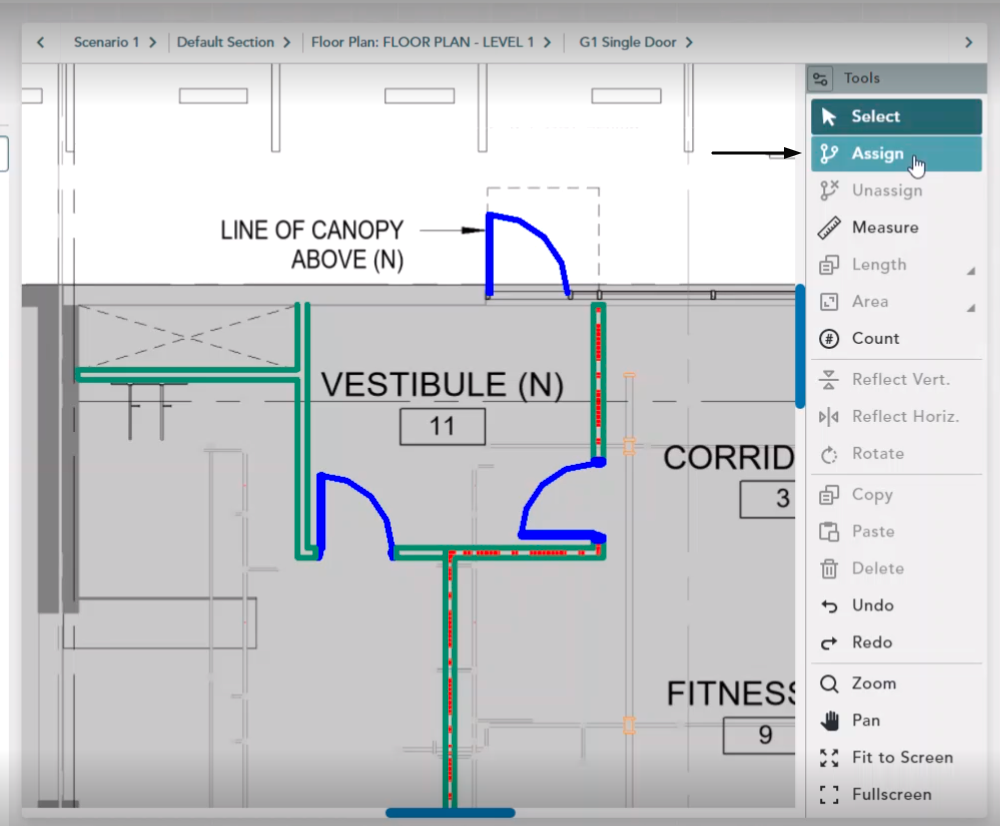
Assigning
Once the Element and target Assembly are both selected hover your mouse over the toolbar on the right hand side and click Assign
You will receive a green toaster menu in the upper right hand corner of the window that confirms the mapping process was successful
The color of the REVIT Element has now changed to Orange
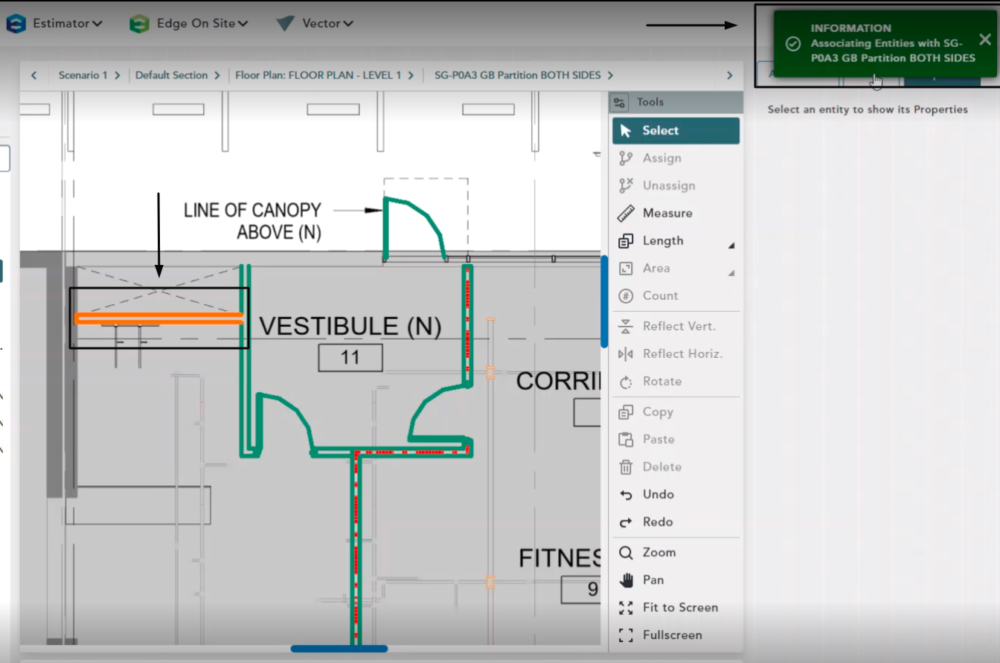
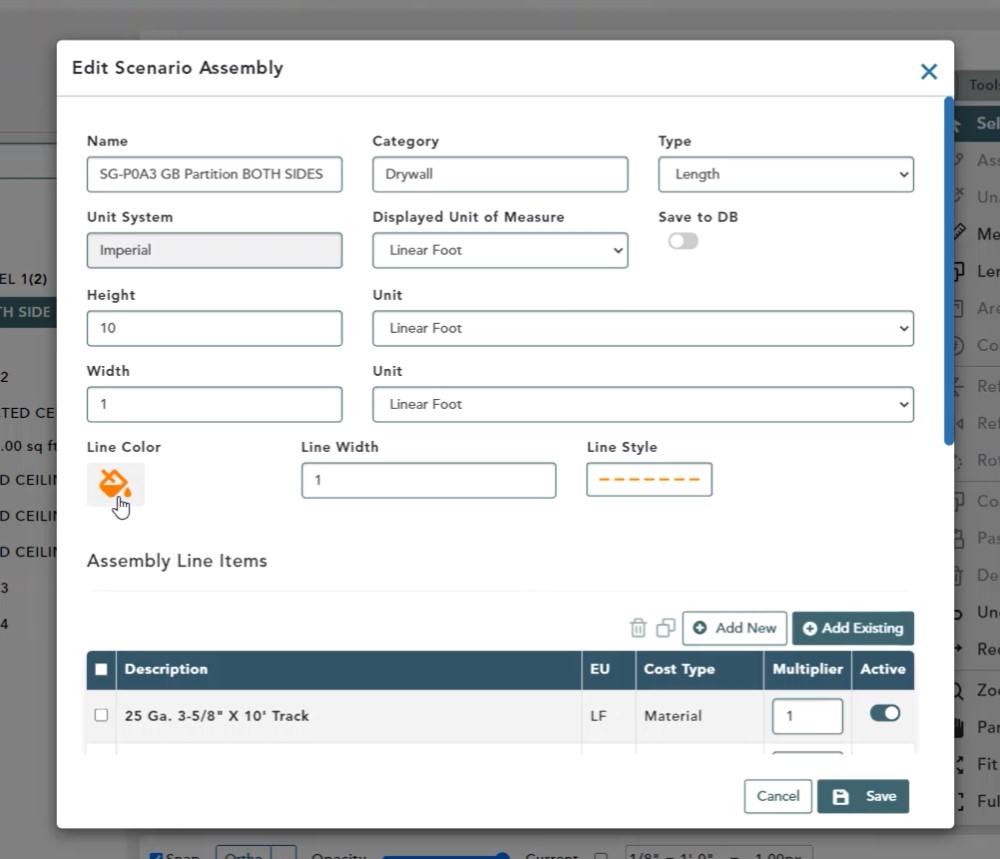
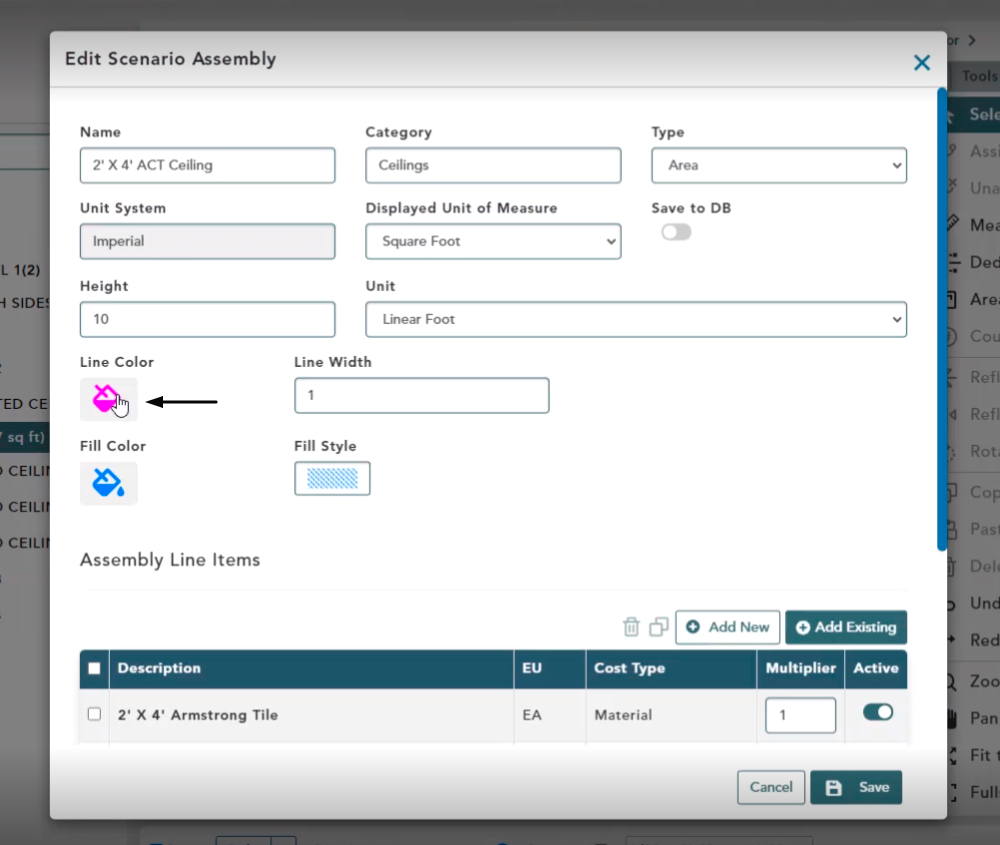
This matches the color set for this Assembly and its properties that gives a visual indicator that the quantities have been transferred from the Element to the VECTOR Assembly
On the left-hand side of the page in the Bid Tree, the length of 9.58 lft has been given to this Assembly
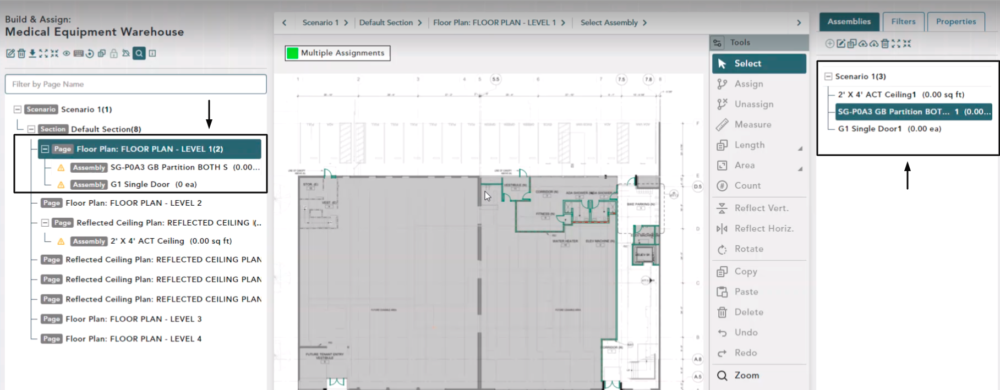
Assigning with Multiple Elements Selected
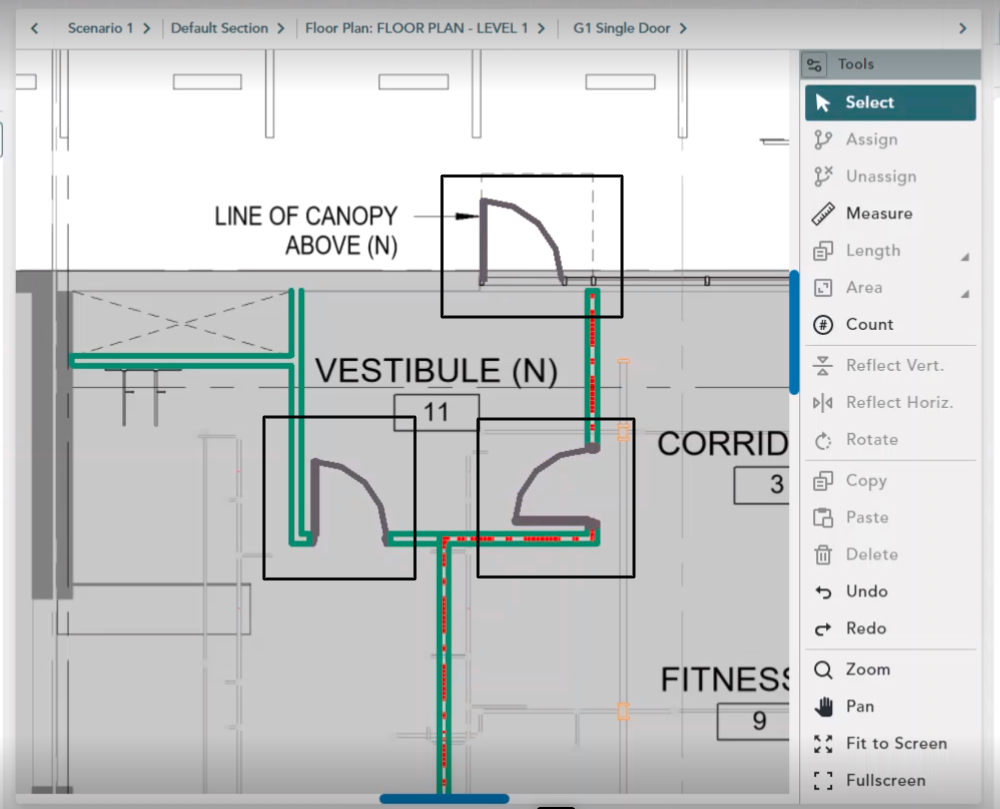
For this example we will select the G1 Single Door.
In the Properties Tab you can view this information under Filters, Family Type
Select additional G1 Single Door shapes by left clicking on them
On the top menu click the drop-down arrow and select G1 Single Door
Click Assign on the right hand toolbar
The green has now changed to black to match the assembly properties
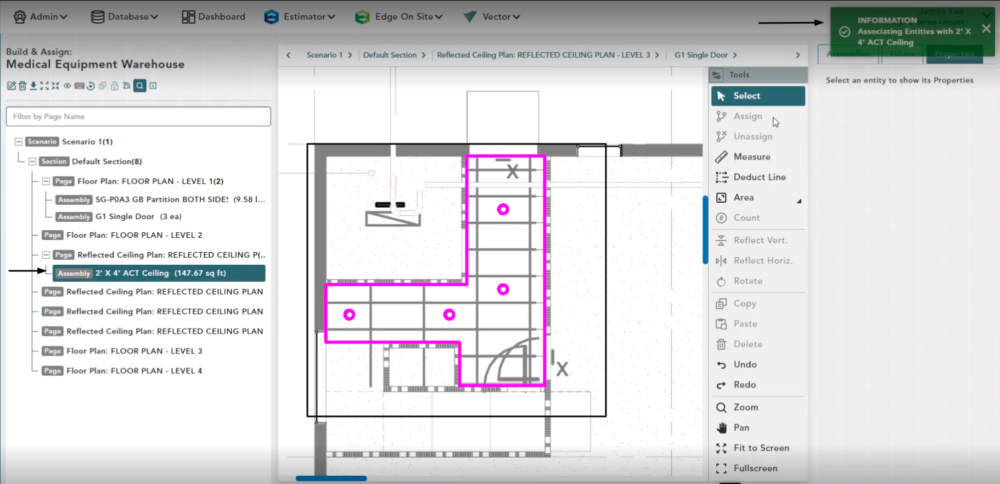
Assigning for Ceiling
Zoom in and select the REVIT shape by clicking inside of it
Then, click the Properties tab to identify this as a 2′ x 4′ ACT System, found under Filters, Family Type
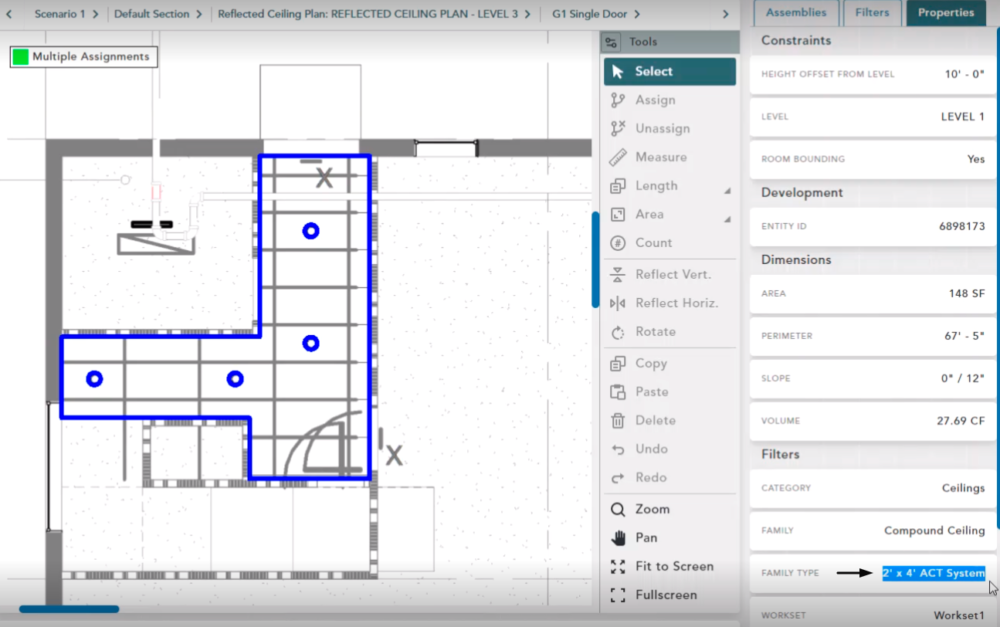
Select the Ceiling Assembly on the left hand side
Click Assign
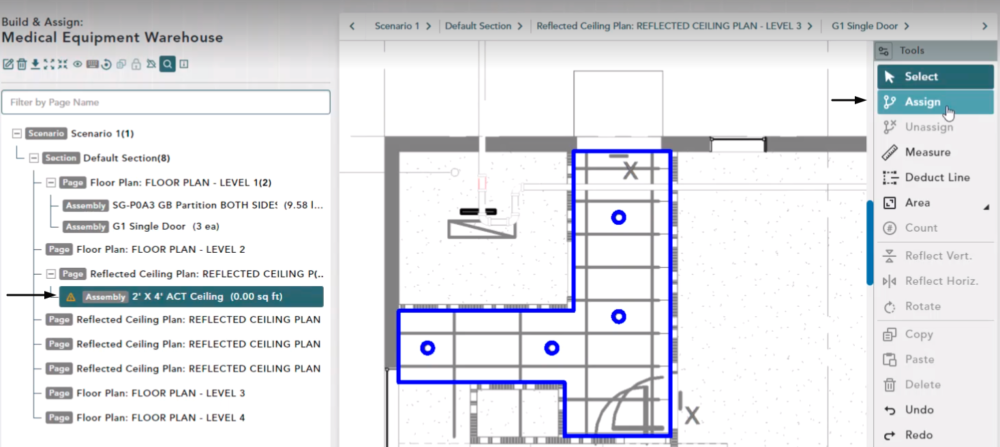
Once it maps you will see these pieces of information as confirmation:
A green toaster confirmation message in the upper right hand corner
Assembly information will be filled in on the left-hand side
Green will change to Pink that matches the properties of the Assembly that were previously set
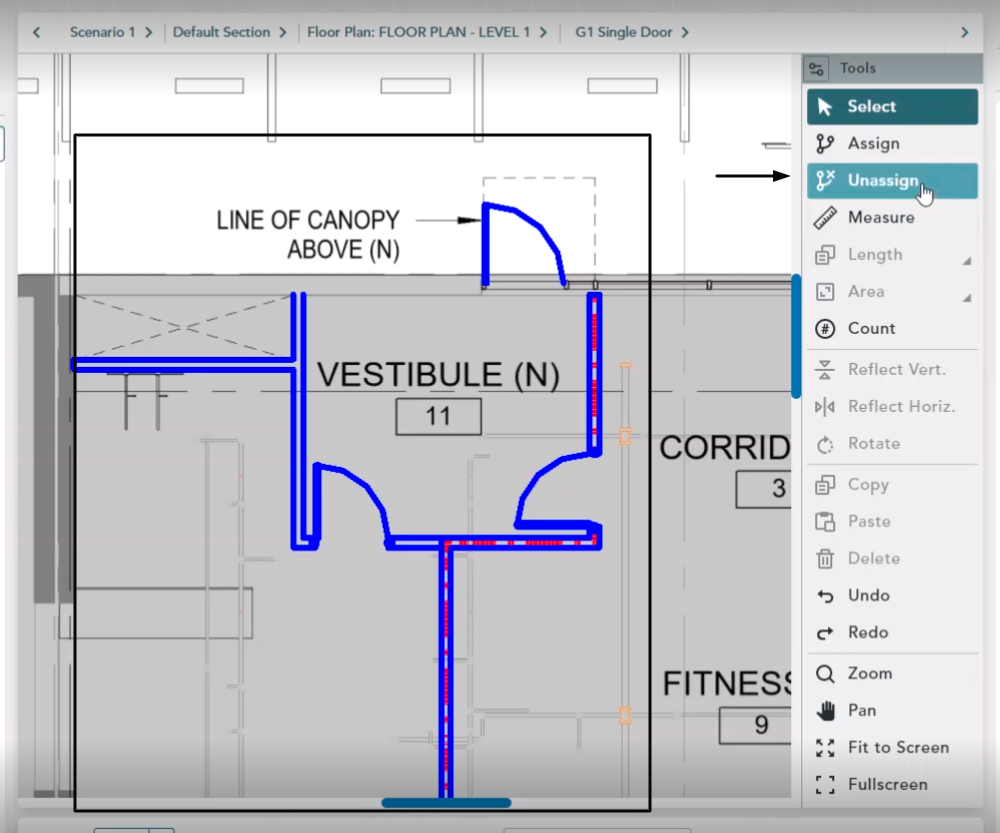
Un-Assigning
Select the REVIT element containing the quantities that you want to un-assign
Choose the target condition on the left-hand side
Click Unassign
The quantity for the assembly is now reset to zero, the color of the element changes back to the default color of green
Unassigning Multiples
Click and drag your mouse around multiple elements to lasso
Click Unassign
Note: Only the elements that have been previously assigned will be unassigned