Objective: In this video and/or step by step walkthrough, you’ll learn how to select a Revit element and view its properties from the build screen
Build Screen
First ensure that you are located on the Build Screen inside of a VECTOR Bid
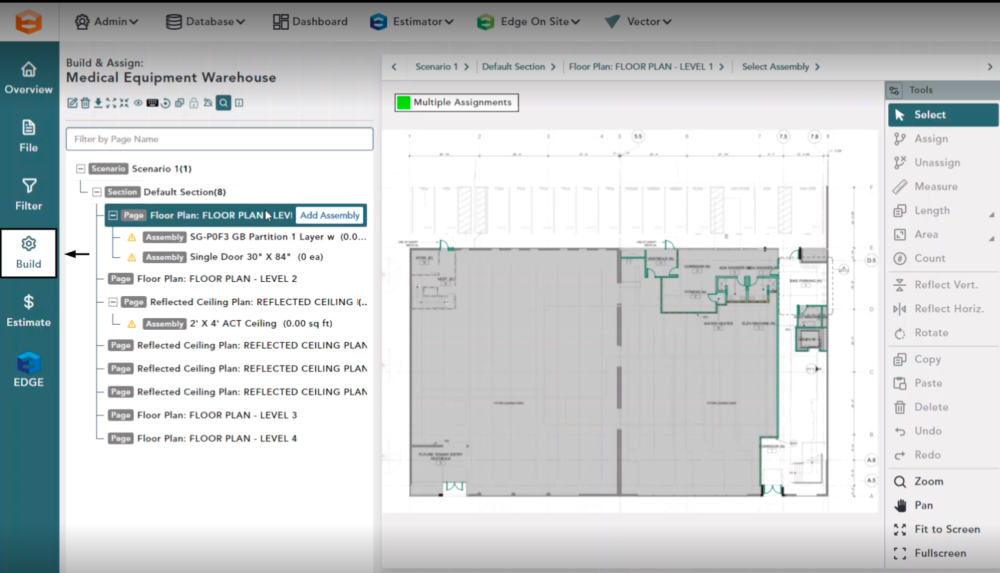
View Properties
Select a Page on the left hand side of your Bid Tree
Zoom in on an area you would like to examine
These shapes are the REVIT Elements from the three-dimensional model imported displayed two-dimensionally
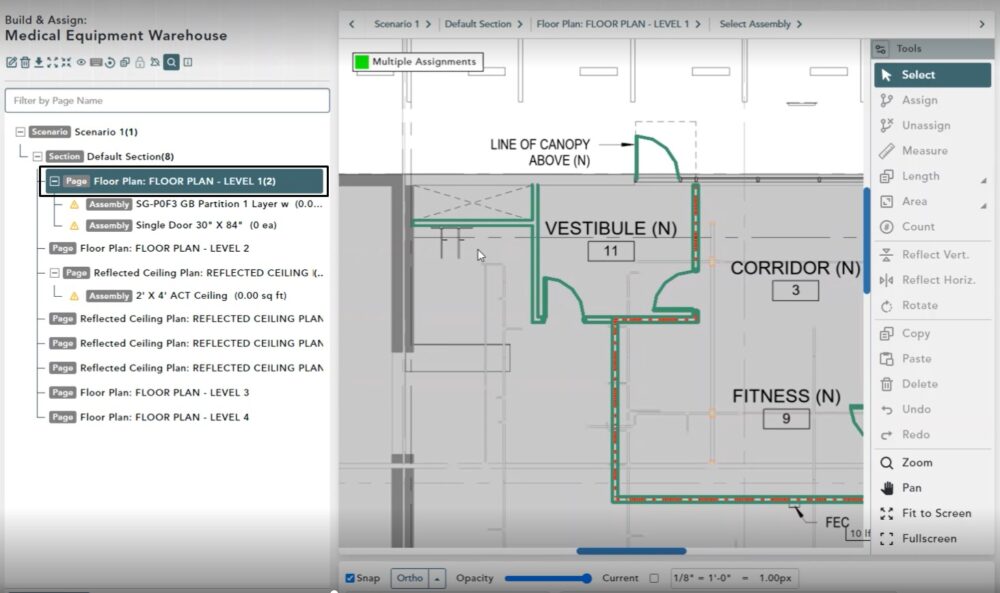
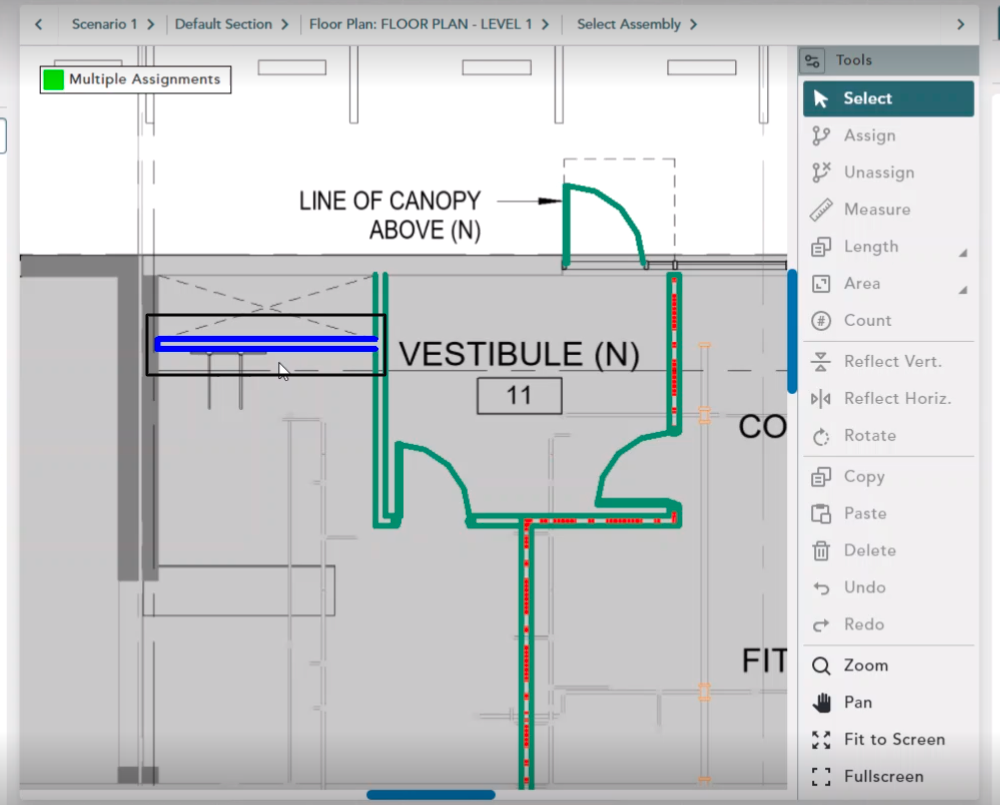
Analyze a Shape
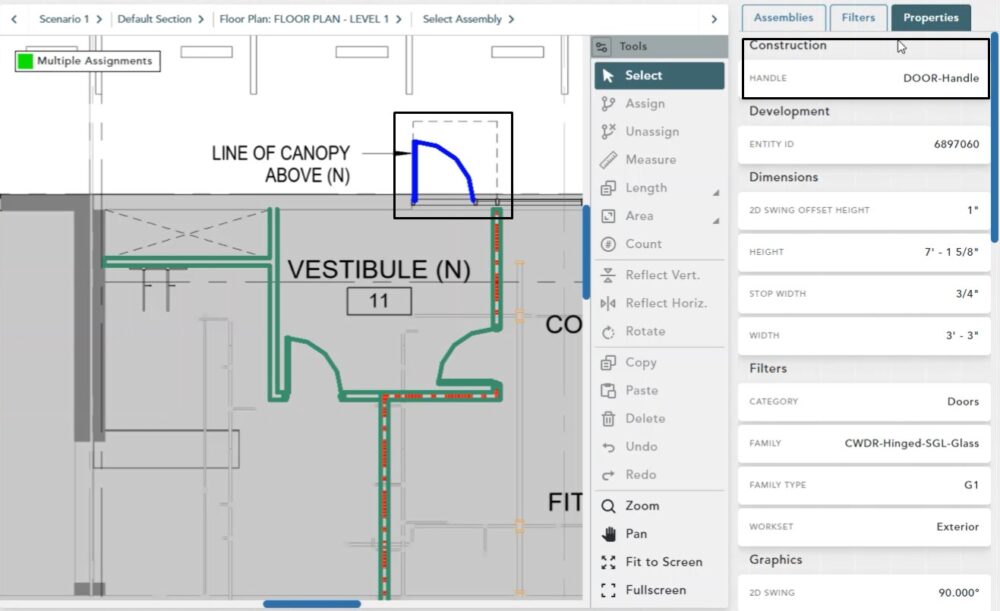
Click on the green line which will then turn blue to indicate that it’s been selected
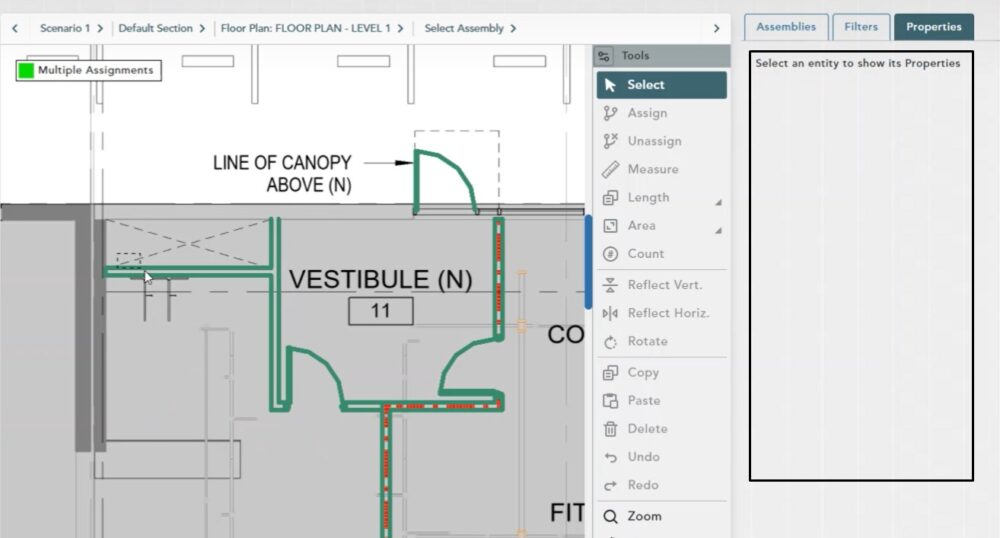
Properties Tab
In the upper, right hand side of your window, click the Properties tab
Here you can see all of the Properties representing various information for this element as inputted by the architect. These are the same properties that were visible in the properties section of your Filter Wizard.
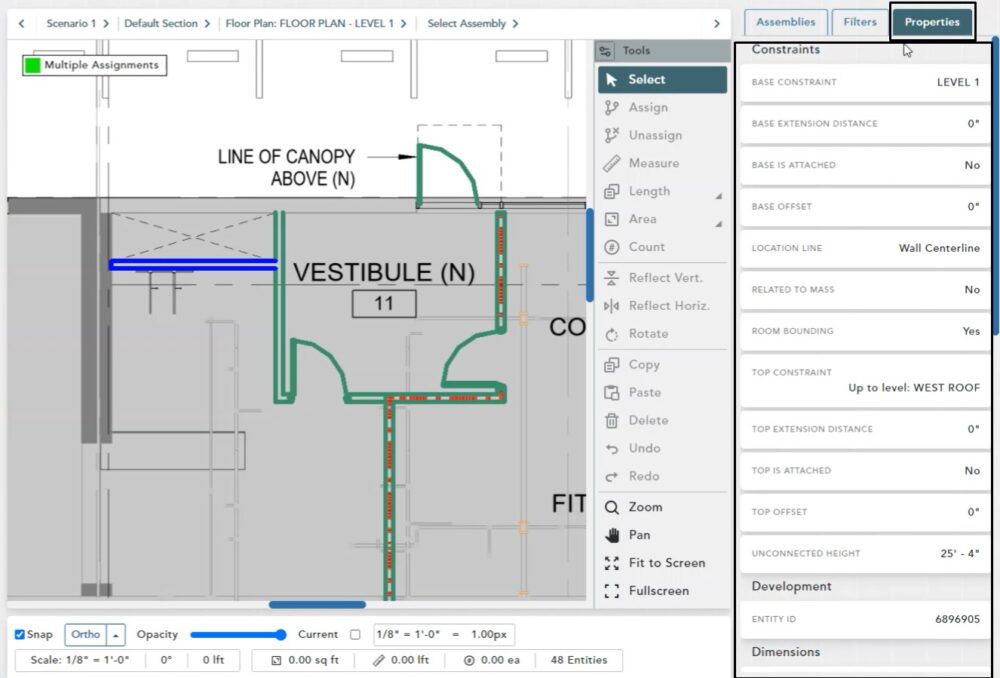
Scrolling down will allow you to see these properties that will help to identify what this shape represents:
- Category
- Family
- Family Type
- Workset

In this area, you will also see:
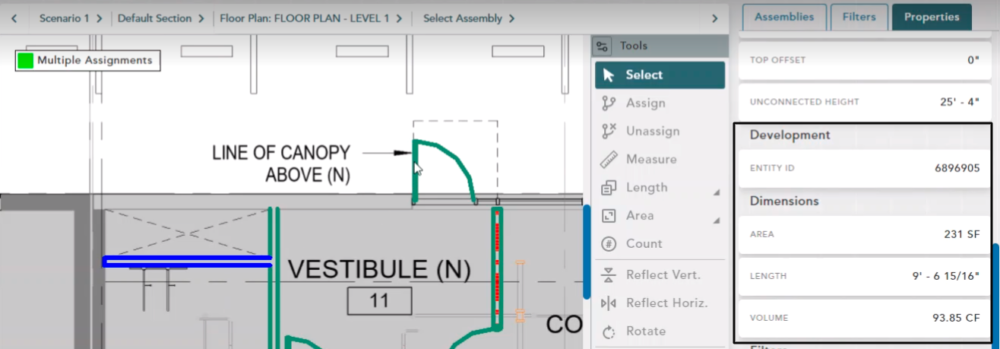
- Entity ID
- Dimensions
When you select a different REVIT element it will also turn blue to show it is selected and the Properties tab will automatically adjust and display the new information
Selecting REVIT Element – Option 2
Left click and drag to create a lasso
The properties for that shape will now appear on the right
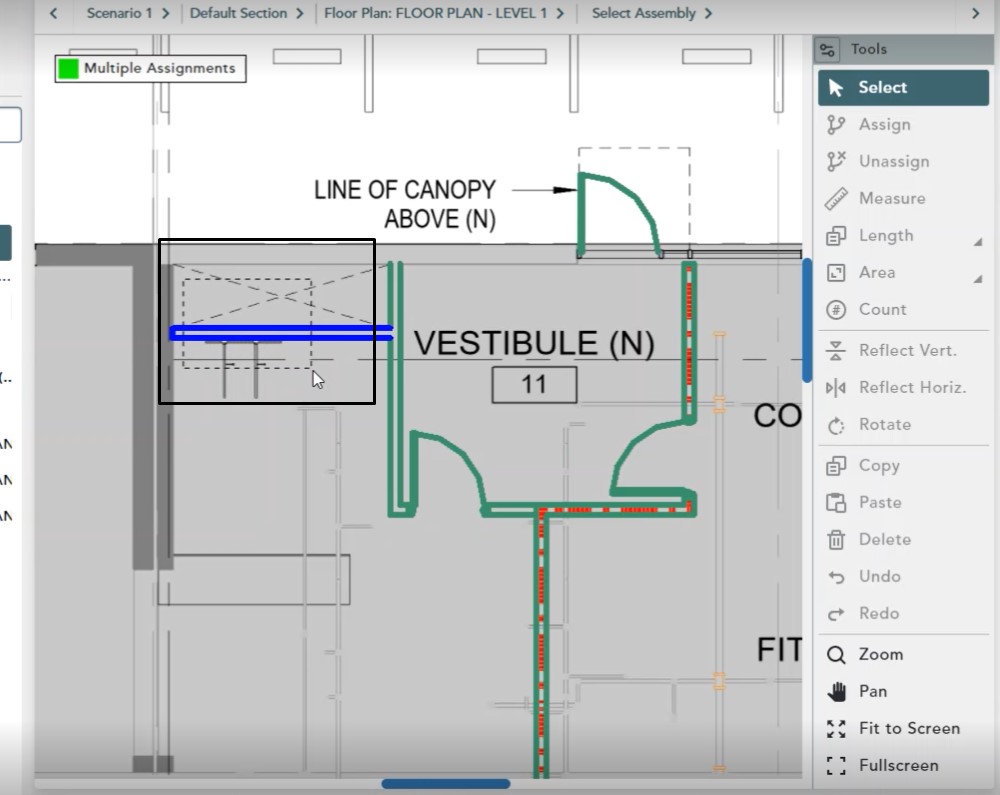
Note: You are only able to view the properties for one REVIT Element at a time
If you try to lasso more than one element, the Properties tab will not display any information and will remain blank until you narrow down your search to only one element