Objective: In this video and/or step by step walkthrough, you’ll learn how to Edit Filter Sets
Access Filter Manager Screen
Login to the Administrative Portal of the Vector Application
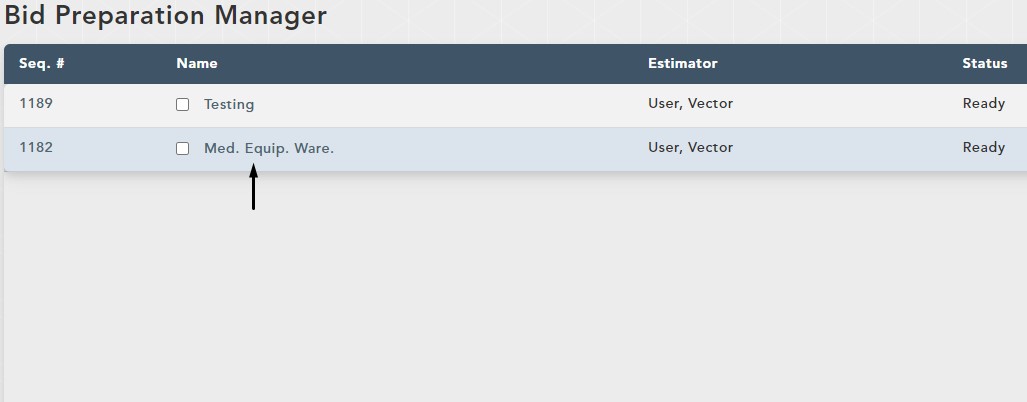
Click on the VECTOR drop-down and click Bid Preparation Manager
Click on the Bid you would like to work on
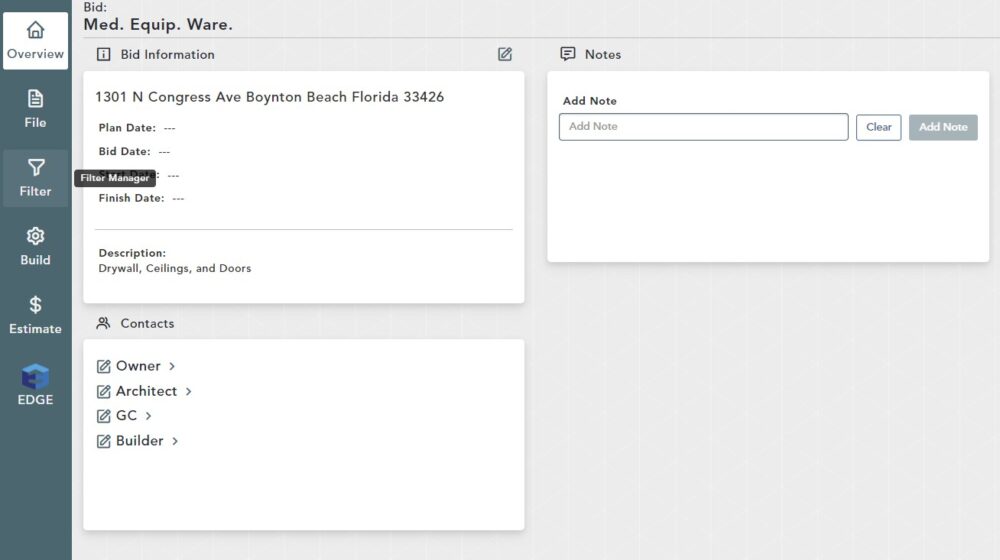
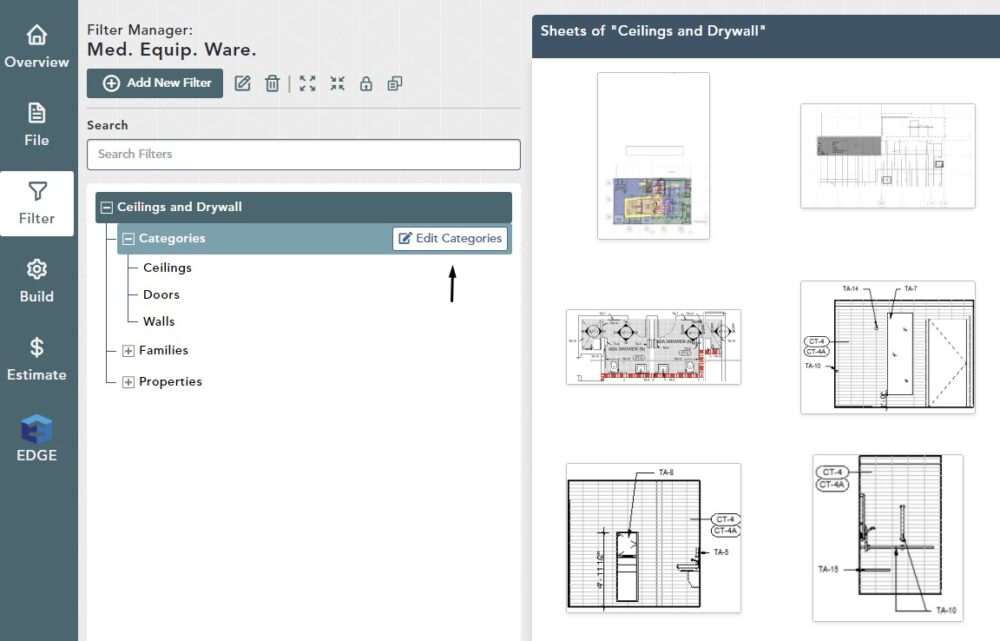
Click Filter
Choose the Filter to Edit
Select the level you would like to edit
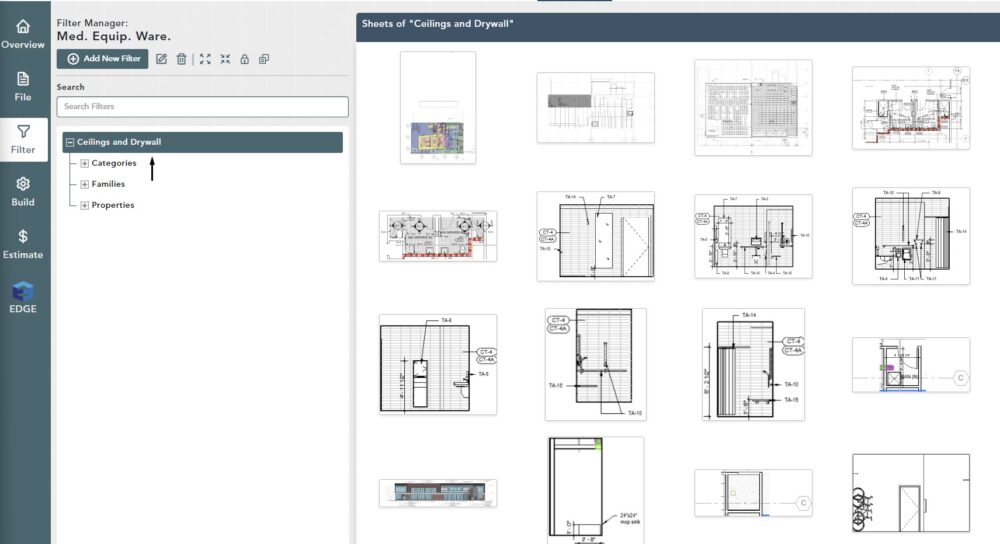
Select the Category to Edit
Click Edit Categories
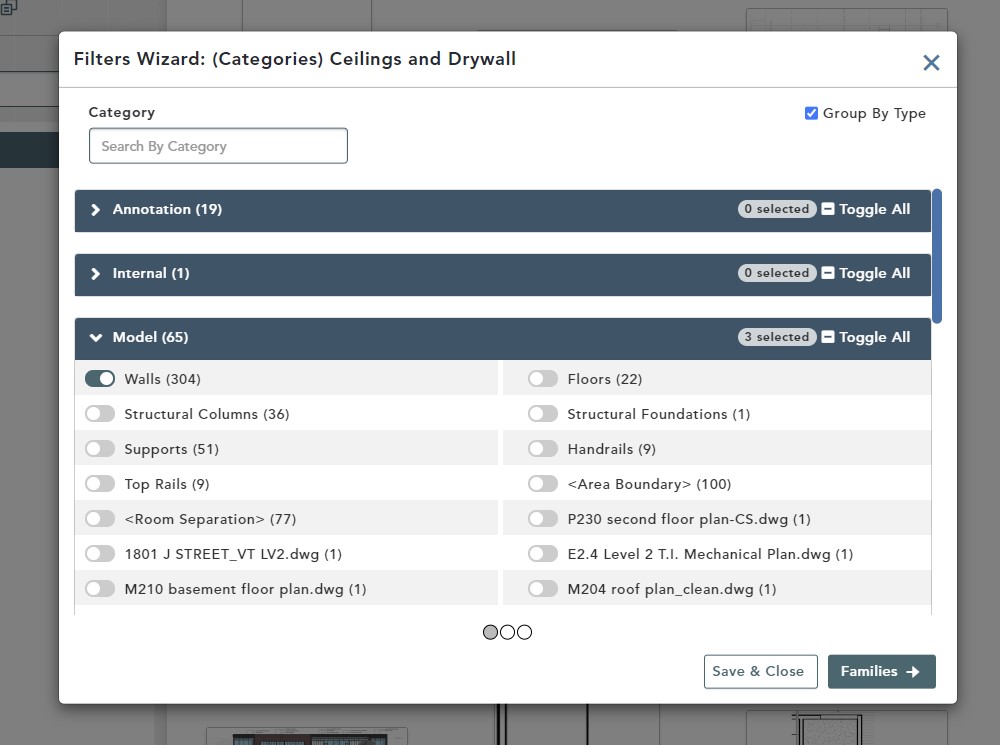
Remove Existing Category
In the Filters Wizard (Categories Level), click the arrow to expand Model
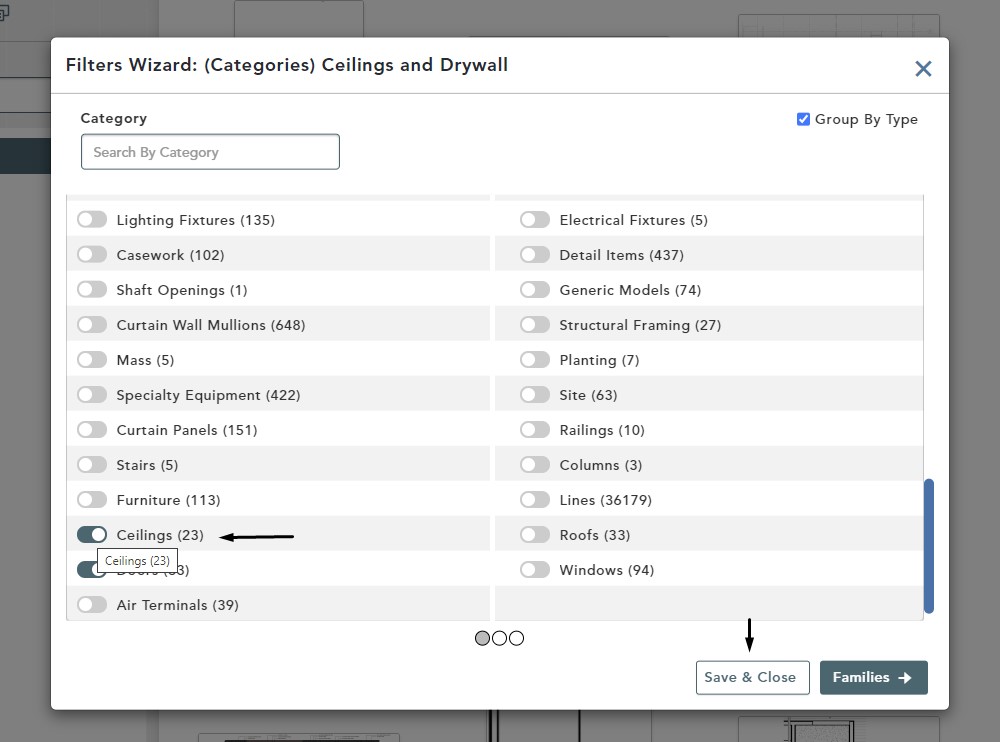
Remove Ceilings
Click the toggle button next to Ceilings to turn it off
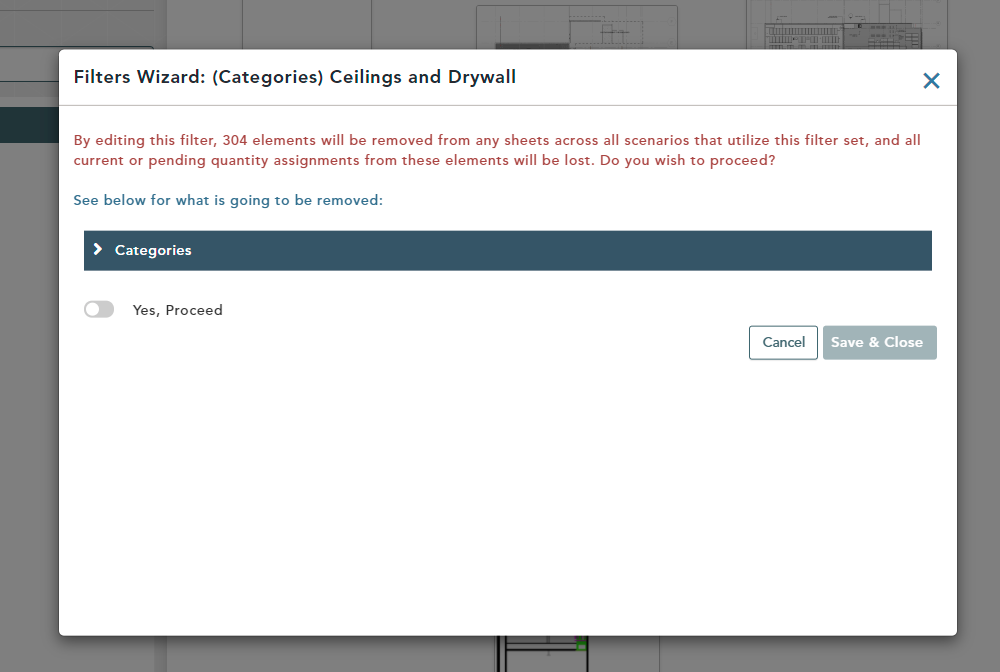
Then, click Save & Close to finalize the change
You will receive a warning message and if you are happy with this change, click Yes, Proceed
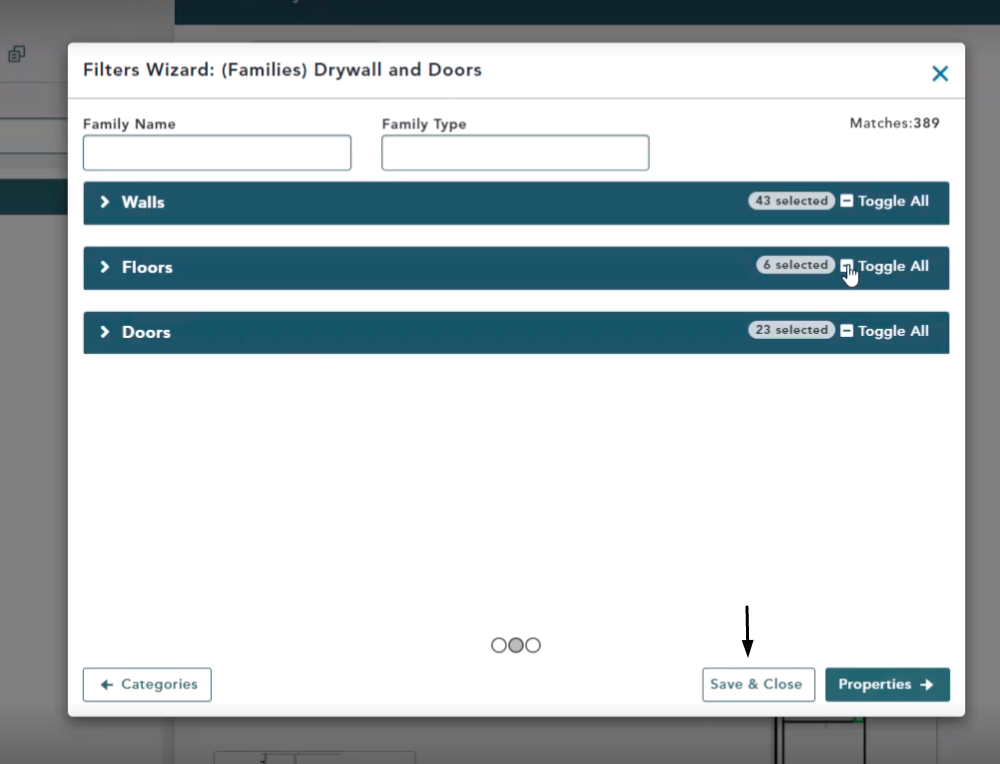
Select the Family to Edit
Select Families, then click Edit Families
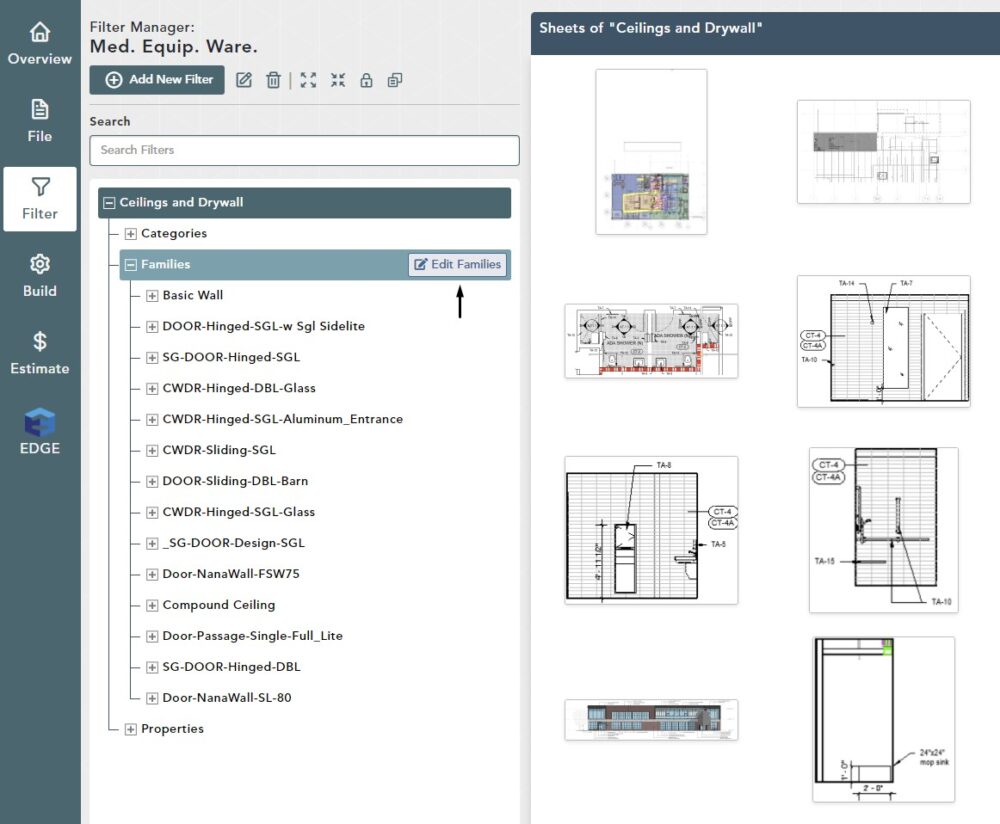
Remove Existing Family
In the Filters Wizard (Families Level), click the arrow to expand Walls, then Basic Walls
Click a few of the toggle buttons next to several Wall presets to turn them off
Click Save & Close to finalize the change
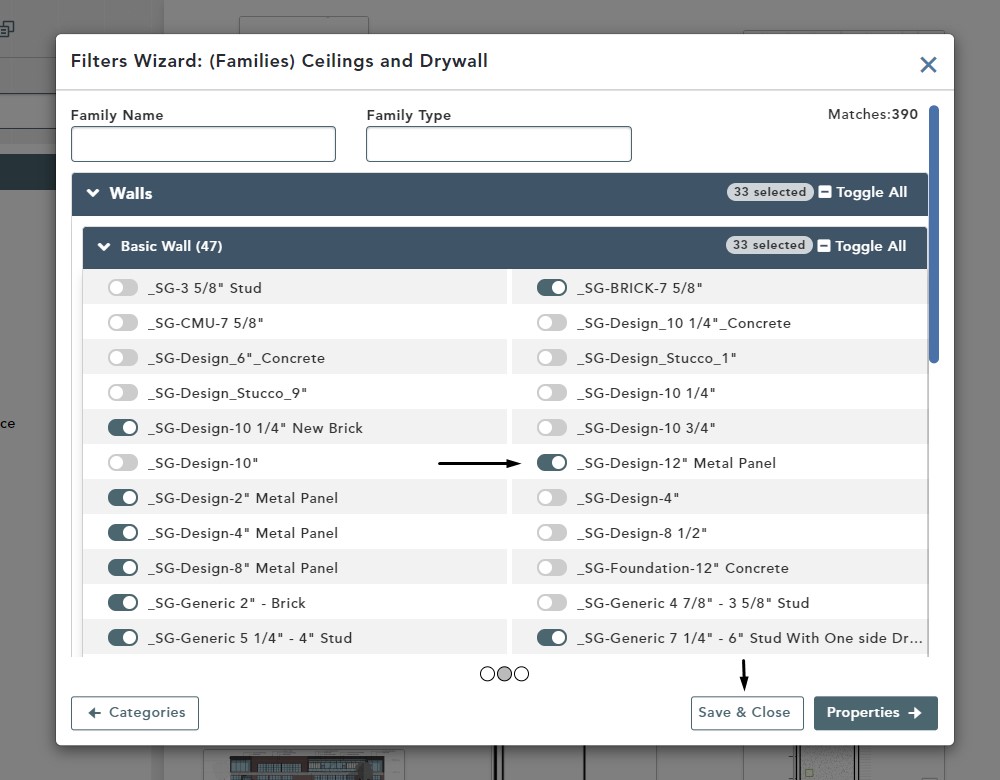
Before you choose to proceed with the change you will receive the same type of warning message as you received in the previous steps
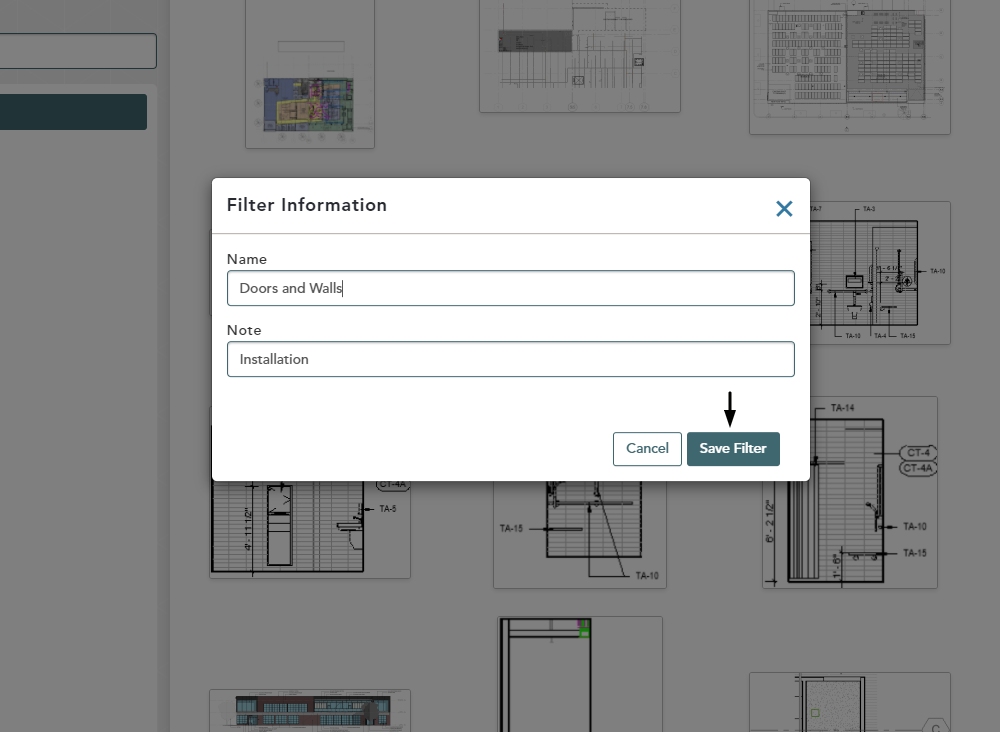
Edit Description of Filter
Select the filter header name, then click Edit

Click in the Name text field to make necessary changes
Click Save Filter
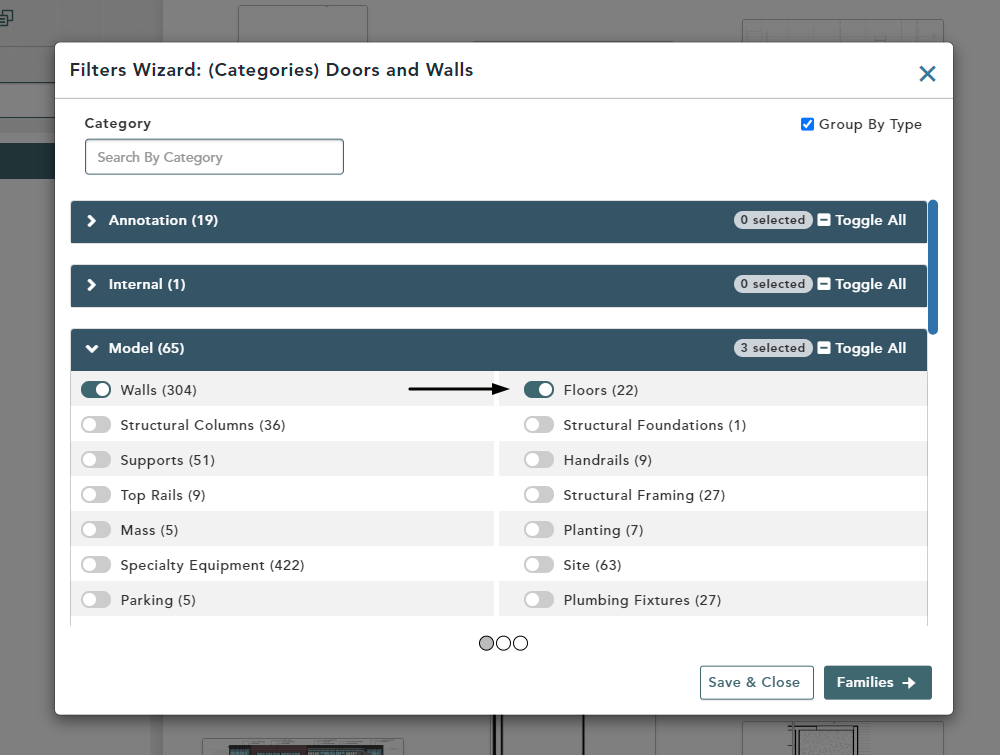
Add Data to Existing Filter Set
- Click Edit Categories
- Click the drop-down arrow by Model
- Click the toggle to turn on Floors
- Click Families
Enable All Floor Families
Click the Toggle All button
Click Save & Close