Objective: In this video and/or step by step walkthrough, you’ll learn about columns and modes on the estimate screen of a VECTOR Bid
Estimate Screen
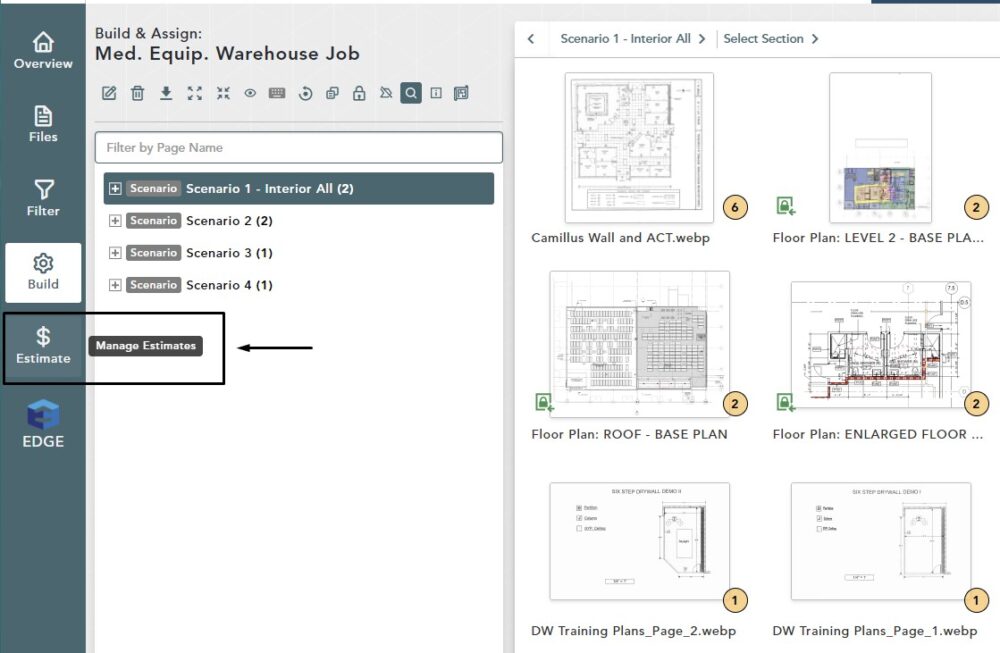
Using the toolbar on on the left-hand side of your screen, left click on the Estimate button
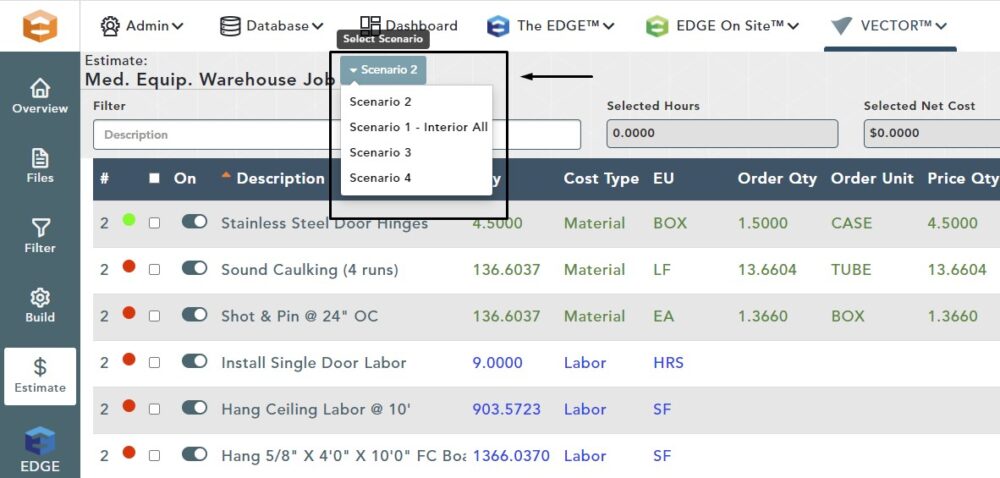
Scenarios
Each Scenario has its own screen
To choose a different Scenario, click the drop-down arrow by the Estimate name and select
Viewing Modes
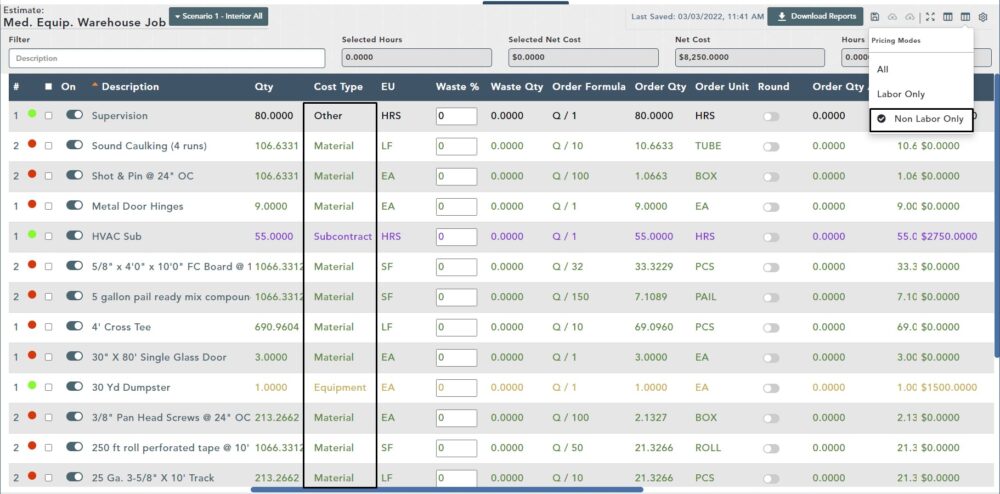
On the toolbar on the left-hand side, hover over the second to last icon labeled Mode
Left click and a pop out menu will appear listing all Pricing Modes
By default, All will be selected and lists items of all cost types in the display; Material, Labor, Equipment, Subcontract, Other
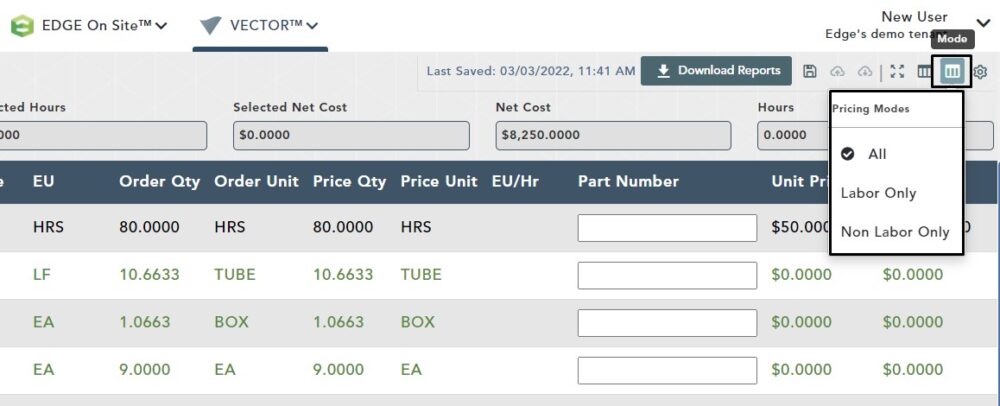
Labor
Left click on the Mode button again to choose a different option
In this example, we have chosen Labor
Once selected, only Cost Types for Labor will appear in the results

Non Labor
Left click on the Mode button again to choose Non Labor
Once selected, all cost types will appear in the results except Labor
Mode Columns
Every Mode will have its own set of default Columns
Columns are displayed in the title bar of the Estimate screen table in navy blue
All Mode
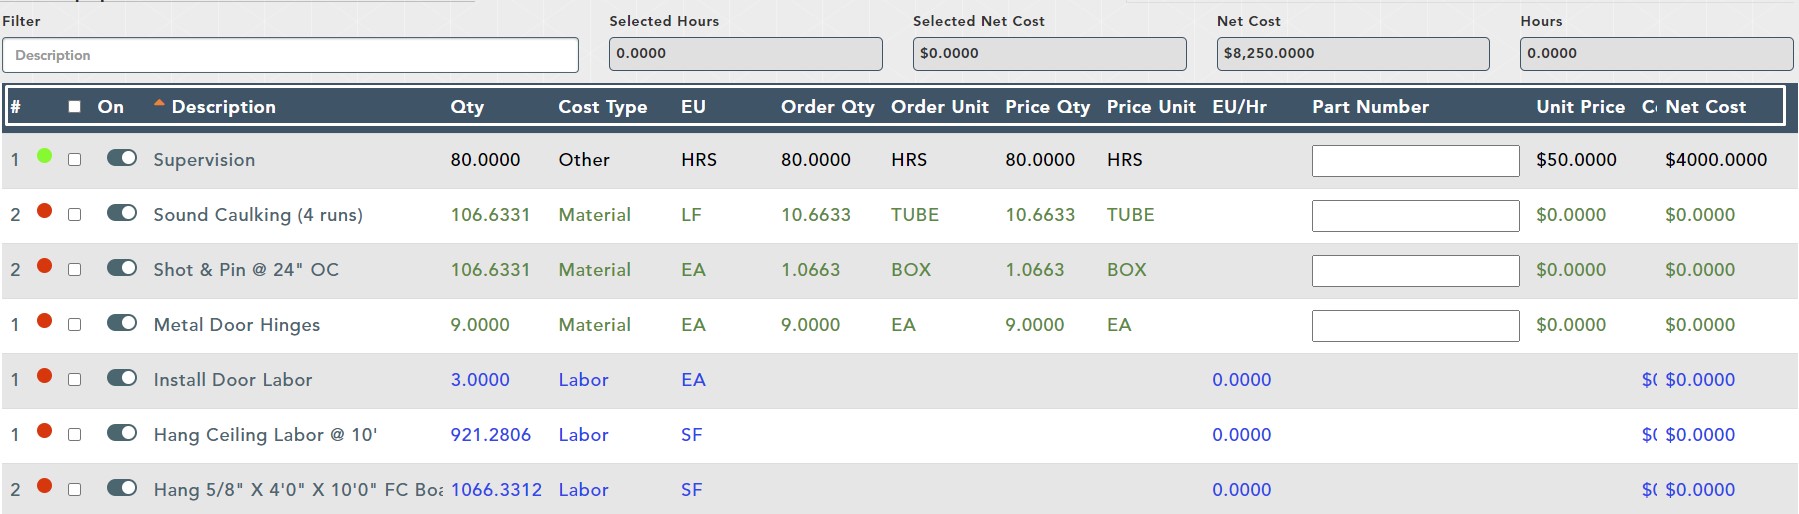
Labor Only Mode
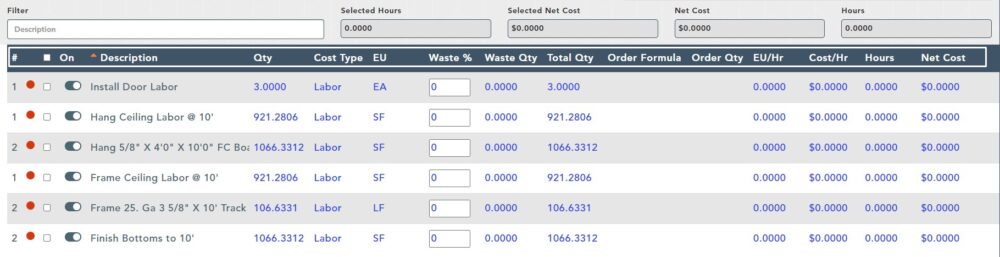
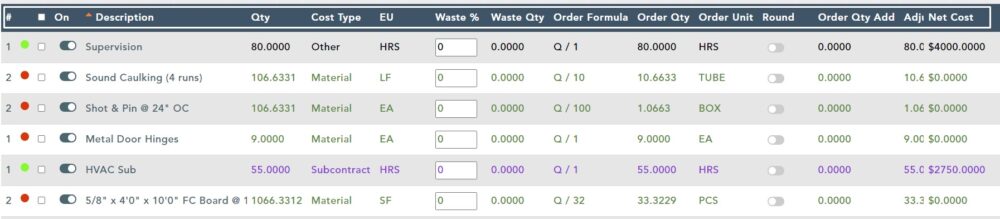
Non Labor Mode
Sorting Columns
Hover over a Column header and you see the ability to Sort
By default, your items will be sorted by Description
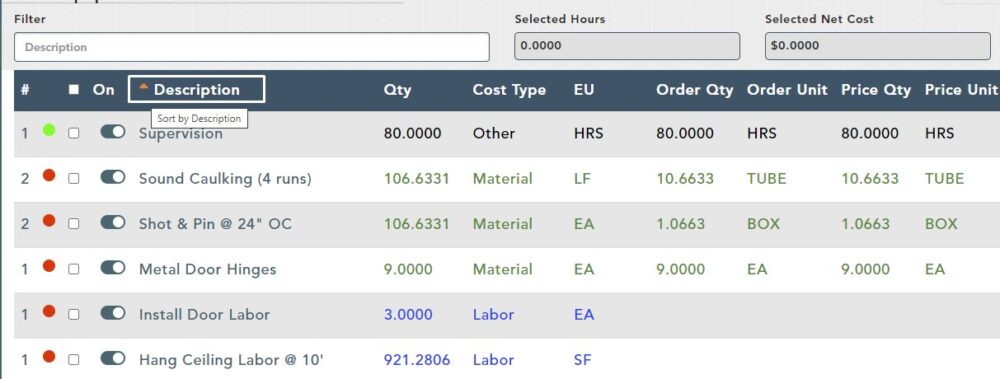
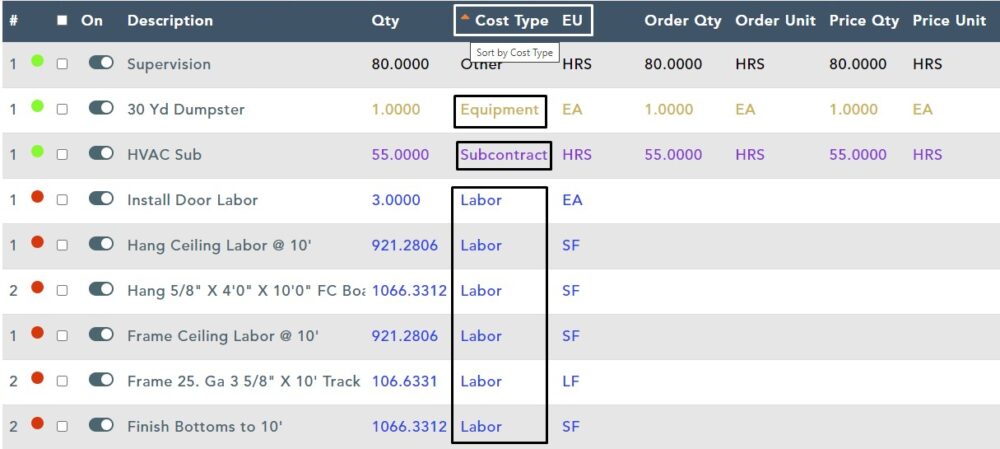
To sort in other columns, simply click on the the column header
In this example, we clicked on the Cost Type column header and the table is sorted by cost type with the item types grouped together
Change Columns Per Mode
To change what columns appear in each mode, left click on the Columns button on the top, right-hand side of the window and a pop out window will appear
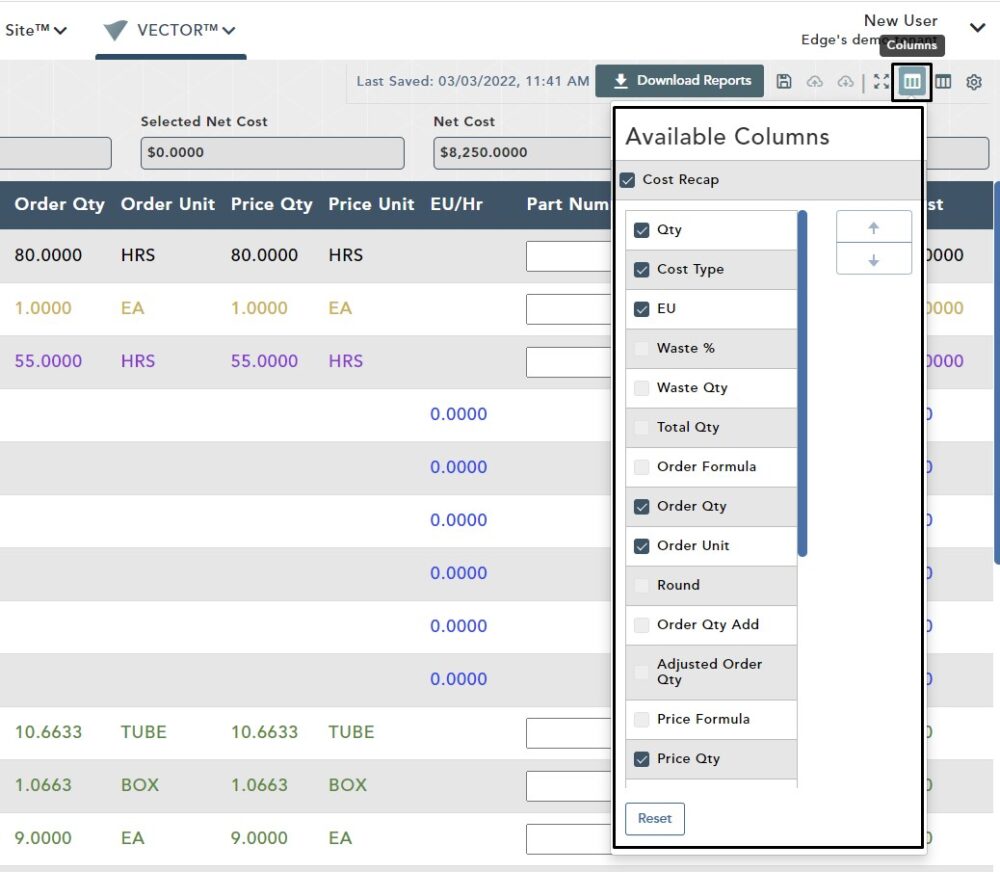
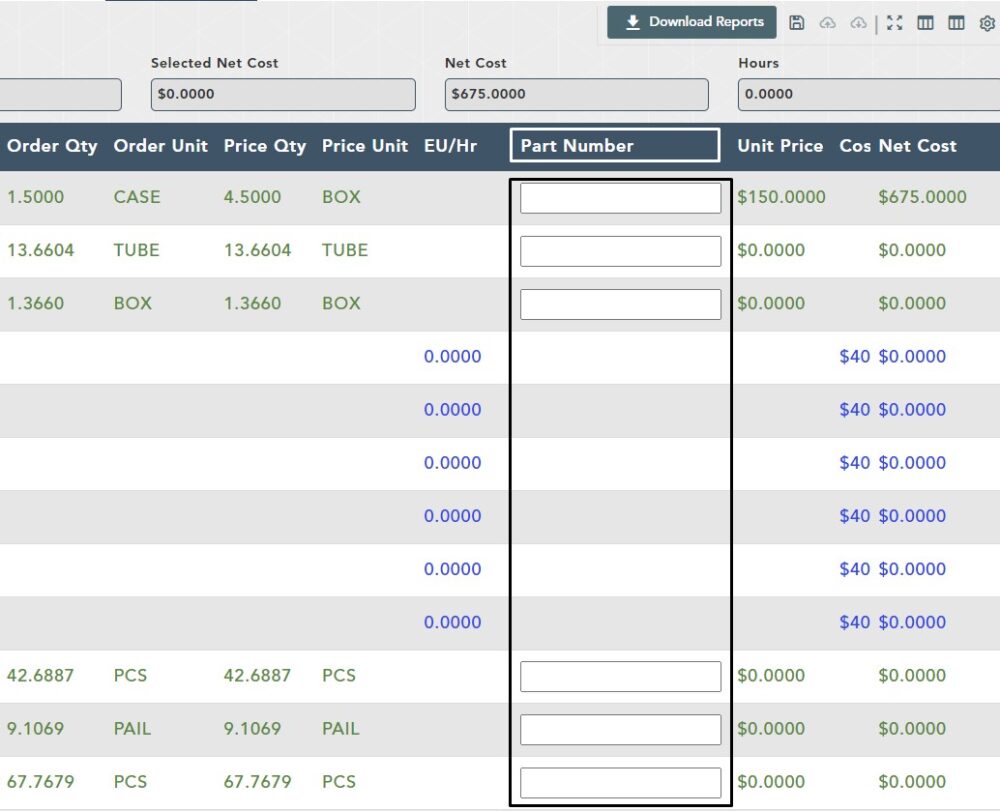
Add a New Column
To add a new Column to the list, click the box beside the one you would like to add
In this example we have chosen Part Number and that column has been added
Note: You can also remove a column by deselecting it
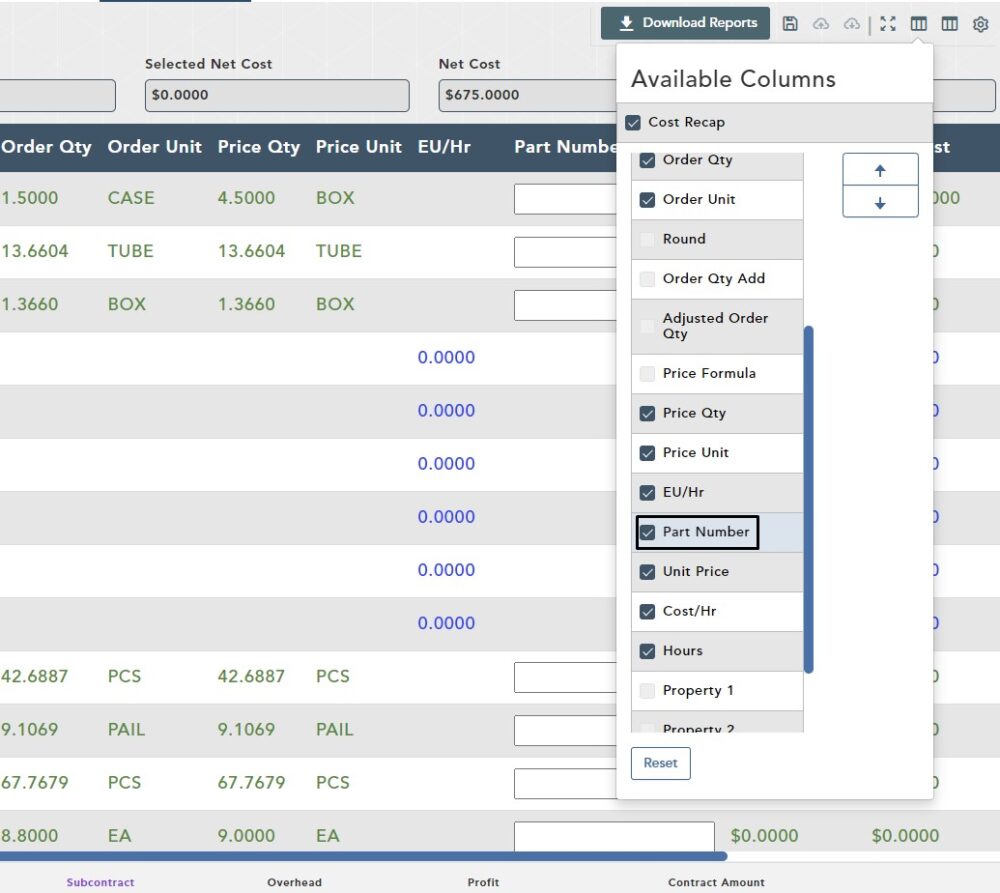
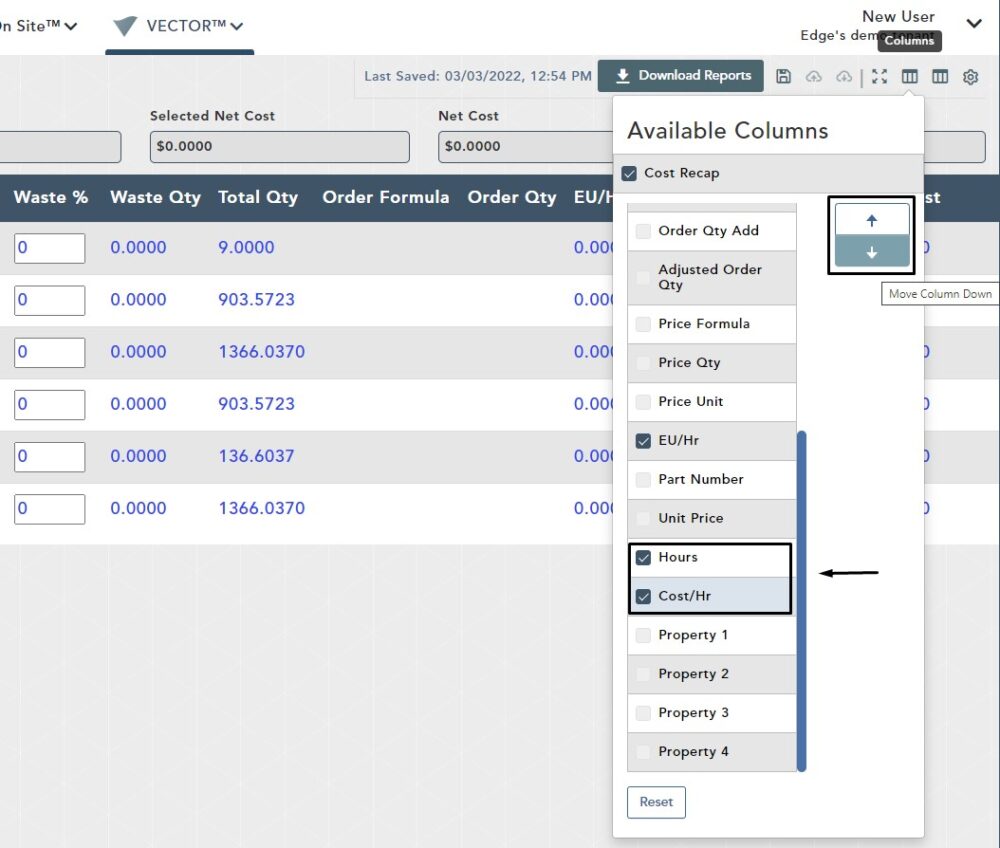
Change Column Display Order
To change the order in which your columns are displayed, click the Columns button once again
Left click on the column you would like to move
Then, using the arrows on the right side of the drop-down window, move the column up or down
For this example, we have moved Cost/Hr down below Hours by clicking the down arrow one time
Note: Choosing the down arrow will move the column further to the right-hand side; Choosing the up arrow will the column further to the left-hand side
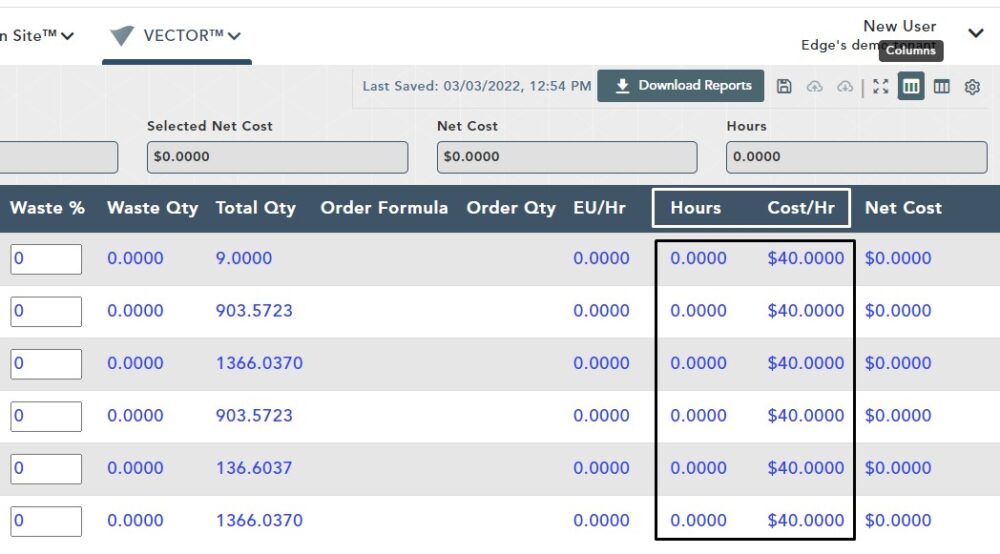
After you make the change, you see that Cost/Hr column was switched with Hours column, and is now further to the right of the header bar
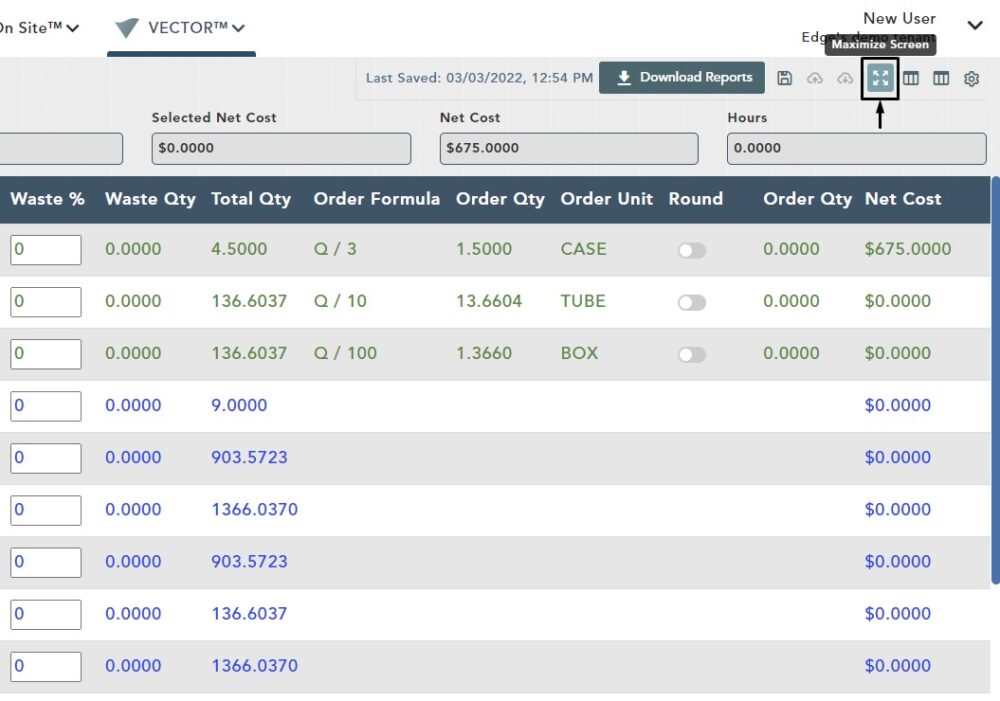
Maximize Screen Button
To increase the size of your Estimate Screen, click the Maximize Screen button