Objective: In this video and/or step by step walkthrough, you’ll learn how to create an assembly in VECTOR by area
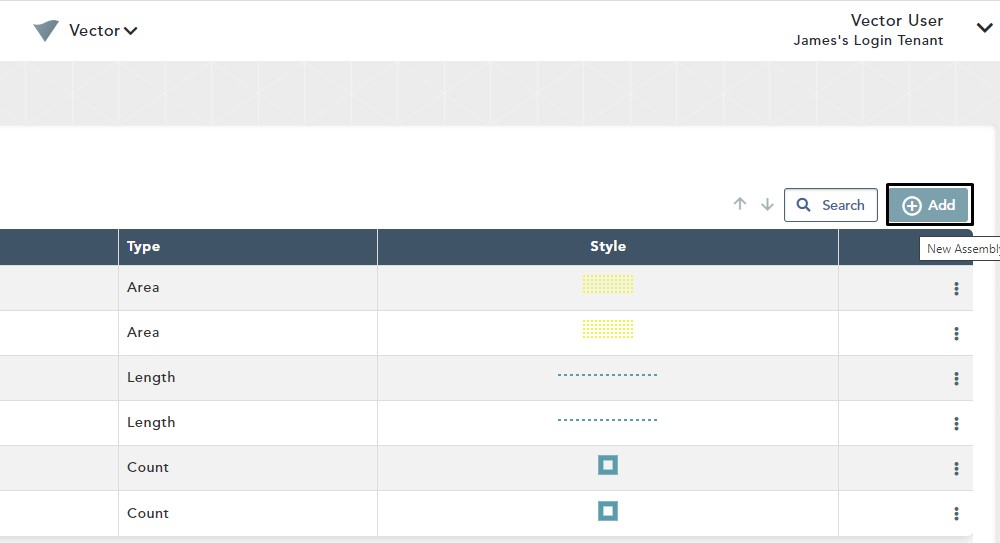
Open the Assembly Manager
Left click on the VECTOR drop-down arrow
Click to select Assembly Manager

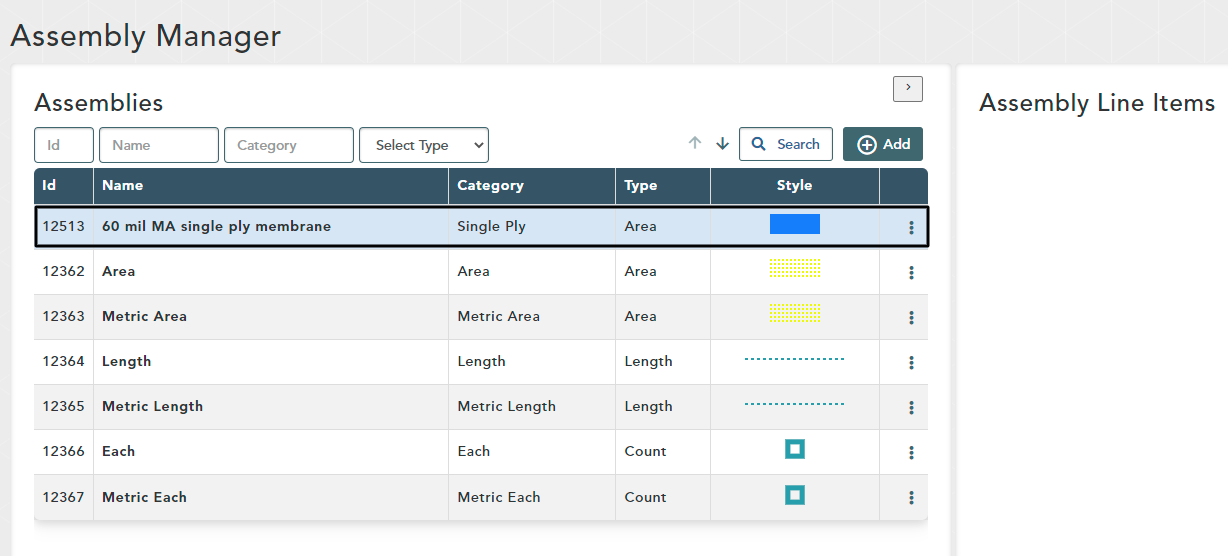
Add New Assembly
Click the Add button on the right hand side of your screen
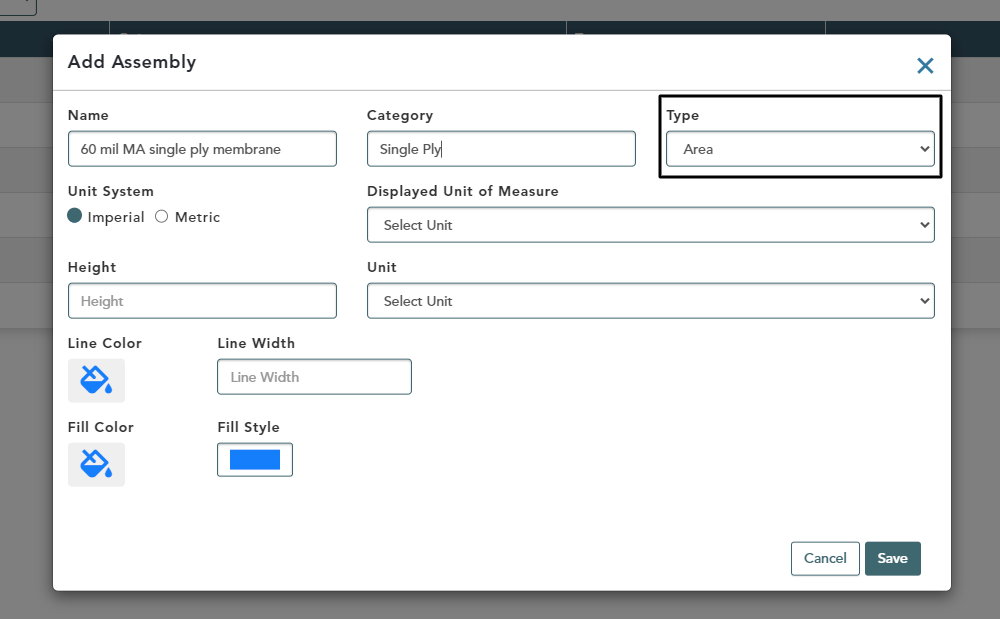
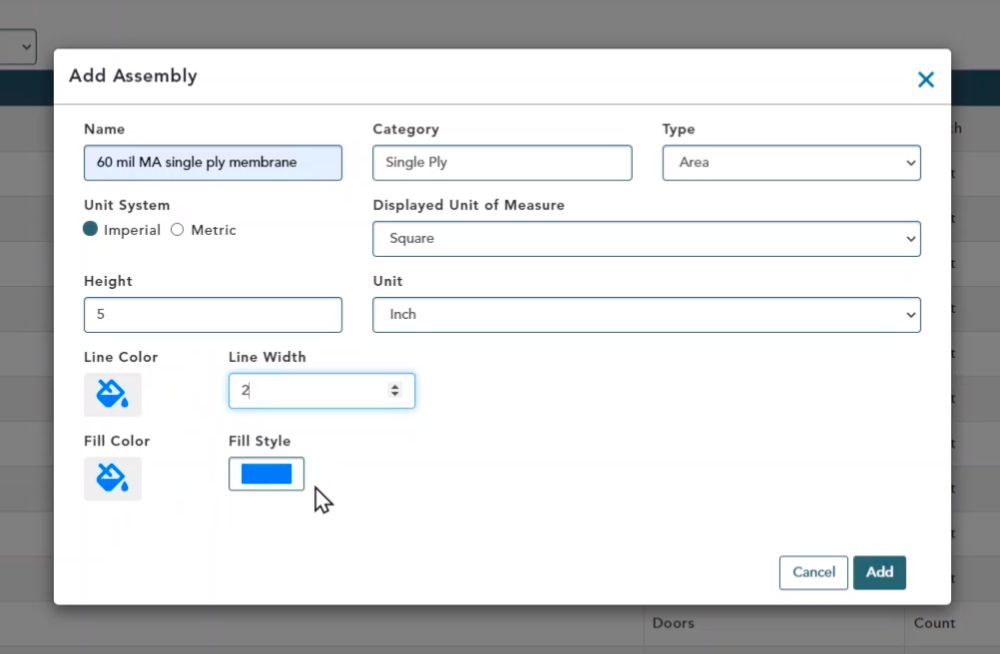
Add Assembly Window
Once in the Add Assembly Window you will need to fill out certain fields
First, create a Name that reflects the assembly you would like to add
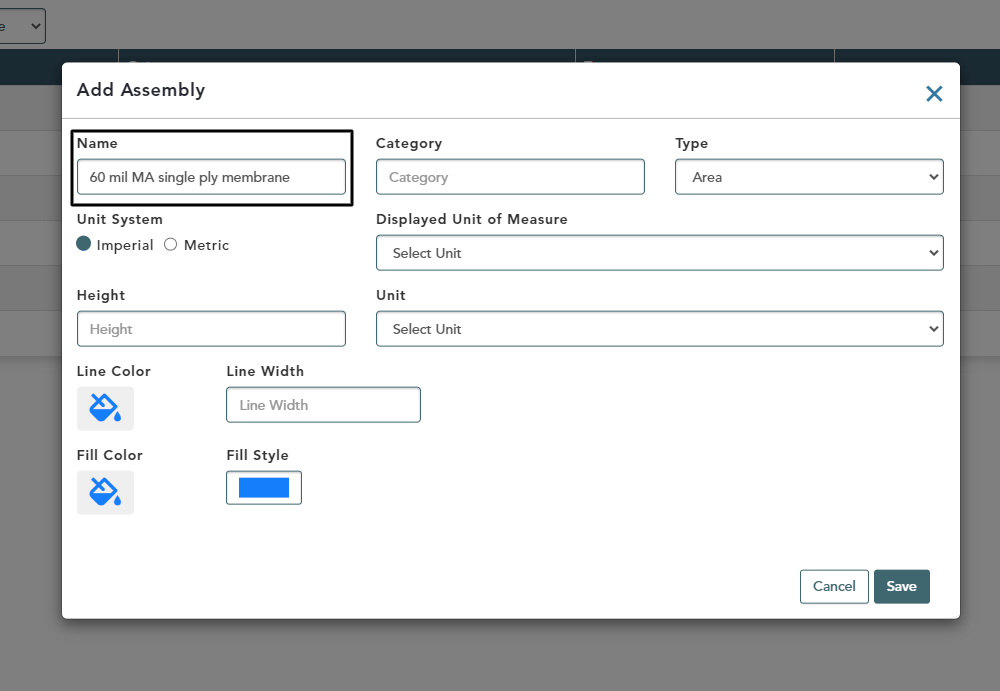
Category
Next, input your Category based on how your company wants to keep your assemblies organized
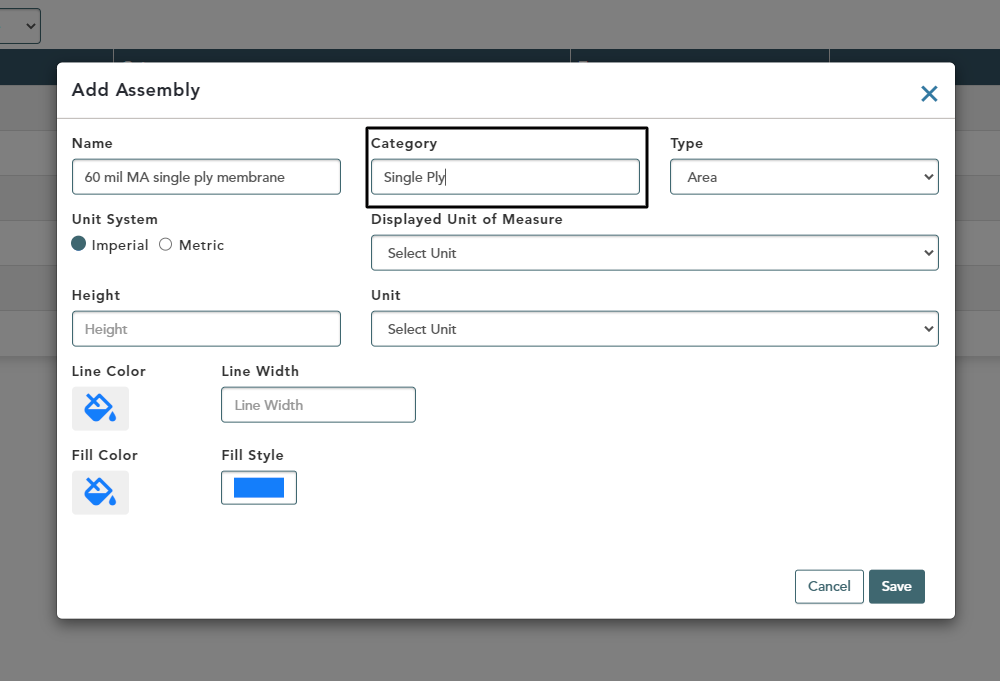
Type
In the Type box, you can choose from Area, Length or Count
The type is chosen based on the corresponding assembly you are creating.
For this example, we are selecting Area
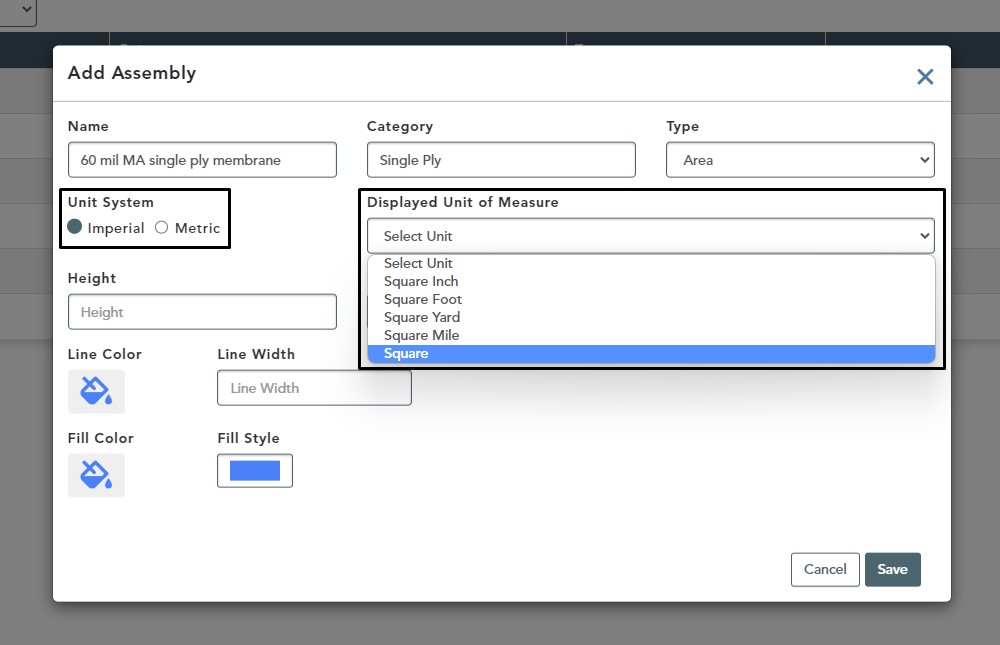
Unit System & Displayed Unit of Measure
Unit System is chosen by what your company needs
Displayed Unit of Measure gives you several choices and you should make your selection based on your assembly type
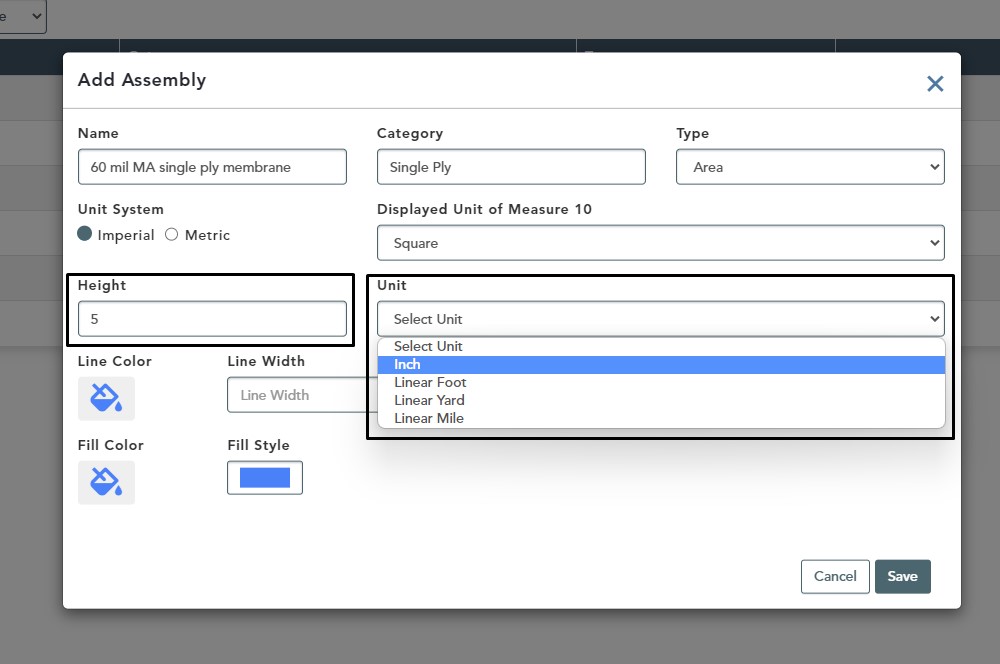
Height & Unit
Height is an optional field used to calculate volume potential used for tear-off down the road
Unit gives you several options and should be based on your particular assembly
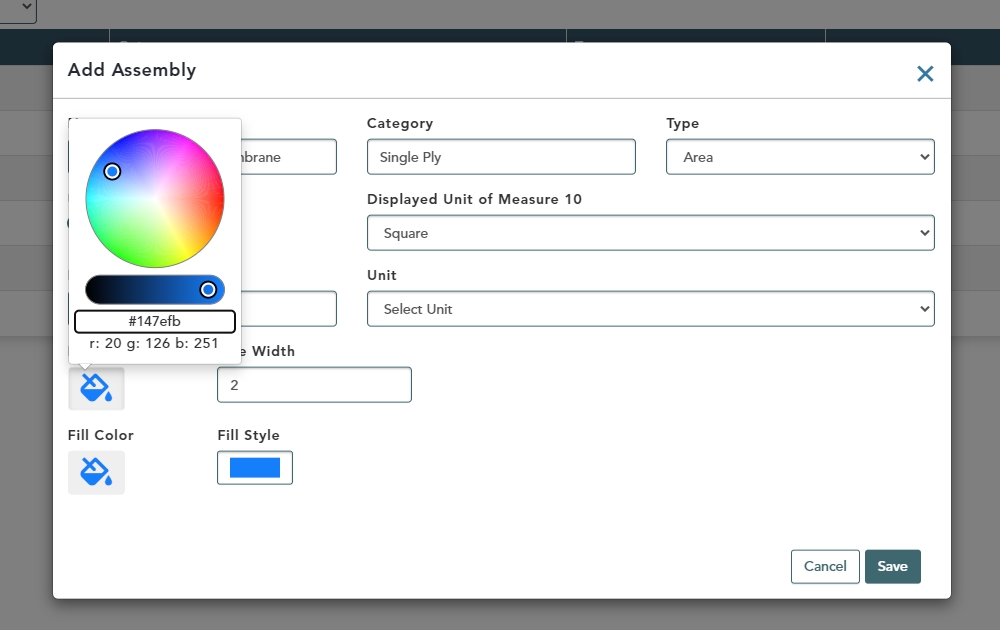
Line & Fill Options
You can choose options for your Line & Fill colors at this point in the assembly creation or you can edit these at a later time

Save Assembly
Left click the Add button at the bottom of the window
After you click Add, you will be returned to the Assembly Manager window where you will see your new assembly added at the top of your list