Objective: In this video and/or step by step walkthrough, you’ll learn how to set the scale for our background image on a page
Build Screen
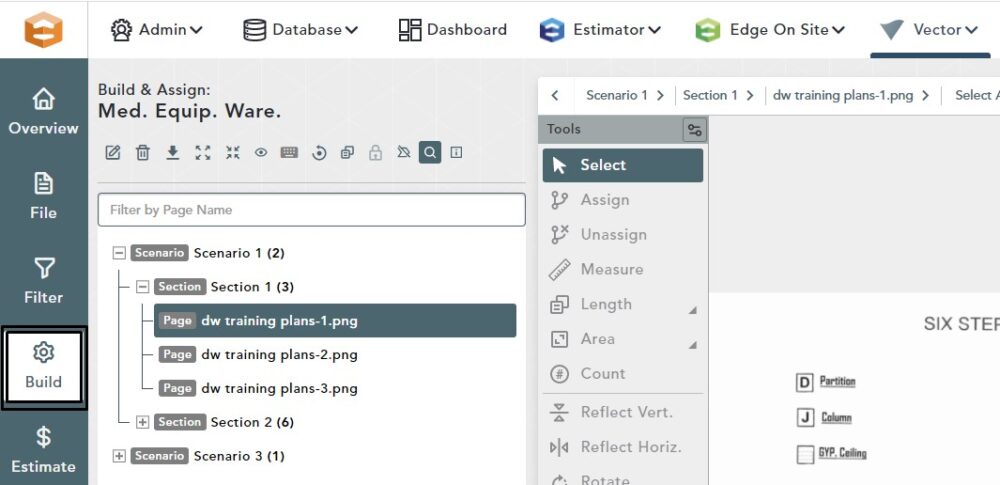
To Set a Scale for your background image, first make sure you are on the Build page of the VECTOR Bid
Page in Bid Structure
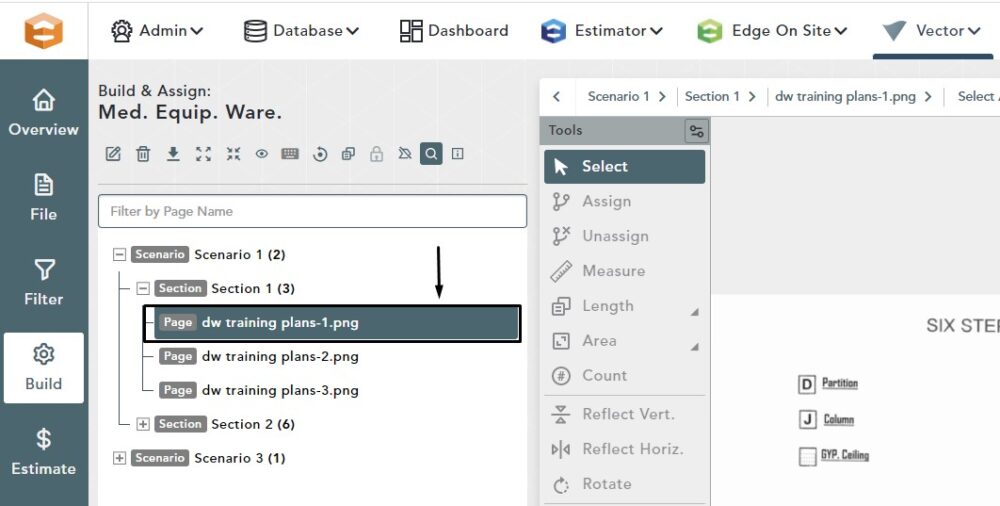
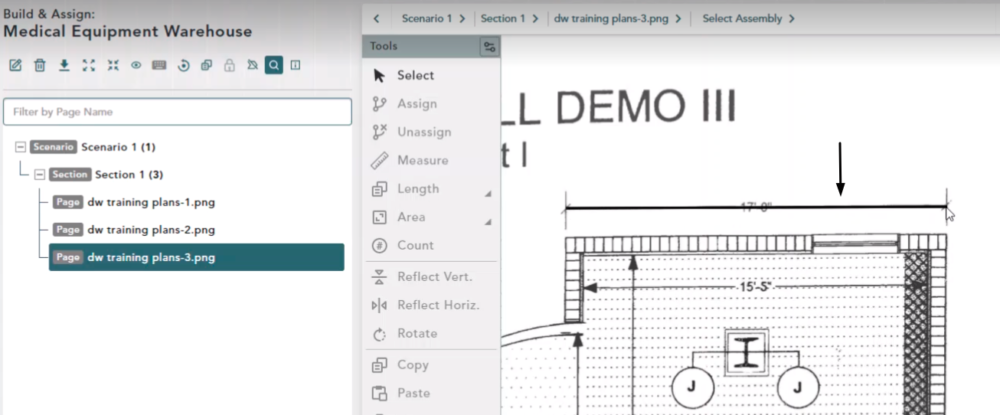
Next, make sure you have selected or highlighted a Page within your Bid Tree structure
Setting a Scale – Option 1
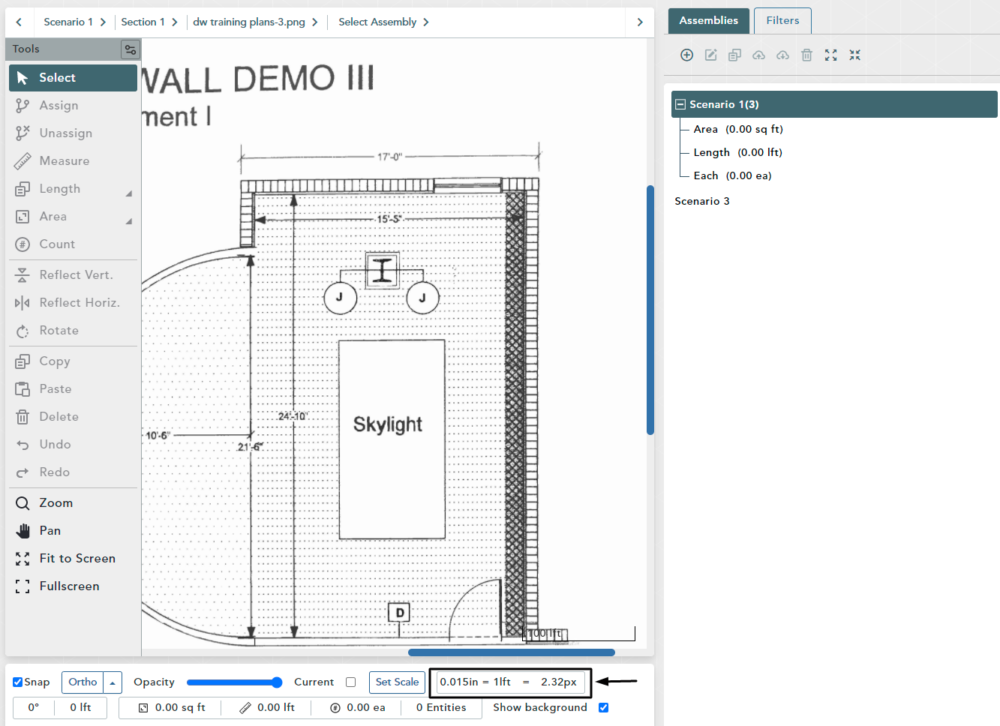
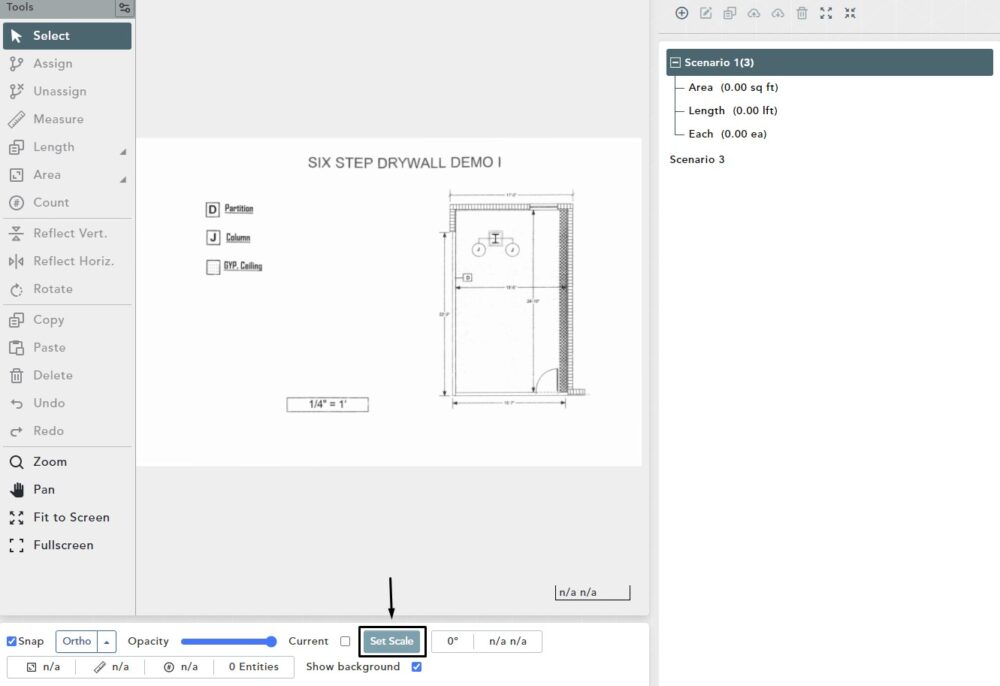
First, left click the Set Scale button at the bottom of your status bar
Setting Drawing Scale Window
On the Setting Drawing Scale window, your first option is Default Scales
Left click the drop down where you can choose from all of the defaults within the application
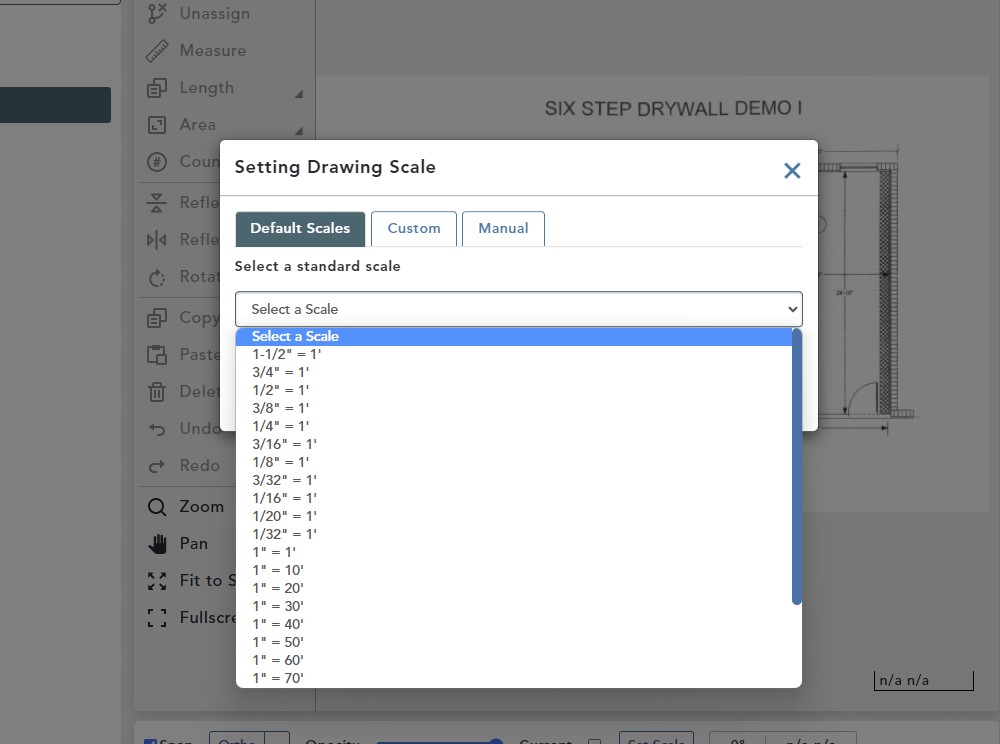
Make your selection, then click Confirm
For this example we are going to choose 1/4″ = 1′
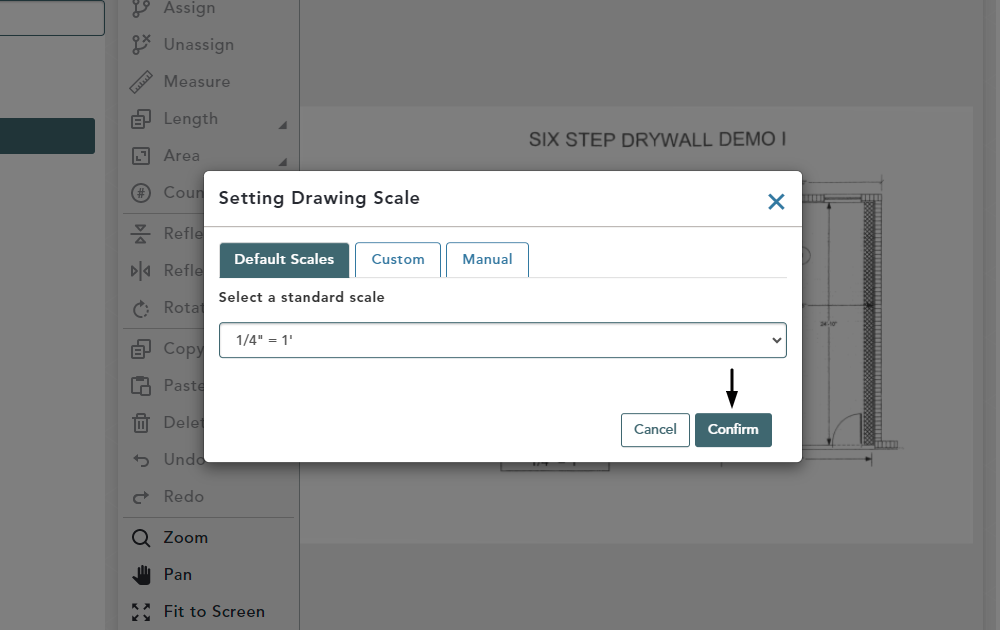
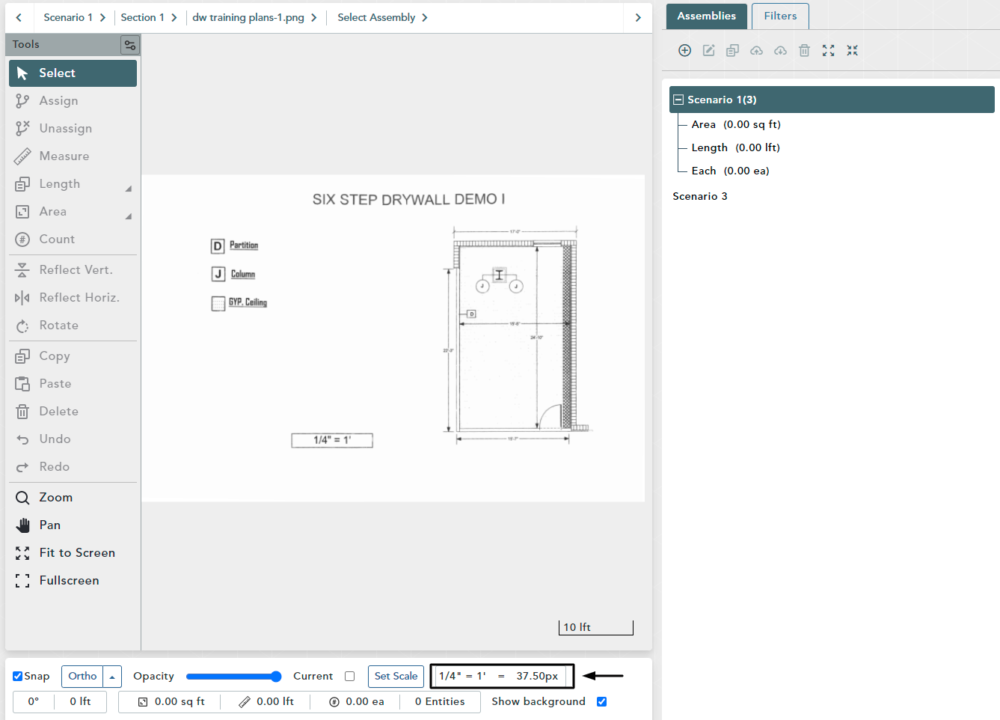
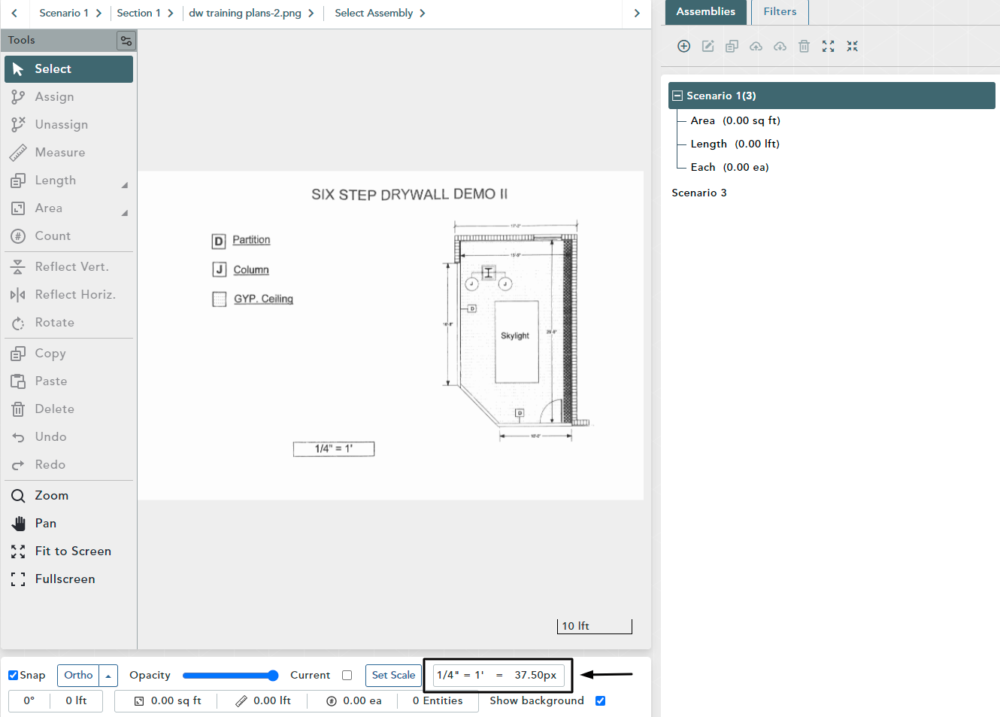
Setting Scale Confirmation
After you click Confirm you will be returned to the Build Screen where you can view your scale status at the bottom of the window
Setting a Scale – Option 2
Click on the Page within your Bid Tree where you would like to change the scale
Again, click Set Scale at the bottom of your window
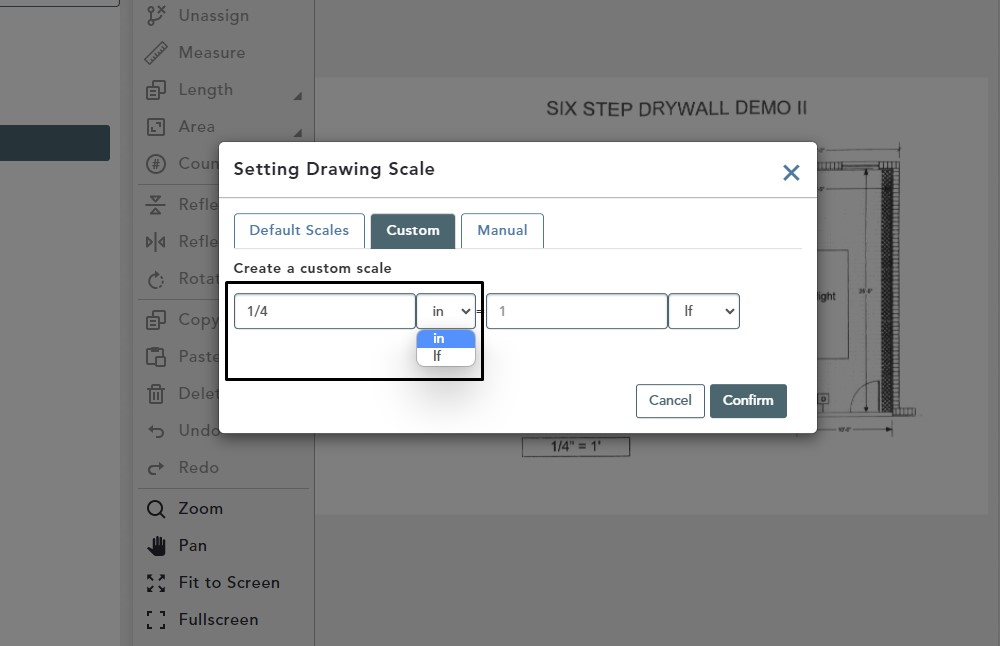
Once inside the Setting Drawing Scale window, left click the Custom tab
From here you can type in your own custom scale for this page
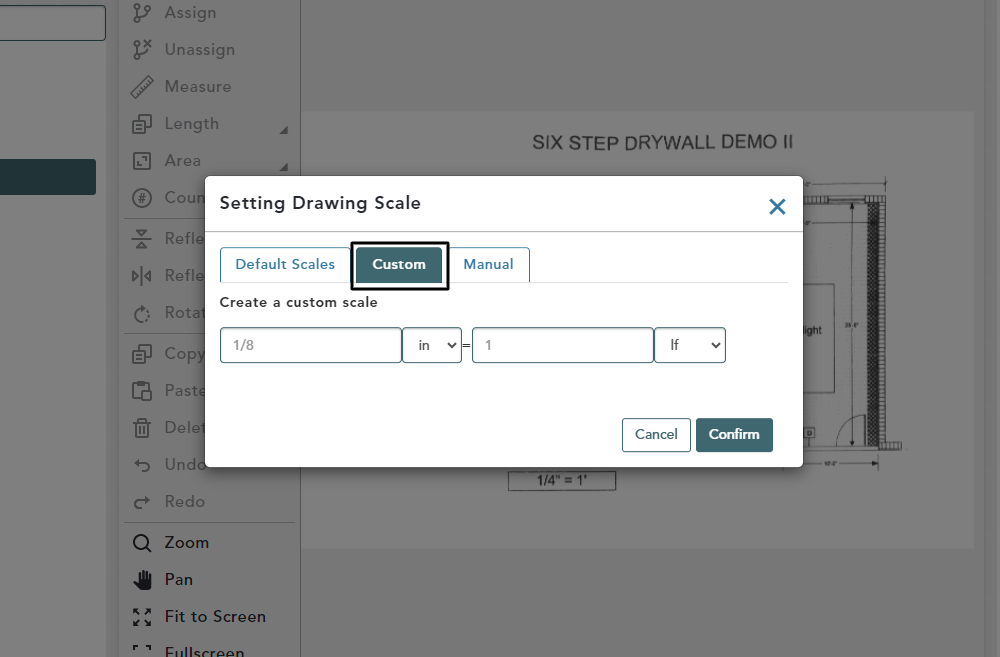
In the first custom scale box you can type in your starting parameters, then click the drop down arrow to the right where you can choose in (inches) or lf (lineal feet)
For this example we are typing in 1/4 and selecting in (inches)
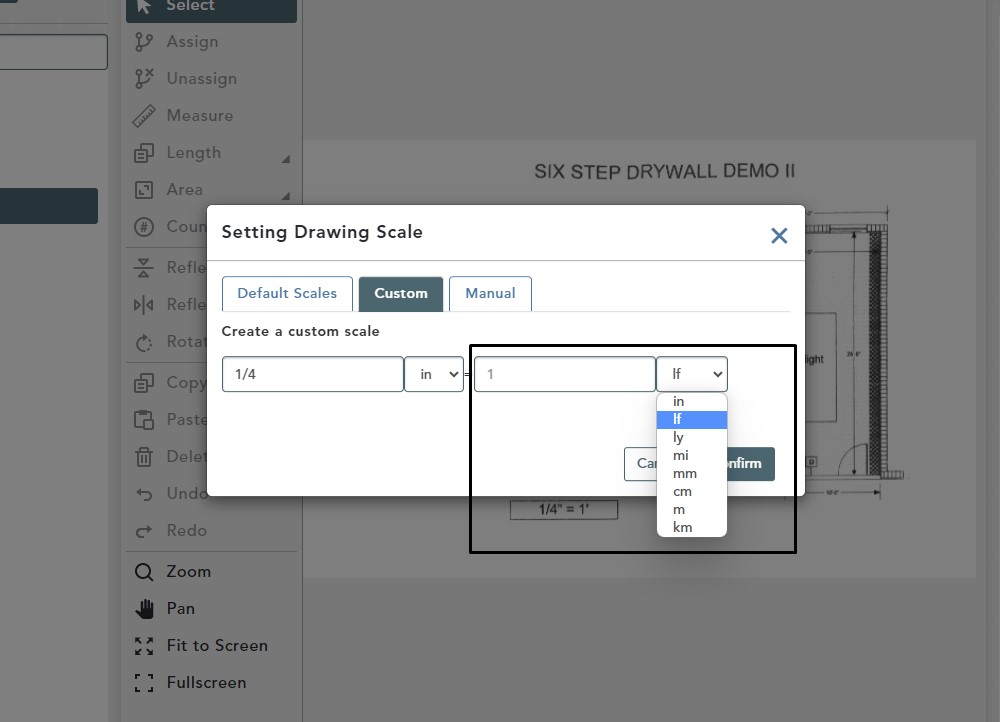
In the second box, you can type in the parameters for the other end of your image scale
The drop down arrow to the right of this box gives you many different options
For this example we are typing in 1 and selecting lf (lineal feet)
Then click Confirm at the bottom of the window
Setting Scale Confirmation
After you click Confirm, you will returned to your Build Screen where you see the scale status of this Page has been changed
Setting a Scale – Option 3
Click on the next Page where you would like to change the scale
Again, click Set Scale a that the bottom of your window
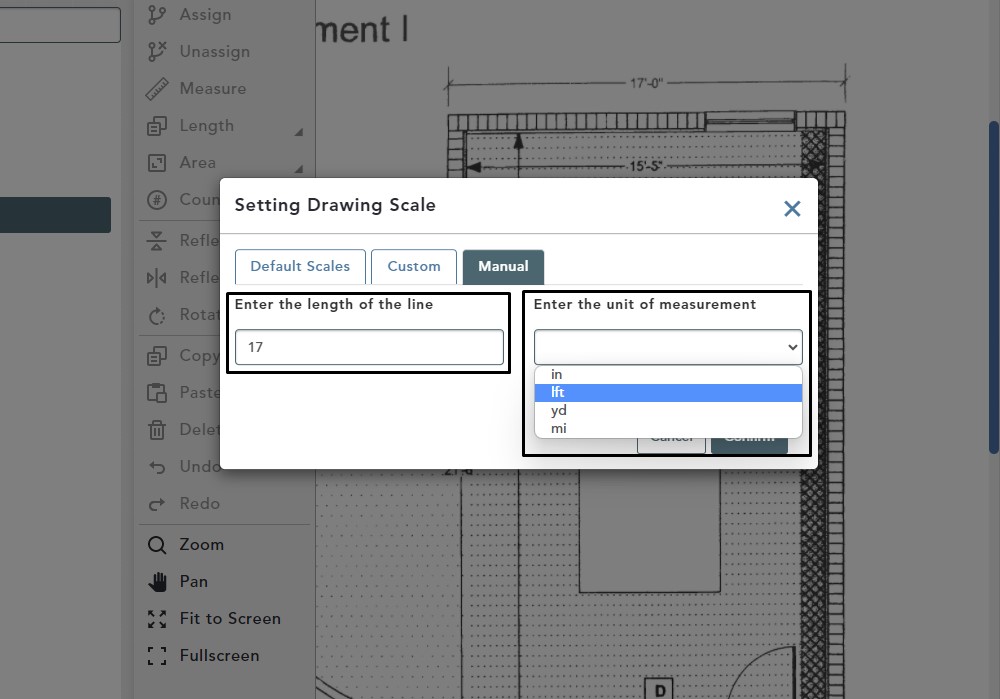
Once inside the Setting Drawing Scale window, left click the Manual tab
Then, click the Measure Line button
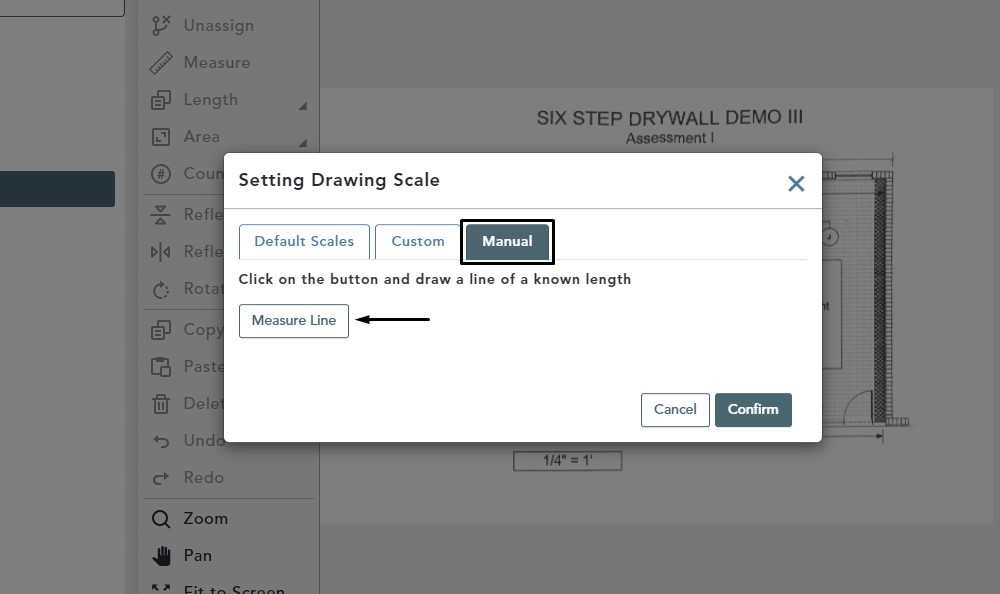
Once you select Measure Line, you will automatically be returned to your image
Find a known dimension on the blueprint to give a reference point
Left click and drag your mouse to extend the line to the end of the known dimension, then click once again to finish the line
In the field on the left, enter the numeric representation for the length of the line, then click the drop down arrow in the second box and choose the unit of measure
For this example the length of the line was 17 and the unit of measure is lineal feet
Click Confirm
Setting Scale Confirmation
After you click Confirm, you will returned to your Build Screen where you see the scale status of this Page has been changed