Objective: In this video and/or step by step walkthrough, you’ll learn about adding a new item to an existing scenario assembly
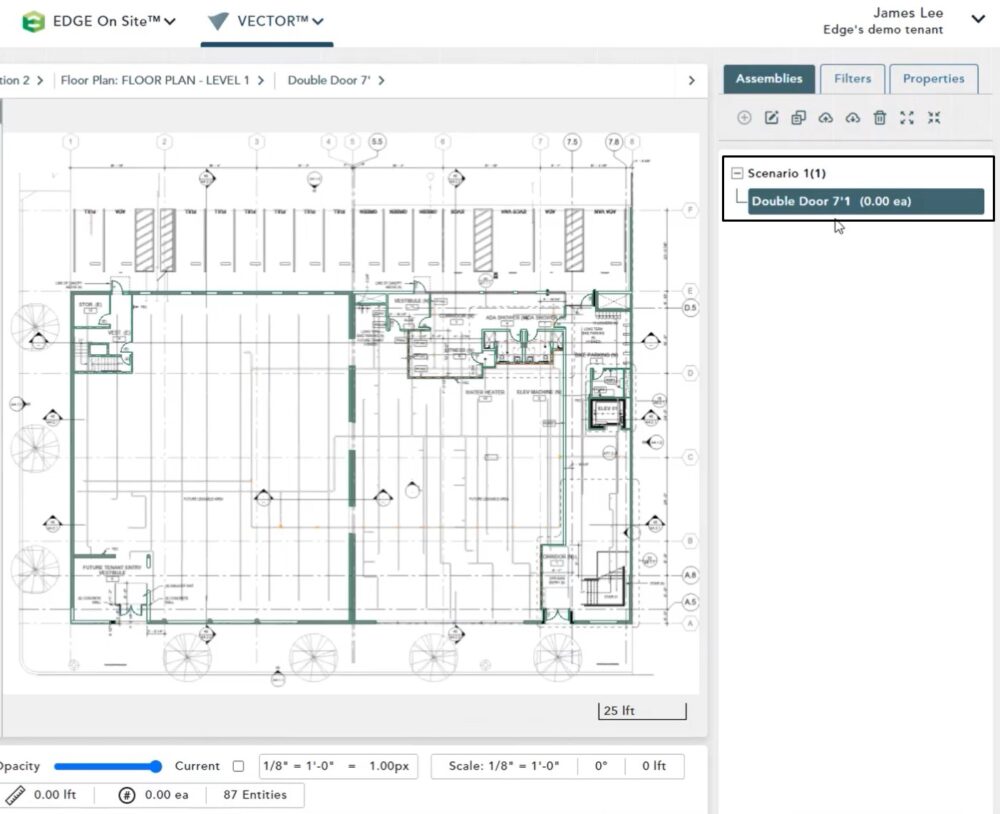
Find the Scenario
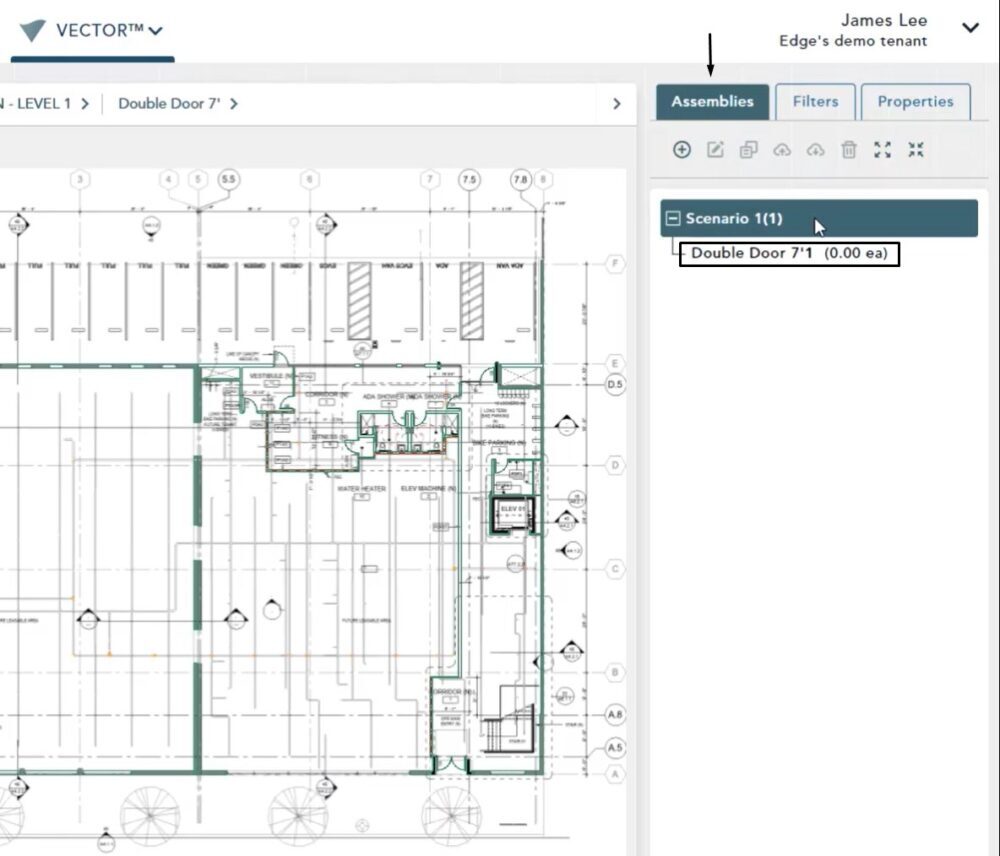
On the right hand side of the build screen underneath that scenario, left click on the assembly you’d like to add an item to
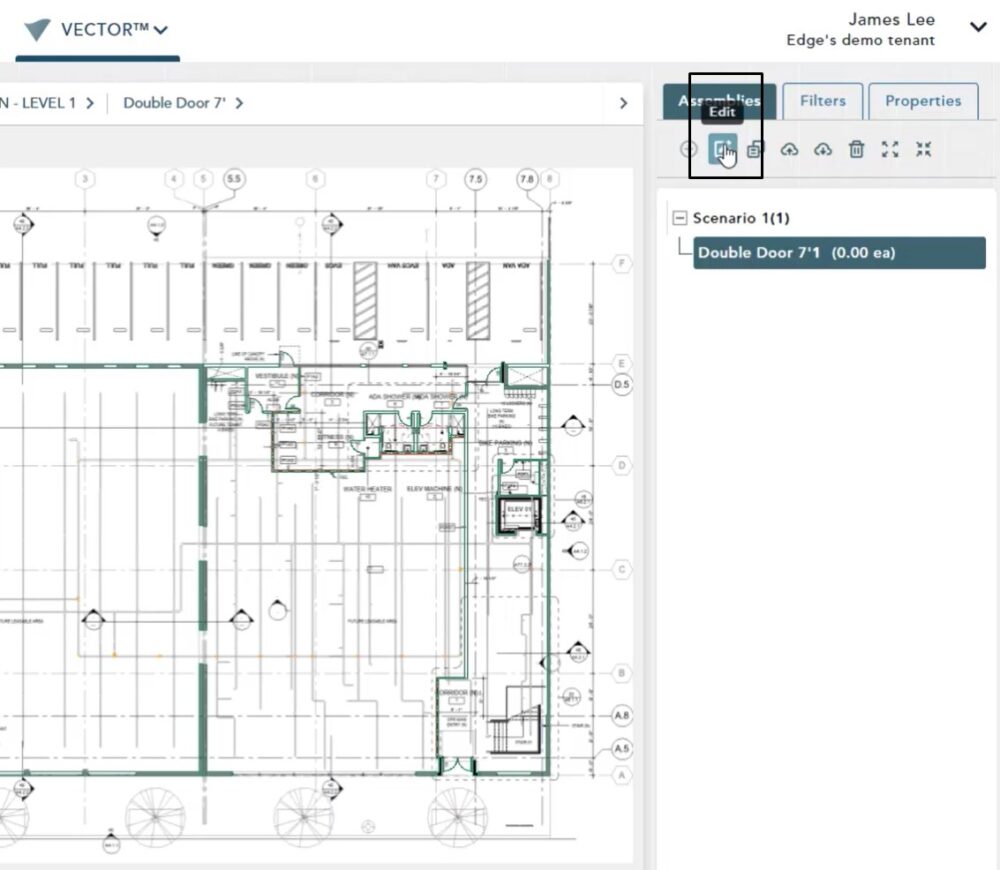
Then click the Edit button
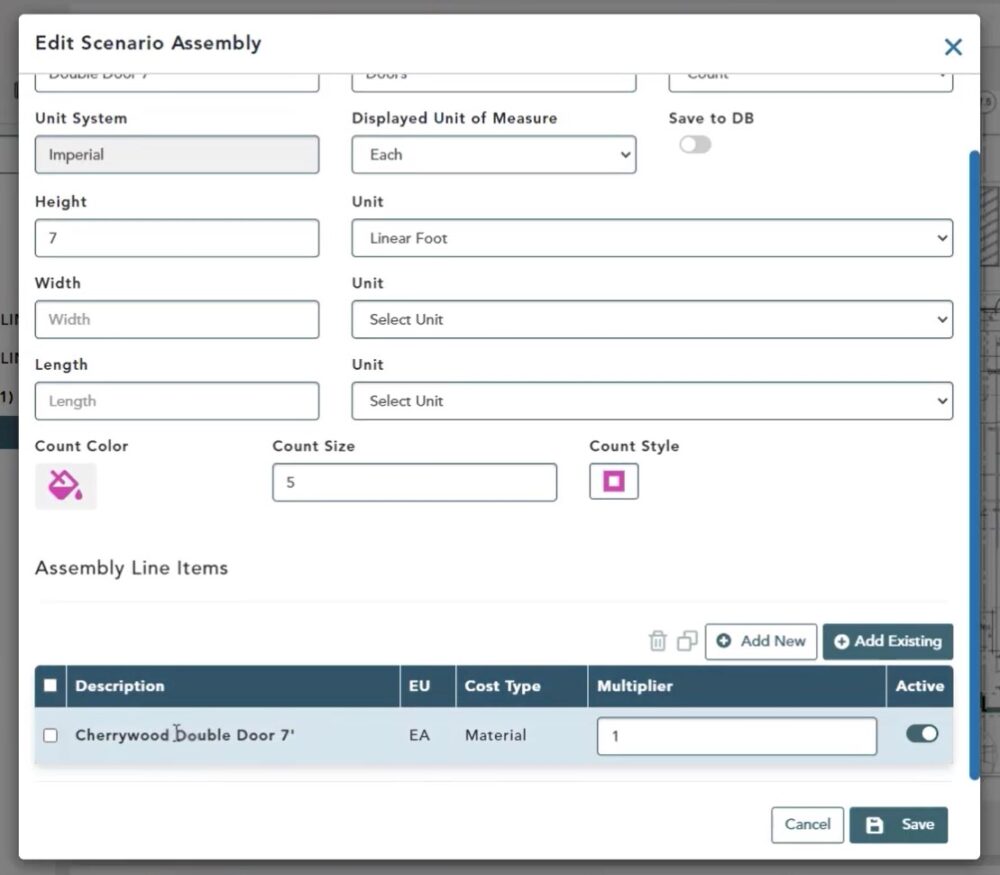
Edit Scenario Assembly Modul
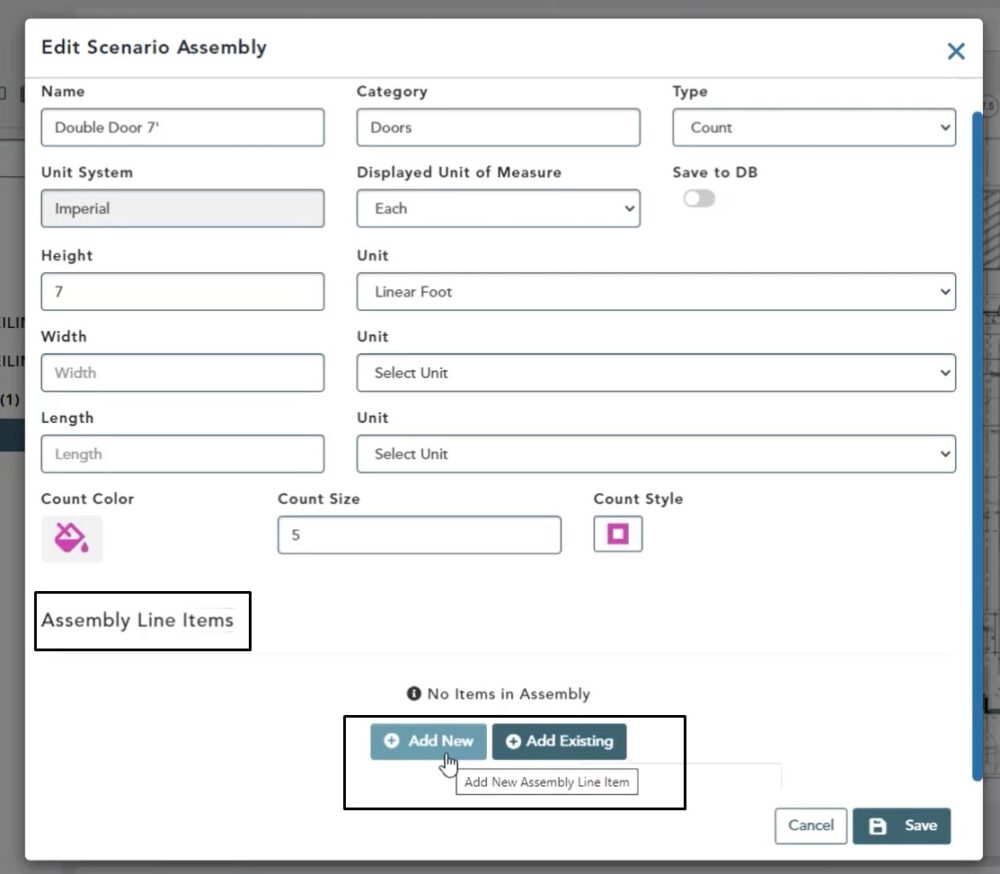
The Edit Scenario Assembly modul will then pop up. You’ll see the same modul when creating a scenario assembly for the first time as well
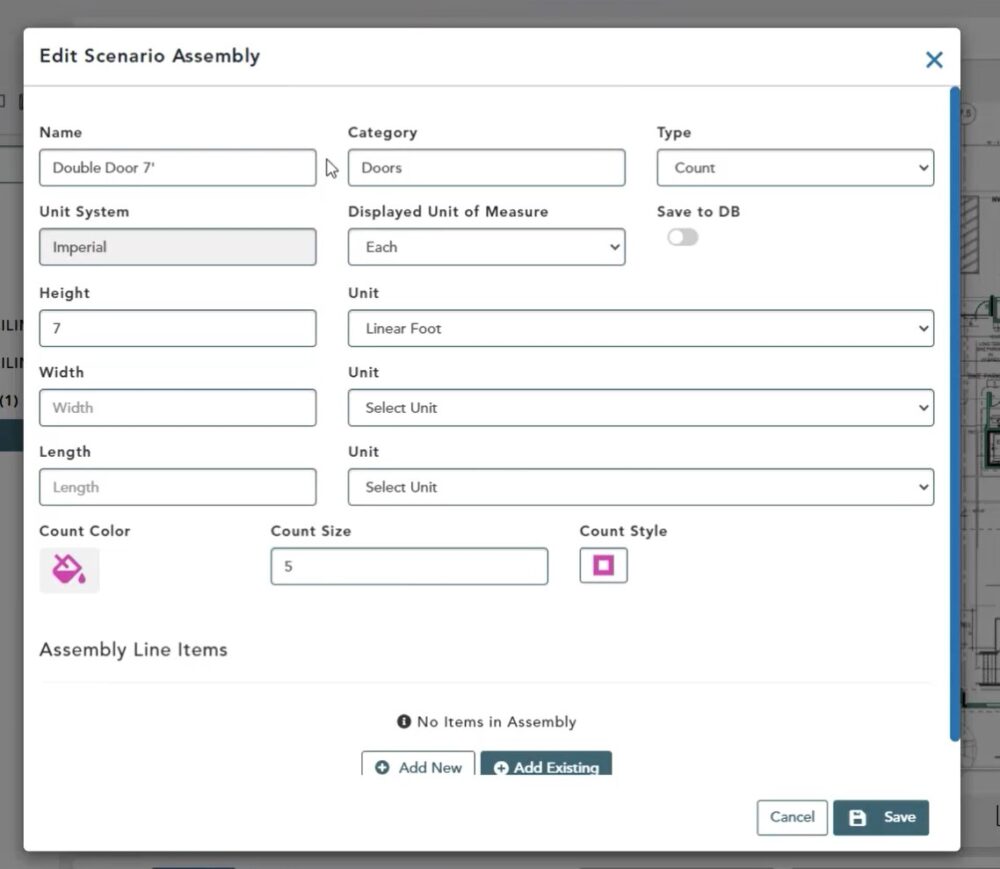
Assembly Line Item
Scroll down to the Assembly Line Item section where you’ll see two options:
- Add New
- Add Existing
Note: To learn how to add existing items from your item database to this assembly, please watch our other video on adding existing items
For this video let’s build a brand new line item for this assembly at the job level
Click Add New
Add Item Modul – General Tab
The Add Item modul is the same modul with the same fields that you would when creating and item for the first time in your database
First, you’ll see a Unit System field. If this job was designated as Imperial you’ll only be able to work with Imperial assemblies and Imperial items which is why you see no alternative option. The same goes for metric designations
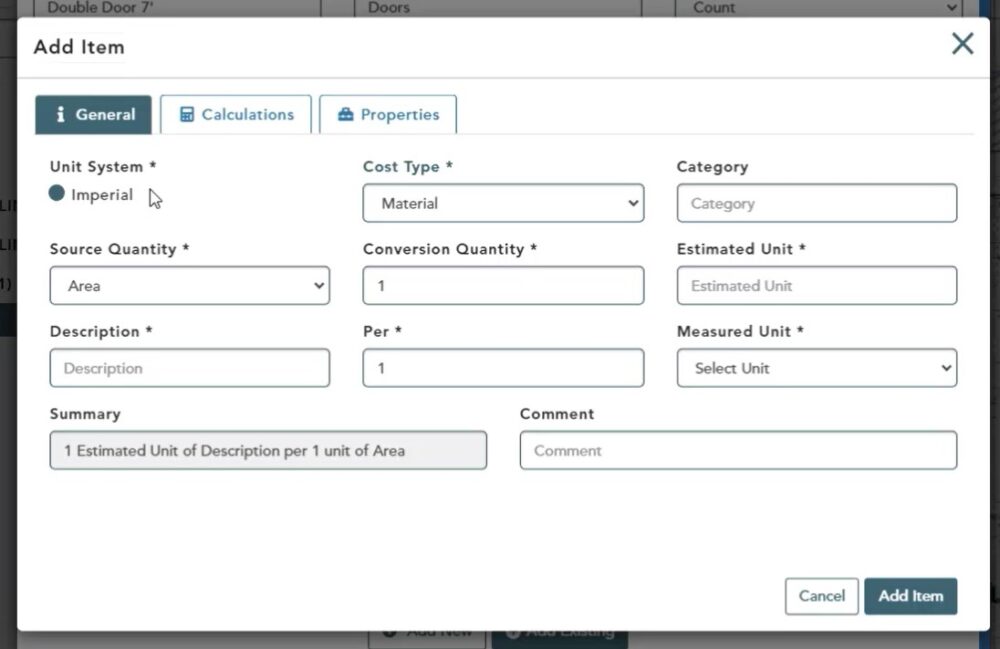
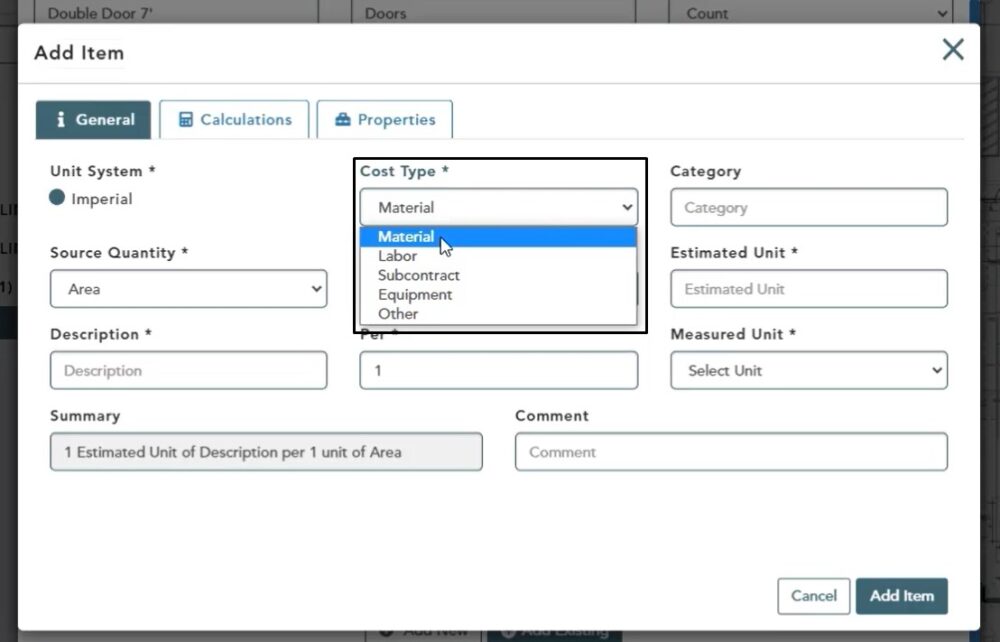
Next, we have our Cost Type field. Any fields with an asterisk are required. Click the drop-down and you can mark this item as belonging to:
- Material
- Labor
- Subcontract
- Equipment
- Other tax class
This items quantity and price will then represent whichever cost type selected.
For todays example, we will select Material
Category and Source Quantity
Next, enter in your Category
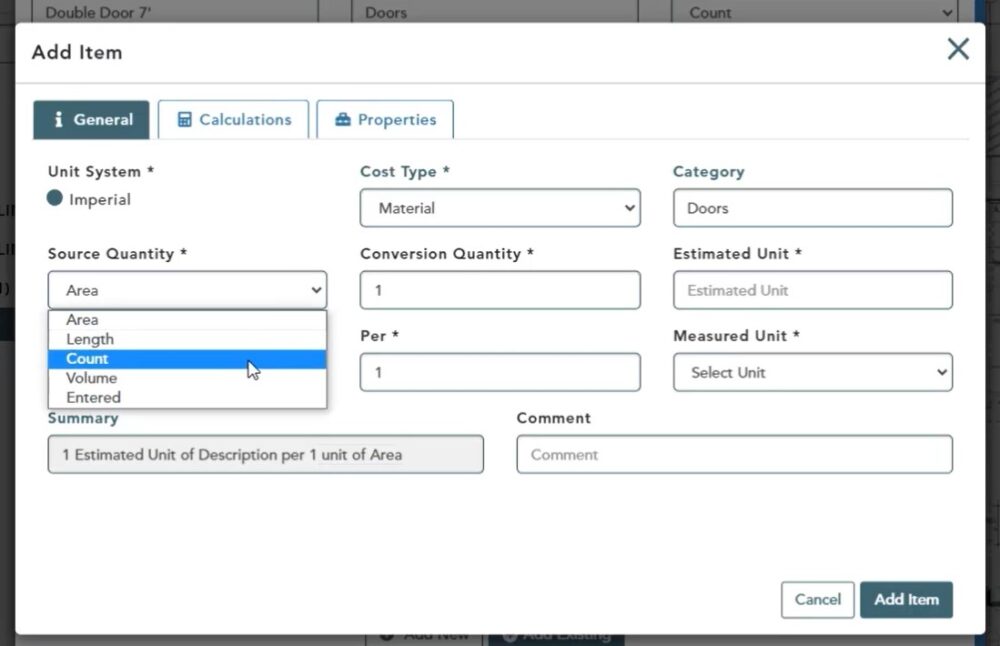
Now, choose the Source Quantity. Source quantity is the first field we need to fill out to help us build our item summary.
For this example, we know that we need 1 estimated unit of this item per one unit of area. The unit of area portion of this summary reflects whatever option is selected in the source quantity field
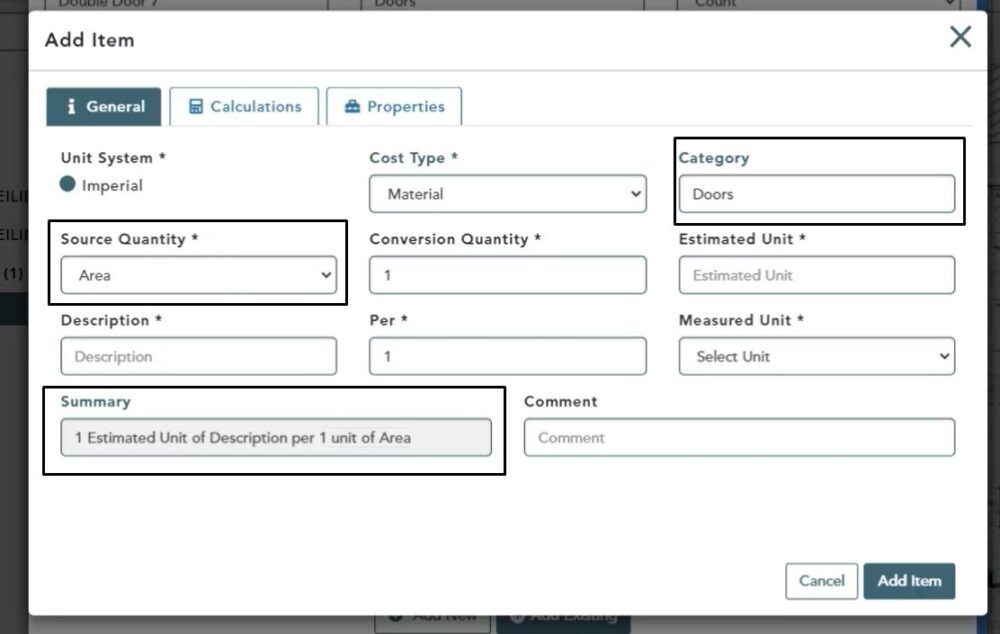
Our assembly is a door so we’re going to change our source quantity to count
Conversion Quantity & Estimated Unit
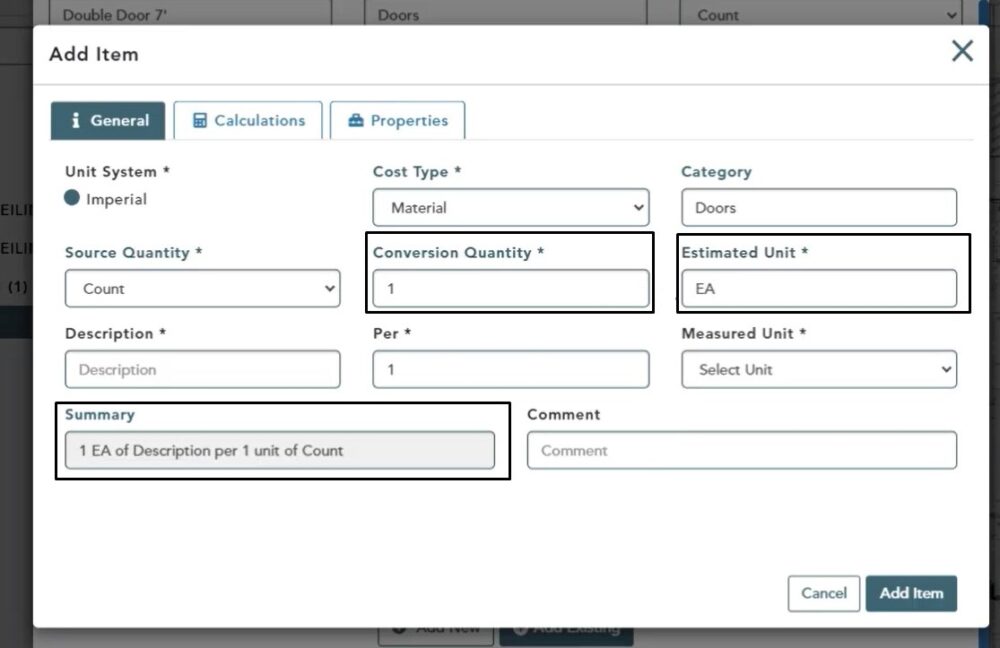
Conversion Quantity controls the first one that you see in the summary field. You can type in that field and then click out of it to change that number.
Next, we define our Estimated Unit, to replace the word estimated unit in the summary. This is a typable field allowing you to enter whatever best describes this item. For this example, we type in EA (each).
Description, Per & Measured Unit
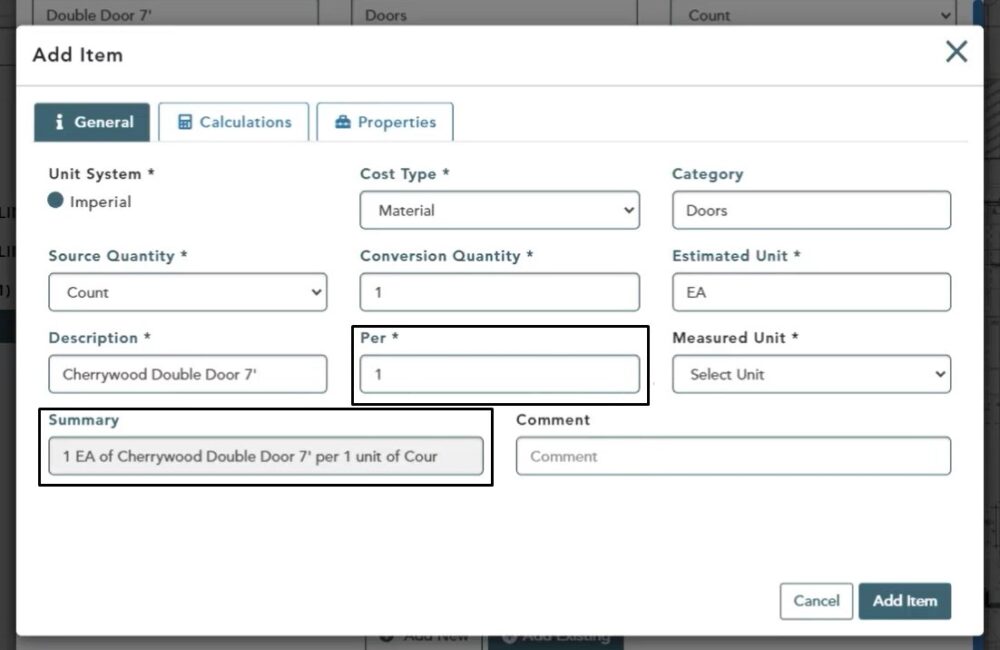
We also need to replace the description by typing whatever this item is. That description now fills in the summary

We can also change our reference point in terms of quantity. If we wanted only one cherry wood double door for every two units of count detected in this assembly, we could build that formula by changing this number. For this example, we will leave it at 1.
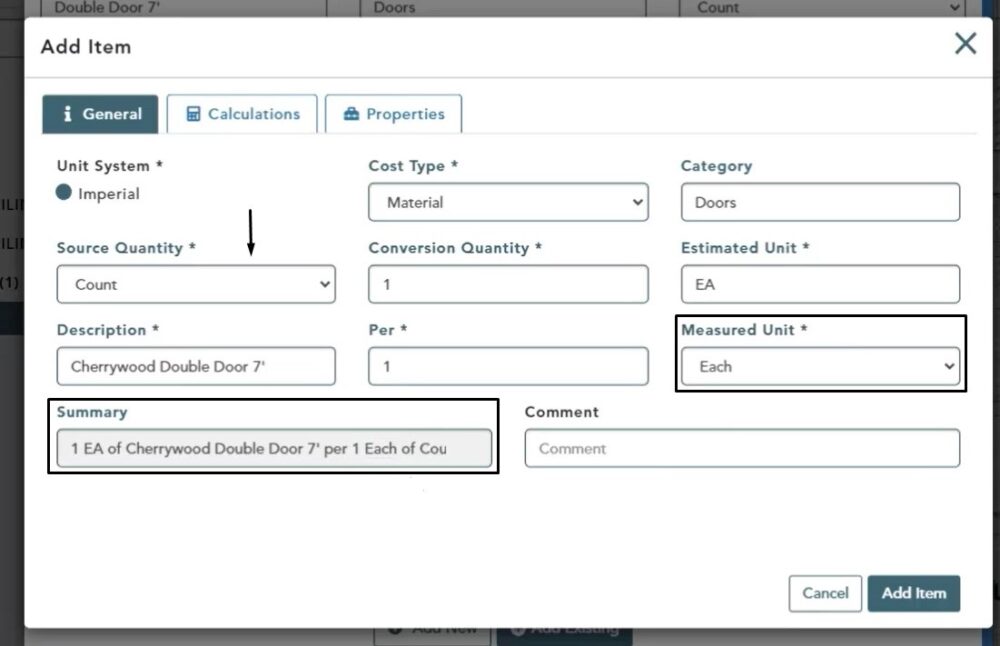
Lastly, we need to choose our measured unit. This measured unit field will change based on what selected in the source quantity.
We know that will be referencing a count source quantity so the only available measured unit for a count is an each.
Add Item – Calculations Tab
Click the calculations tab at the top of this item to see what you can further build. You now see some additional fields.
First, we have the ability to enter in an optional waste percentage inside of the item. You can also do this at the estimates screen.
You can also choose to have this item automatically round anytime it appears on the estimate screen inside of a bid
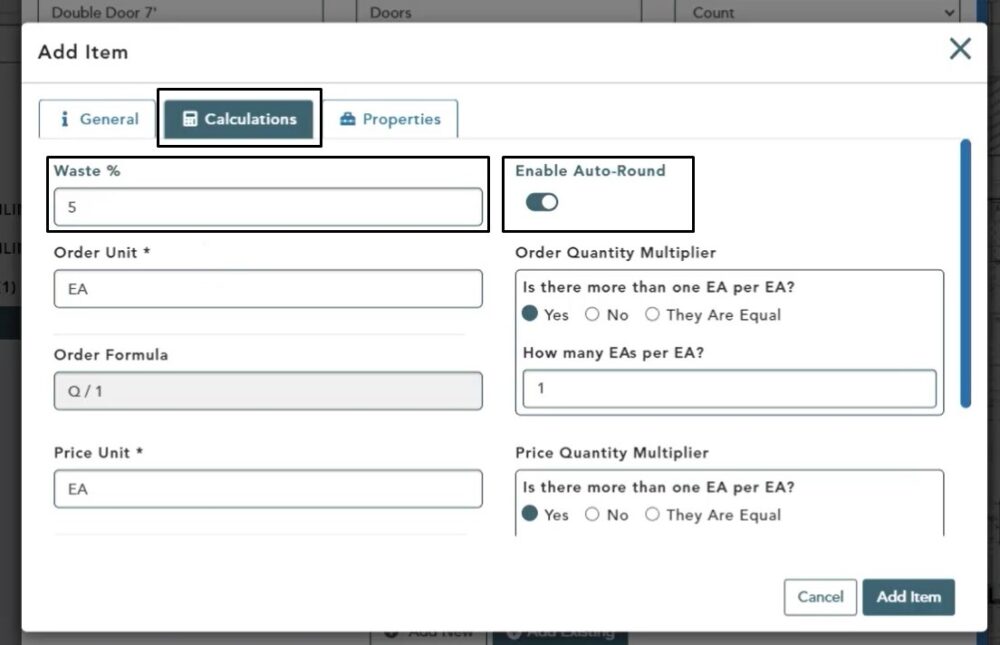
Order & Price Unit
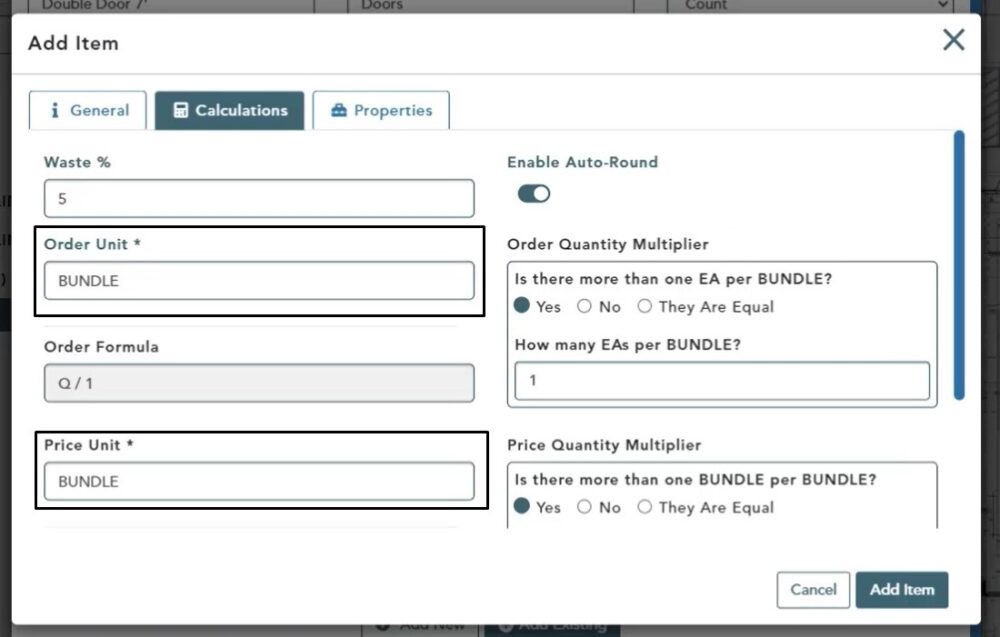
Next, we can build additional formulas for how this item is ordered and priced. By default the order and price unit will be the same as your inputted estimated unit in the general tab.
For this example, let’s say we can only order these doors in a bundle. You can type a custom order unit into the order unit field, and the price unit will default to that entry.
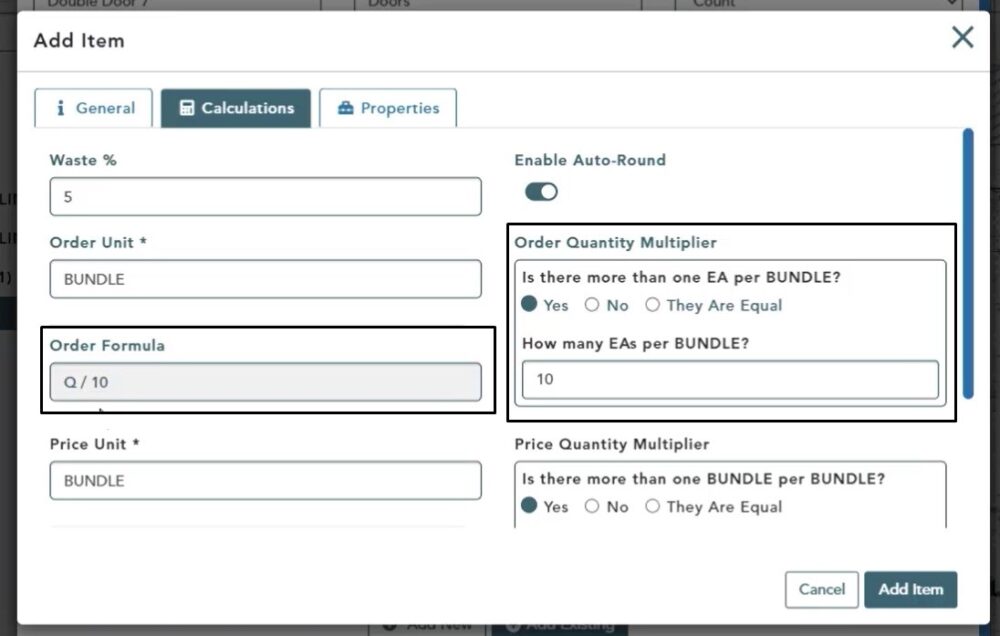
Order Quantity Multiplier
First, we need to let this modul know if is there are more than one each per bundle.
Here, we could click yes, and input 10 in the how many EA’s per bundle text box.
Whatever quantity of doors is generated by this item will be divided by 10 and display as your order quantity on the estimate screen.
Price Unit
You can then formulate further at the price unit level as well if you’d like to price the item differently than estimating and ordering it.
You can change the price unit back to EA, then click no there’s not more than one bundle per each; there’s more eaches per bundle.
Now, you can multiply the order formula quantity by 10 to get back to the normal each count and price by the door individually. You can set the cost for each door inside of the item itself which will automatically appear on the estimate screen when this item is in use in a bid.
You also have the ability to type in a custom part number.

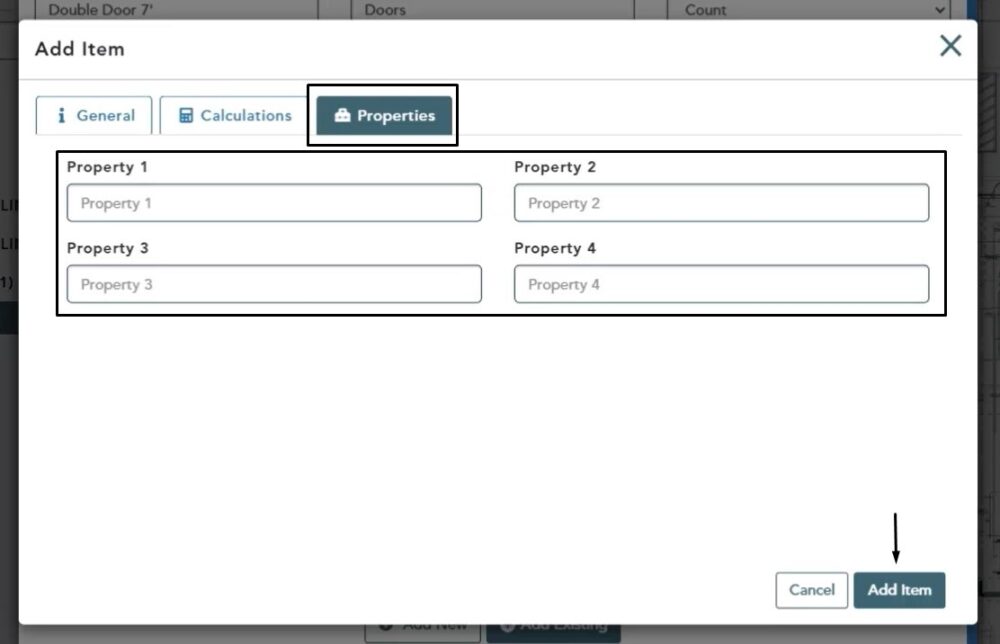
Text Properties
On the Properties tab, you have the ability to type in various text properties or notes inside of this item.
After you have filled out all required information, click the add item button
Edit Scenario Assembly
After you click add item, the item will now appear inside of the scenario assembly.
Click the Save button
Once quantity is given to this scenario assembly, that item will generate based on its given formulas on the estimate screen